Hello, friends! I hope you are all doing well. Time is flying by, and as school is coming to an end, it occurred to me that my son will be leaving for camp in less than a month! That means that I have to get some cards ready to send to him while he’s there. I think I have a few in my stash, but I like to send several every week. Our two dogs like to send him cards, too! So, I decided to make some quick and easy cards using some of my favorite large word dies from Waffle Flower, along with an adorable stamp set that I just recently purchased – the “You Rescued Me” set from My Favorite Things.
NOTE: all supplies are linked to multiple sources in the thumbnails at the end of this blog post.
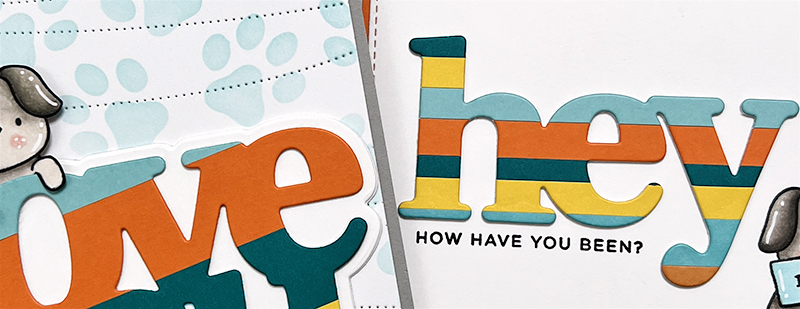
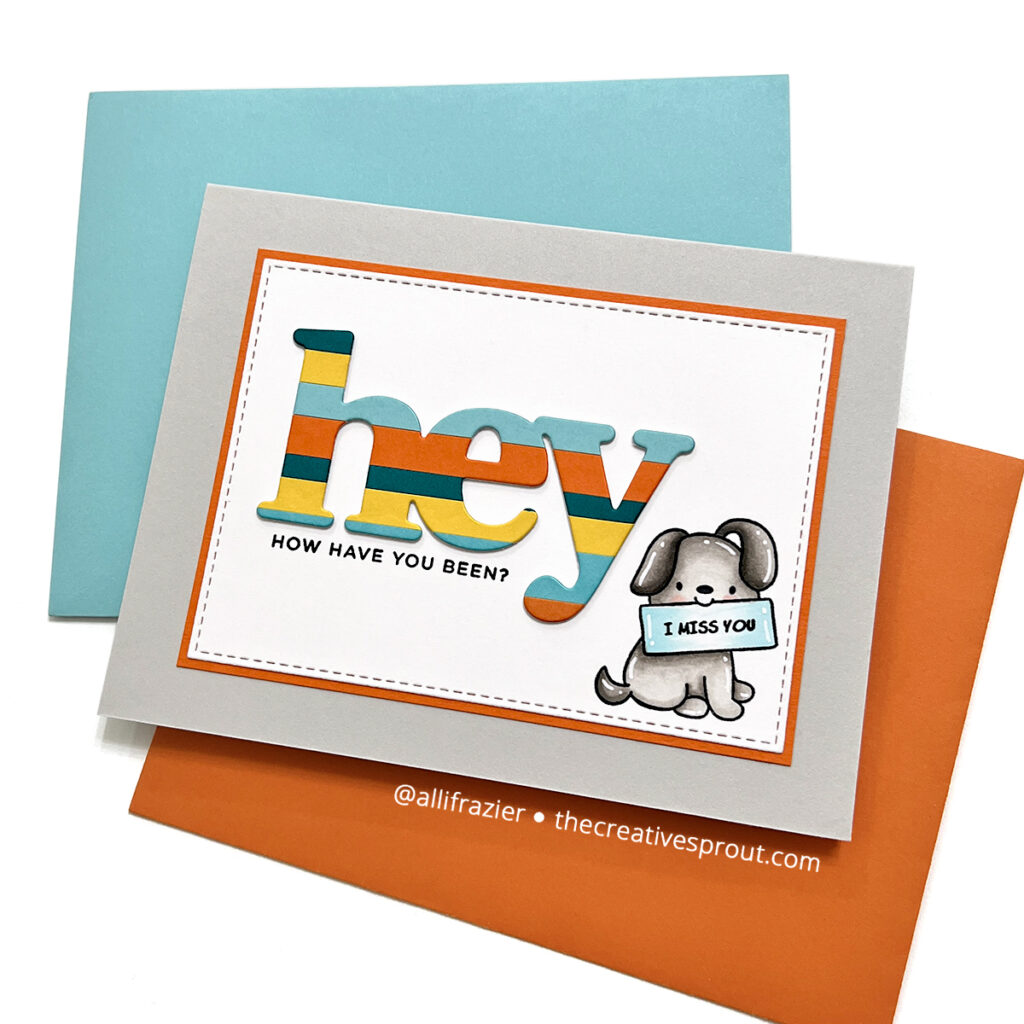
Because these cards were going to be pretty simple, I decided to at least make my dies look more interesting. Making a striped die cut is really easy. I just cut strips of colored card stock at random widths on my paper trimmer, and then I glued them to a piece of copy paper. I then used my die to cut this out, and voila…a striped die! This first card features the Oversized Hey Hi Hello set (now retired).
I stamped the adorable pup with Memento Tuxedo Black Ink and colored it with my OLO markers. I cut this panel out with my A2 Stitched Rectangle STAX set from MFT. The little “I Miss You” sentiment on the dog’s sign comes from a cute set from Mama Elephant called “Comic Sayings”. The “How Have You Been” sentiment comes from a Simon Says Stamp set called “Hi There Greetings”.
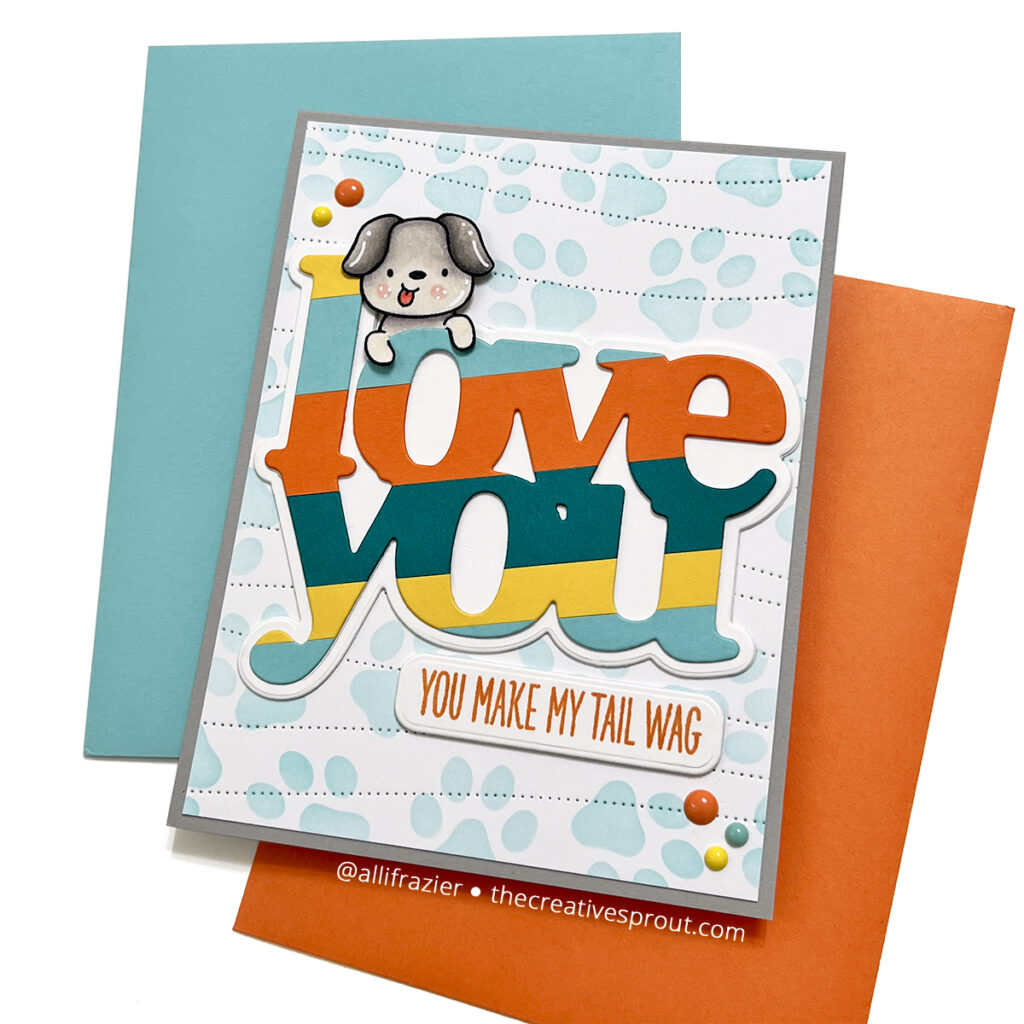
My second card features the Oversized Love Print die set. I used the same method for creating my striped “love you” as I did on the first card, except I lined my die up on my striped paper at an angle. I colored another dog from the “You Rescued Me” stamp set and fussy cut him out so that he could perch on top of the die cut. Isn’t he adorable?? The subsentiment on this card comes from a retired MFT stamp set called “You Make My Tail Wag.”
For the panel on this card, I first cut it using one of my favorite Birch Press Design cover plates called “Pinpoint Contour Plate”. This cuts an A2 sized panel, so I did trim it down a bit so that my final card would show a little bit of my gray card base. After trimming it, I used the Paw Print Stencil Duo to add the design in the background. There are two stencils in this set. I didn’t use the second stencil that adds shadows to the paw prints. After glueing all of my elements onto the panel, I added a few enamel dots. I did pop the pup’s head up on foam tape to level him out with my stacked die.
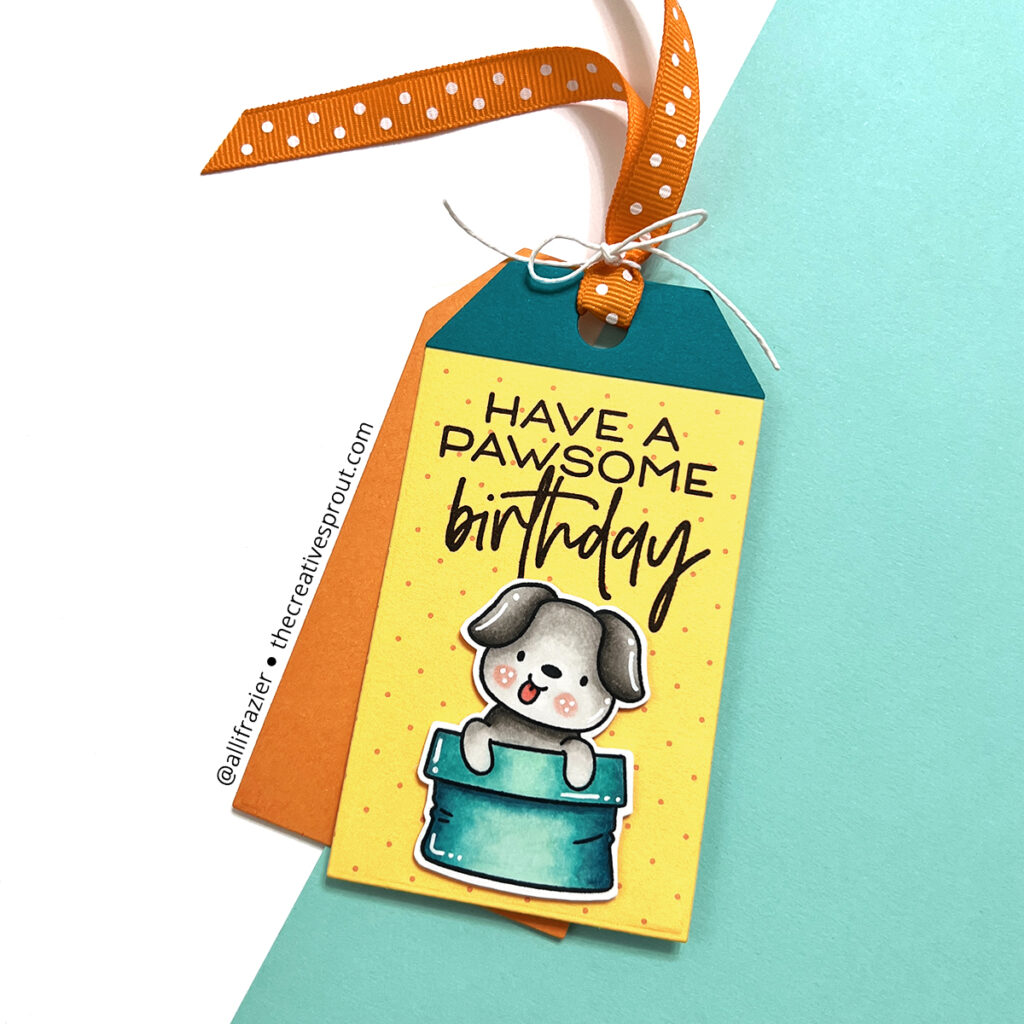
I had one little guy leftover that I had stamped, so I decided to make a cute tag. By the way, this is the same stamped image that I used to cut the dog that is perched on my “love you” card. I don’t have the matching dies for this set, so I did fussy cut this guy for the tag, too. I shouldn’t really say “guy” because one of these dogs is my dog Maggie. Our other dog, Marvel, is a boy. I cut the tag from some Waffle Flower patterned paper – this is the Half-Half Dots Enchanted Paper Pad. I cut another tag from orange card stock because I like having a second tag in the back to make the tag a little more interesting. I also cut a third tag from from some teal card stock and used my paper trimmer to cut off just the top part, again to add more interest to the tag. I stamped the sentiment from the Pawfect Sentiments stamp set. A little ribbon and string, and this tag was done!
I hope these cards bring a smile to your face today! As always, I appreciate you visiting my blog.
Wishing you all a crafty day,
Allison
SUPPLY LIST
Note: External links on my blog may contain affiliate links. This gives me the opportunity to earn a small commission when you click on the links and place an order. This comes at no additional cost to you. Thank you so much for your support! You can see more information on my Affiliate Disclosure page.