Hello, friends! I hope you all have been enjoying your weekend. I have been trying to stay crafty, although I did take some time out yesterday to veg on the couch with my husband and watch some movies. I can’t remember the last time we did that! Of course, he wasn’t feeling well, so that probably is why we did it. Otherwise, I have been trying to stay crafty as much as possible.
The May releases from Spellbinders have been coming in waves this month, and they released several new tools just the other day. There are new punches: the 3-in-1 Tag Punch and the 3-in-1 Banner Punch. They also released a new Guillotine Paper Trimmer. You can see me use all of these new tools in my video and get my impressions on each of them. You can CLICK HERE to view on YouTube or watch it below.
NOTE: all supplies are linked to multiple sources in the thumbnails at the end of this blog post.
For my projects today, I wanted to play one more time with the May Large Die of the Month and the Small Die of the Month. New registration for the May clubs ends tomorrow, May 27th. FYI, when clubs don’t sell out, they can be purchased from inventory at a later time. However, the price goes up because you don’t get the special club price. I adore both of these clubs this month, and they’re both still available as of the time I am writing this blog post.
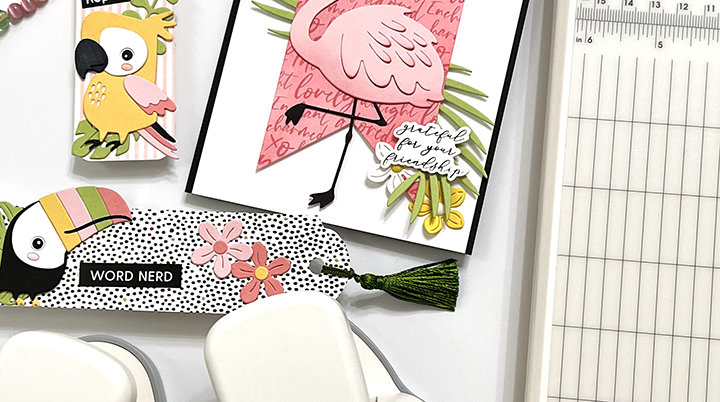
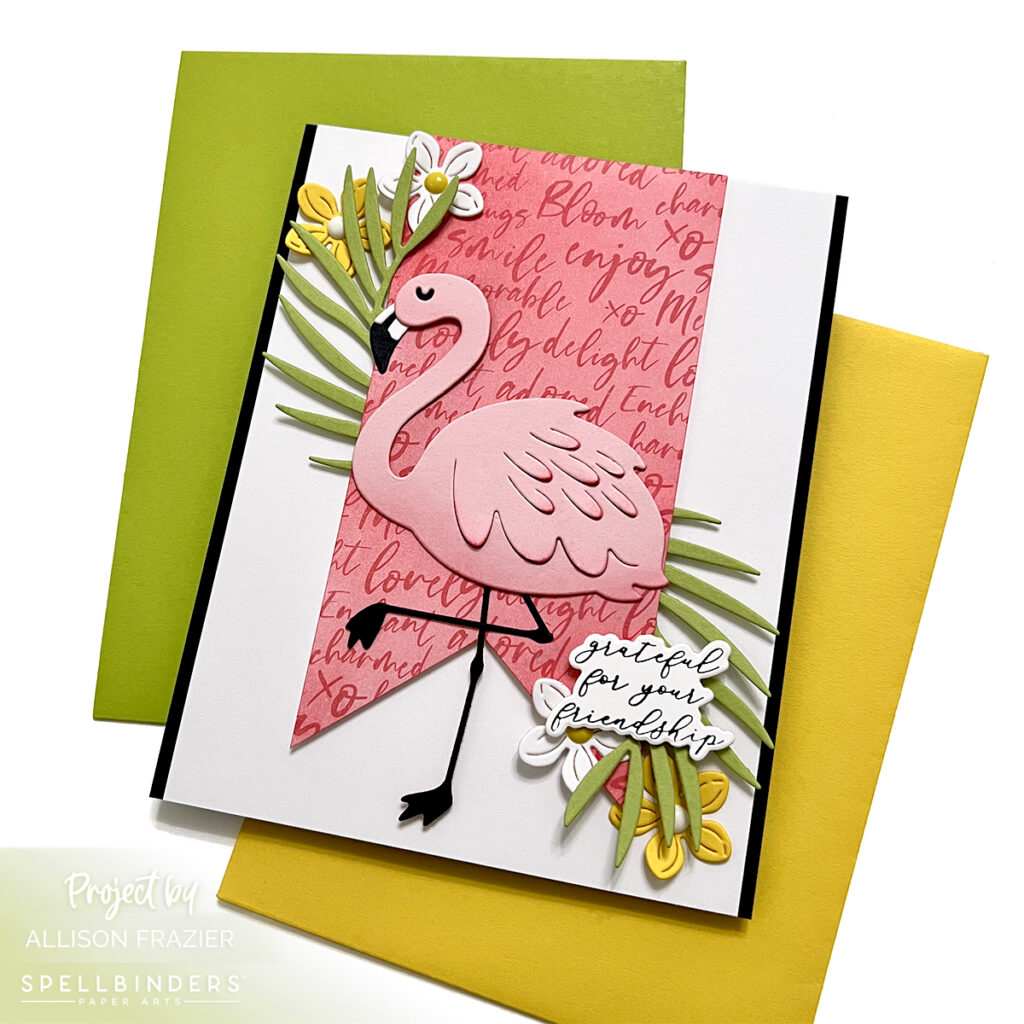
For my first project, I created a card using one of the flamingos from the Large Die kit. For all of my projects today, I used a paper pack from the new Bayfair Collection that was just released. This collection also has some fun ephemera that complements the paper, as well as some new dies that I will be sharing in another blog post. You can see in my video how I changed the color of the paper simply by adding ink. This first card features the 3-in-1 Banner Punch. This punch has three different width settings, and I used the widest width for this banner, which is 2.5″. The great thing about the punch versus a die is that you can make your banner as long or as short as you want it. This card design is rather simple, but that flamingo is really all you need, right?? I did add a few small flowers, as well as a little sentiment that I hot foiled with my favorite opaque black foil. This is actually from the Sentiments of Wonder BetterPress Plate & Die Set, but as you may already know, I love foiling with my BetterPress plates.
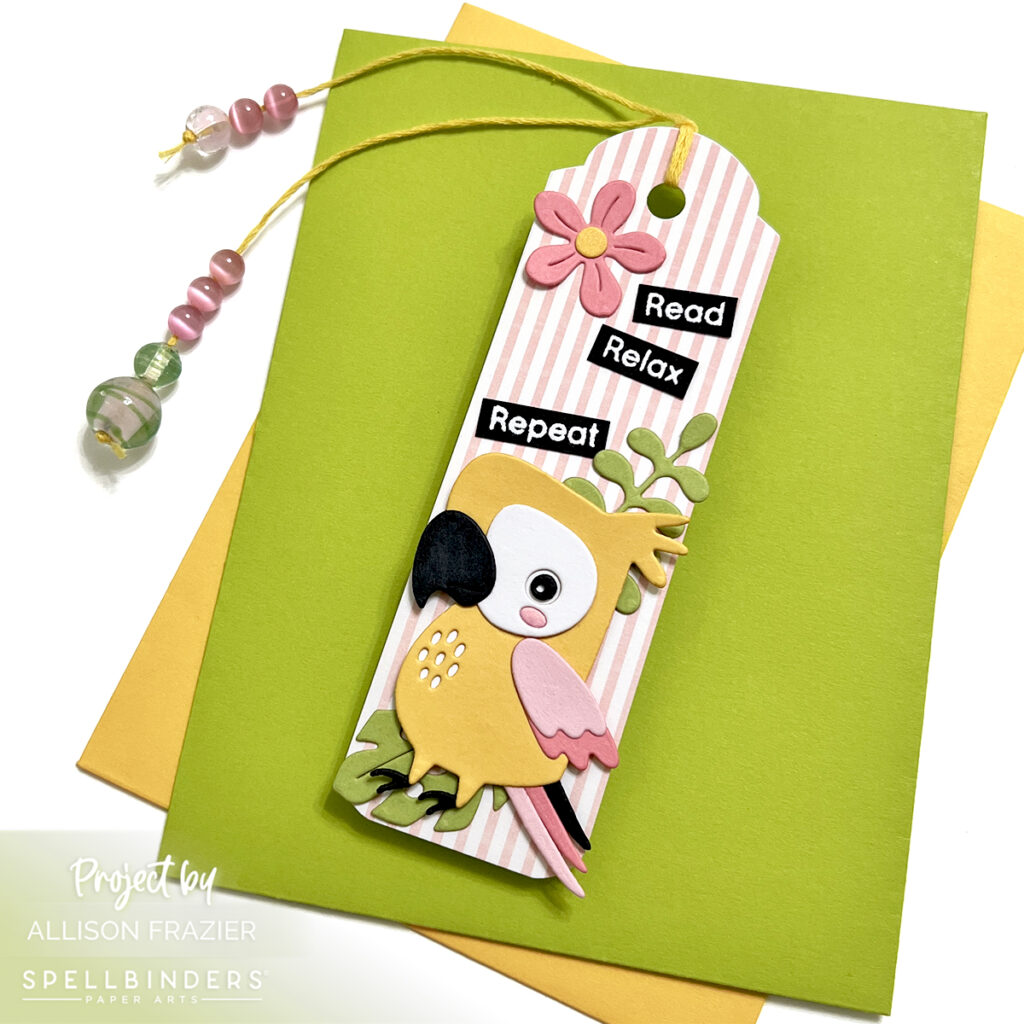
My second project is this adorable little bookmark, which is something I don’t often make. But, like I mentioned above, these new punches can make banners or tags of any length. I used the 3-in-1 Tag Punch for this, using the smallest width of 1.5″. You’ll notice that the corners at the bottom are rounded. I actually pulled out another Spellbinders tool for that – the 1-2 Punch: Corner Rounder & Notch. I used some striped paper from the Bayfair paper pack and the adorable parrot and foliage from the Small Die Kit. The sentiments come from an older My Favorite Things stamp set called “Our Story.” I just had to use this sentiment because the “repeat” went perfectly with the parrot!
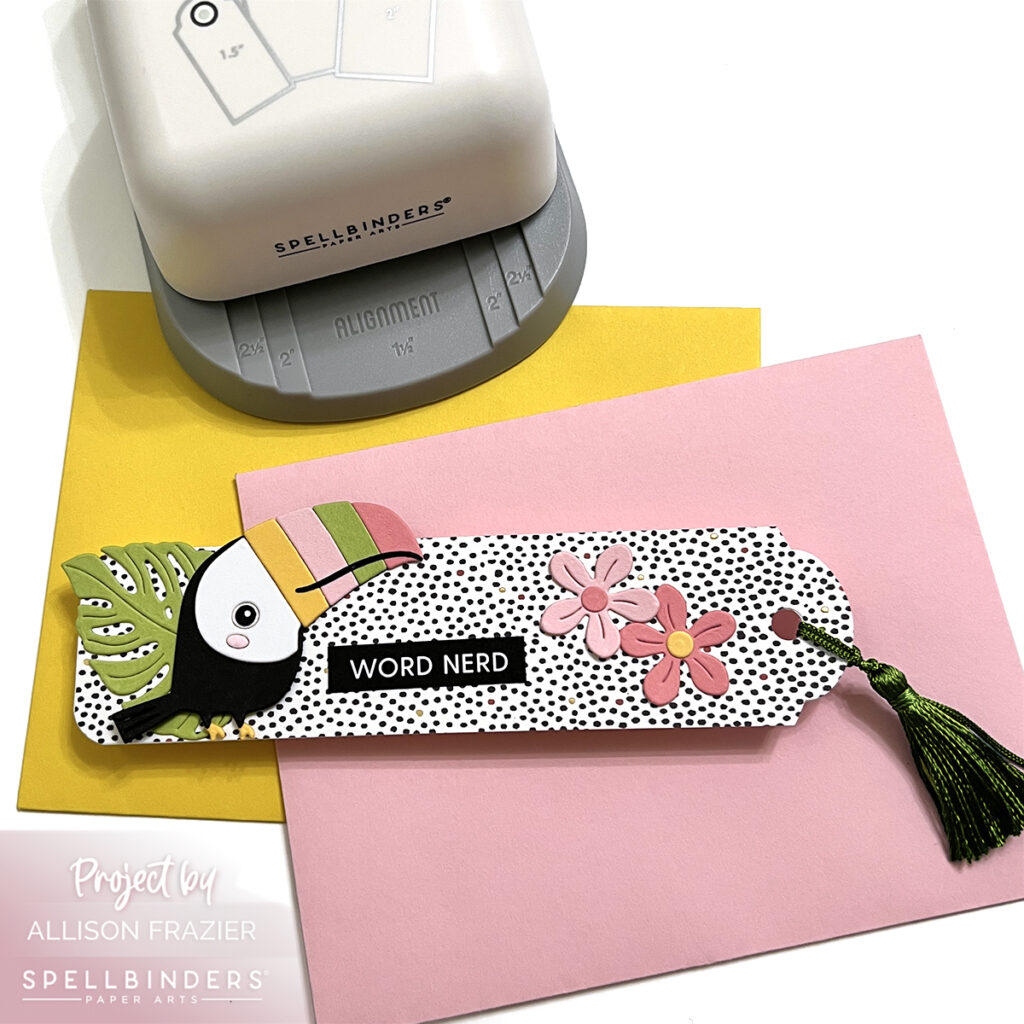
I couldn’t let the adorable toucan from the Small Die kit go neglected, so I made another bookmark. Again, this paper is from that same Bayfair paper pack, and I used the 3-in-1 tag punch. This bookmark is longer than the other one, which is easy to do when you have a punch only cutting the top part of your paper strip! The “word nerd” is from a subsentiment strip set from Waffle Flower called “Story.” Have I mentioned lately how much I love sentiment strips? They satisfy the lazy crafter in me – haha.

I had some leftover paper from that flamingo card, so I decided to make a sweet little tag using the 3-in-1 Tag Punch again. This time, I featured a brand new die set called Layered Anemone. You can see how I also rounded the bottom corners on this tag with that 1-2 Punch.
I hope these projects bring a smile to your face today. As always, I appreciate you visiting my blog.
Wishing you all a crafty day,
Allison
SUPPLY LIST
Note: External links on my blog may contain affiliate links. This gives me the opportunity to earn a small commission when you click on the links and place an order. This comes at no additional cost to you. Thank you so much for your support! You can see more information on my Affiliate Disclosure page.