Hello, crafty friends! I am excited to be joining Simon Says Stamp for Day 2 of the Celebrate Release Blog Hop!
Promotion
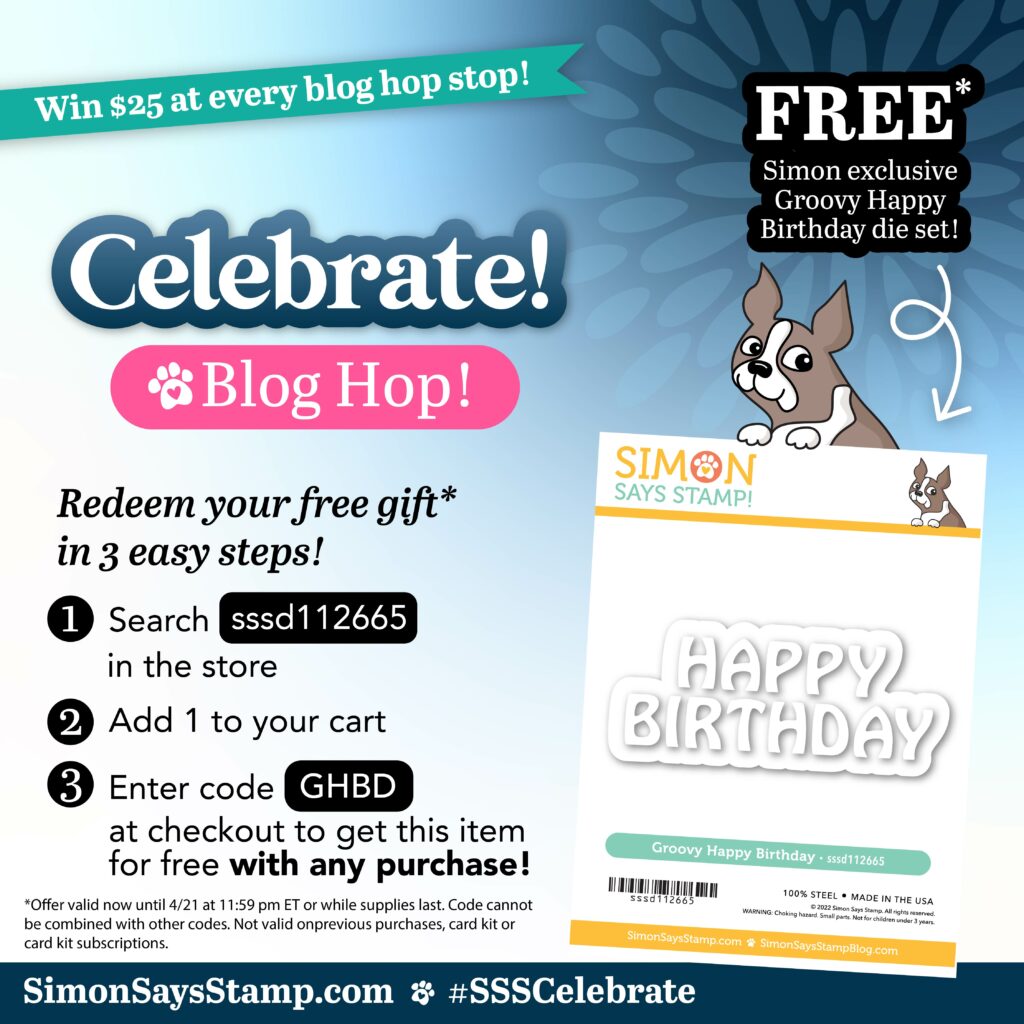
As you can see in the graphic above, Simon Says Stamp is offering their Groovy Happy Birthday die set FREE with any purchase! Be sure to add it to your cart and then use the code GHBD at checkout. This promotion expires on 04/21/24 at 11:59 pm EST.
Giveaway
Simon Says Stamp is giving away a $25 coupon to every stop on the hop – woohoo! Leave me a comment for your chance to win. Winners will be posted on the Simon Says Stamp blog on Wednesday, April 24th.
Galleries
When you’re finished hopping, and you’re looking for more inspiration, check out the Celebrate Gallery on the Simon Says Stamp blog. There are galleries for each release, and we encourage you to share your creations there, as well!
Video
For today’s cards, I used a really easy technique for coloring embossed panels and die cuts. Even though it is easy, I think the results are pretty dramatic. I do have a new video showing you how I made my cards. You can view that below, or you can go directly to YouTube.
Note: all supplies are linked in the thumbnails at the end of this blog post.
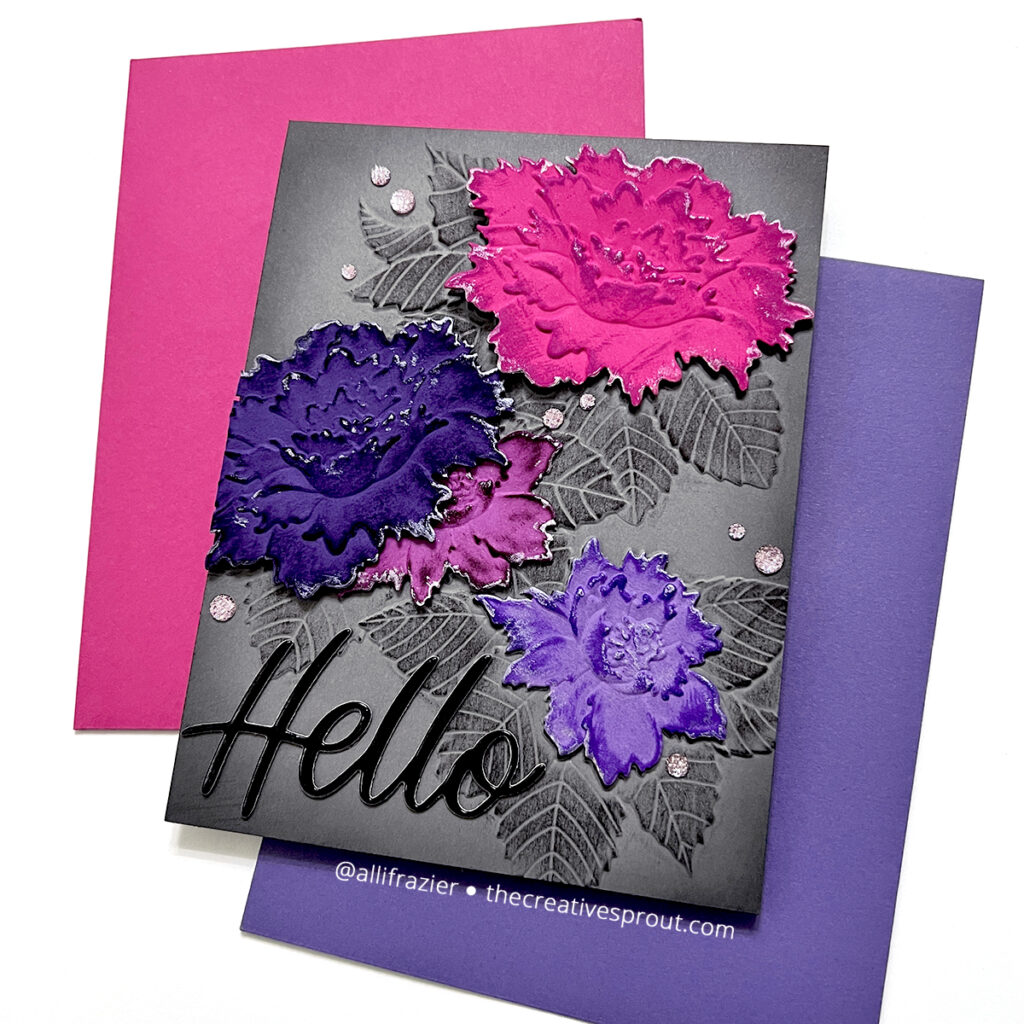
For both of today’s cards, I used the new Blossom Bunches Embossing Folder and Dies. This is a 3D embossing folder which allows for so many different techniques. And, I love that this folder comes with dies to cut out two of the flowers! Even though there is not a die that matches up with the flower on the left, you can see that I made it work with just the two dies.
This first card uses somewhat of a nontraditional color palette and cool colors. This was the card that I made first, and I applied some of the things that I learned to the second card. For both cards, I used my Distress Ink mini cubes to color both the embossed panel and the embossed die cuts. I went direct to paper with my inks. Again, you can see the technique in the video. I cut the flowers from colored card stock and then I chose inks that were slightly darker. The ink colors that I used were: Seedless Preserves, Wilted Violet and Villainous Potion. For the large pink flower, I used Altenew Purple Wine. For the leaves and edges of the gray card panel, I used Black Soot. You want to use ink pads that have a firm felt pad. If you use a foam pad, I think you would run the risk of smooshing ink into non-embossed areas.
After I had colored the flowers, I applied a little bit of Lunar Paste (color: Silver Lining) to the outside edges and some of the embossed areas. The sentiment is the Handwritten Hello die. This comes with a shadow layer, but I just used the word itself with some black glossy card stock. I used a combination of liquid glue and foam tape to adhere my flowers to the card.
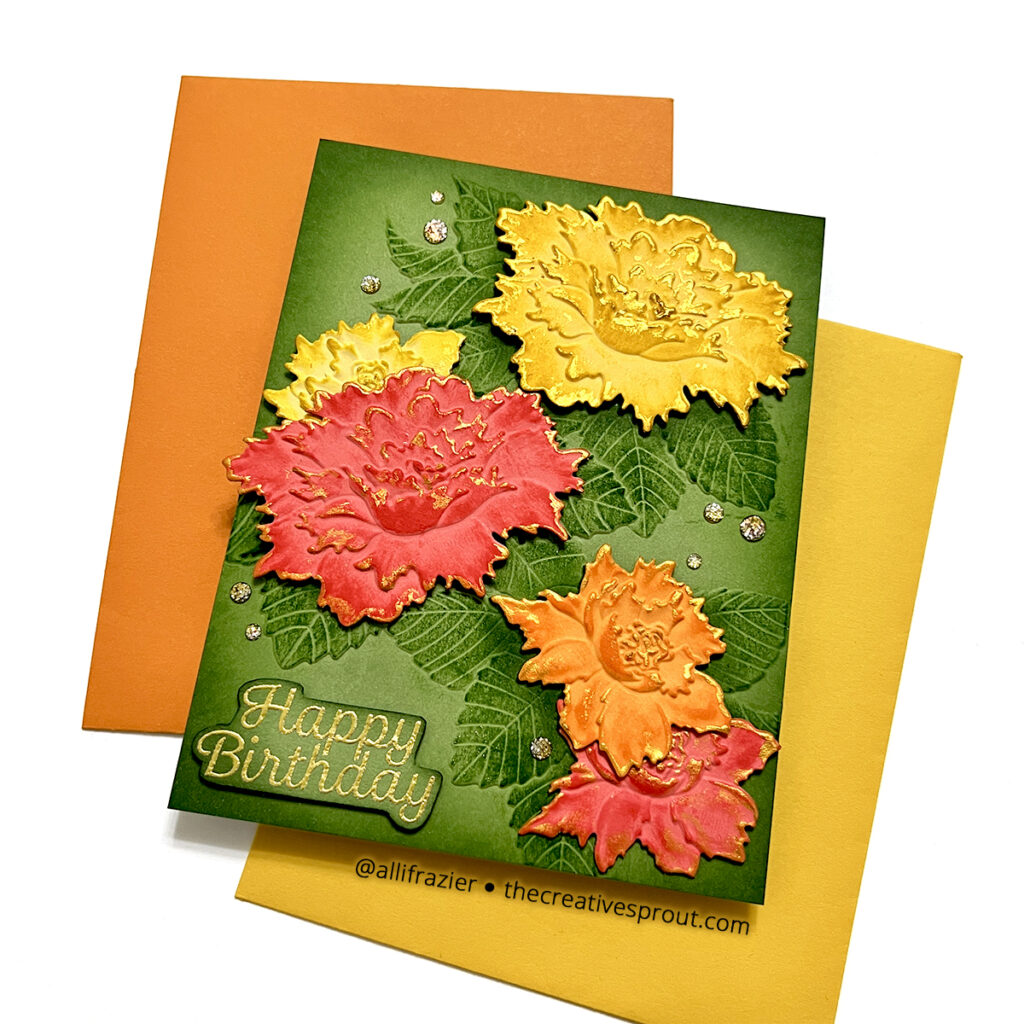
So, what did I learn from the first card that I then applied to the second card? Well, for one, I knew I wanted to add a fifth flower since odd numbers are better in design. The other thing that I wanted to do was add more shading to the base of the leaves, so that it would look like the flowers were actually casting shadows. This is the one time that I used a tool other than my fingers or my ink pads because I grabbed one of my Shader Brush 0+ from Waffle Flower to add that shading. The ink colors that I chose for this card are: Squeezed Lemonade, Mustard Seed, Fossilized Amber, Dried Marigold, Worn Lipstick, Mowed Lawn and Rustic Wilderness.
For this card, I used Lunar Paste on the edges again, but I used the color Slippery When Wet to match the warm color palette. My sentiment comes from the new Celebrating You Stamp Set. I heat embossed it with gold embossing powder, fussy cut it, and added it to the panel with foam tape. For both cards, I used some of my favorite embellishments from Pinkfresh Studio – glitter drops! These are the Sparkle and Shine Ombre color. I used the Blush color drops on the first card.
Are you ready to hop along and see inspiration from all of the other designers?
I really enjoyed making these cards – I never tire of finding ways to use my embossing folders! I hope these cards bring a smile to your face. If you want to see the other cards that I have made with the Celebrate Release, you can click here to view my blog post from April 18th. Thank you so much for visiting my blog today. Be sure to hop along and leave some love for all of the talented designers sharing inspiration today!
Wishing you all a crafty day,
Allison
SUPPLY LIST
Note: External links on my blog may contain affiliate links. This gives me the opportunity to earn a small commission when you click on the links and place an order. This comes at no additional cost to you. Thank you so much for your support! You can see more information on my Affiliate Disclosure page.

LOVE your deep and rich and bold colors! WOW!
Absolutely Beautiful! Love the bold backgrounds with the bright florals! Thanks for sharing!
Stunning floral creations.
These are so beautiful!
Oh wow I love the purple pink and grey card! Amazing 🤩💜💜💜🇨🇦
Beautiful cards!! Love this technique and using the lunar paste to make the flowers pop even more…stunning. TFS
Beautiful card!! Love how you captured all the dimension with your inks. Thanks for sharing your tips and inspiration.
Pretty cards
gorgeous background
Beautiful cards!!! Loving the bold colors!!
Love the bold, beautiful colors in these cards, especially the second one!!!
Beautiful cards, love these flowers.
Stunning! Love the vibrant colors.
These flowers and colors are incredible!
These cards are stunning with their bold colors. Beautiful job.
I love both cards! The green card is more spring like I guess, but I like the black as well. Both are beautiful!
The pink and purple of the card is striking.
What a different style card. I love it. Great colors and I love your design.
I love the BOLD colors you chose for your cards! Awesome job! TFS 🙂
These flowers are definitely NOT shy!!! That technique and palette of colors truly has an impact. The Lunar Paste adds a special touch. I will definitely try this out. Thank you for sharing.
Stunning cards! I am in love with all the 3D embossing folders everyone is creating these days! I really love the ones that come with a stencil so I can color them!
Amazing cards!
Your card is stunning. I love the bold colors.
Love pink and purple together!
Wow, how pretty! I think I need that folder and die set.
Striking and amazing technique Alli! So different in the alternate colourways, but oh so gorgeous, both! xoxo
Such a lovely use of bold colors. I may need to be brave and try these color combinations. Thank you for sharing.
Your cards are stunning!
Fantastic work!
Beautiful cards especially the purples. Love it
Fantastic cards!!
Beautiful blossoms! Lovely colours!
OOOH! These are both dramatic and bold! Great cards!
Lori S in PA
Beautiful job. I love the floral folder.
Absolutely beautiful!!!!
These cards are bright and beautiful!
Oooh..such vibrant colors. Nice cards.
I love the design of these beautiful flowers! Wonderful cards!
These cards really caught my attention! Such intense colors and so nicely done!!!!
what gorgeous cards! The bold colors on the dark backgrounds highlight the gorgeous creation. Thanks for sharing
Your color combos make me want to dive right into creating
Beautiful vibrant card!
Pretty cards!
Beautiful cards! Colors are vibrant and the black one with the shading is so eye-catching! Thank you! Great inspiration!
Lovely!
Really lovely cards – the florals are gorgeous!
Thank you for the lovely inspiration!
Fantastic cards! I love the fall colors on the floral design! And, the birthday cards are so cute!
I love your florals.
These are both great cards! I loved the “non traditional” colors you chose in the first! Thanks for showcasing that embossing folder because it caught my eye and it’s fun to see it used “in real life”. Great inspiration!
Beautiful cards! Fun technique and great color choices.
Those are fantastic! I love those vibrant colors!
I like the bold combination.
I love the colors you used in your beautiful cards! Thanks for sharing!
I love your use of BOLD colors. I’m going to step outside my comfort zone.
Wow, wow, WOW! Your cards are stunning and the flowers look so velvety and soft, just as they would in nature, only better. Great set of cards!
Love all of the details on all three cards.
They really come to life! Thanks for sharing.
Such bold and beautiful cards! Thanks for sharing!
Hi Allison!! Love both of your cards! These embossing folders with select die cuts are brilliant.
Awesome cards! Great use of the embossing folders.
Terrific flowers and embossing folder combo.
Beautiful cards.. love the embossing folders.
The colors are so bright and bold. Love the flowers.
I like your colorful card designs.
I like the color combinations. Nice colorful cards. Thank you.
I really enjoyed this post! It was super interesting to see both dramatically different colorways of this card design. Well done!