Hello, friends. I hope you’re all doing well! We were hit with a giant, unexpected snowstorm in Colorado this weekend. Normally, I would take advantage of the situation by retreating to my craft room. But, it ended up being one of those lazy, curl up on the couch and drink hot chocolate type of weekends. Much needed, I must say! I made up for lost time yesterday, making four cards with some of the February Spellbinders Monthly Clubs .
Monthly Club Facts:
- Clubs open up to new subscribers on the 6th of each month
- Subscription window for new members ends on the 27th of each month
- You can cancel at any time
- The Deluxe Caboodle Value Club includes all ten clubs PLUS an exclusive bonus item. For February, the bonus item is the Fluttering Hummingbird BetterPress Plates & Die Set.
- Club members receive exclusive member pricing in the Spellbinders online store.
Let’s get to the cards that I made! I have a new video showing how I made my cards using the Stencil of the Month and the Small Die of the Month. You can CLICK HERE to view on YouTube or watch it below.
Note: all supplies are linked to multiple sources in the thumbnails at the end of this blog post.
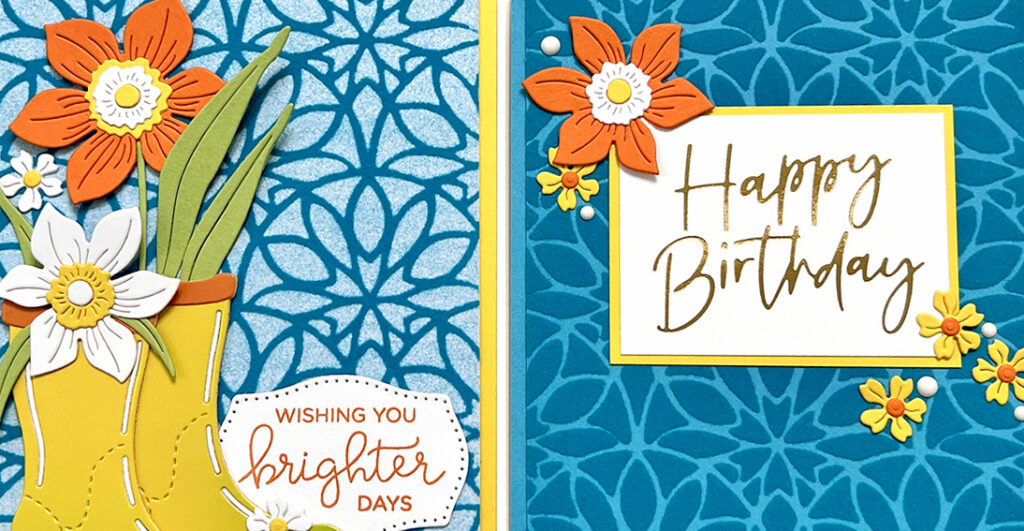
For my cards today, I used the Stencil of the Month Club. For February, it is a set of 4 different background stencils plus a circle mask. Several of the stencils were perfect for playing with flock transfer sheets, so I grabbed some of my favorite blue flock colors and my Transfer Gel Duo and got to work. I sprayed the first stencil with Pixie Spray, so that it would cling tightly to the card stock and not let any of the gel get under it. I spread a thin layer of the gel with my Stencil Pal and, after removing the stencil, set the panel aside to dry for a couple hours.
Once my panel was dry, I laid the flock face down on top of the panel and ran it through my die cutting machine. I forgot to point out in my video that this gel works with either heat (a laminator) or pressure (a die cutting machine). I do have a laminator, but it certainly is more convenient to use my die cutting machine! Once I removed the flock sheet from the panel, I had a perfectly flocked, stenciled design. But, I also had a perfect negative image on the original transfer sheet! I took this transfer sheet and adhered it to a piece of card stock in order to give it stability. I used a piece of double-sided adhesive in order to do that. This negative image is what I used for the background on my first card.
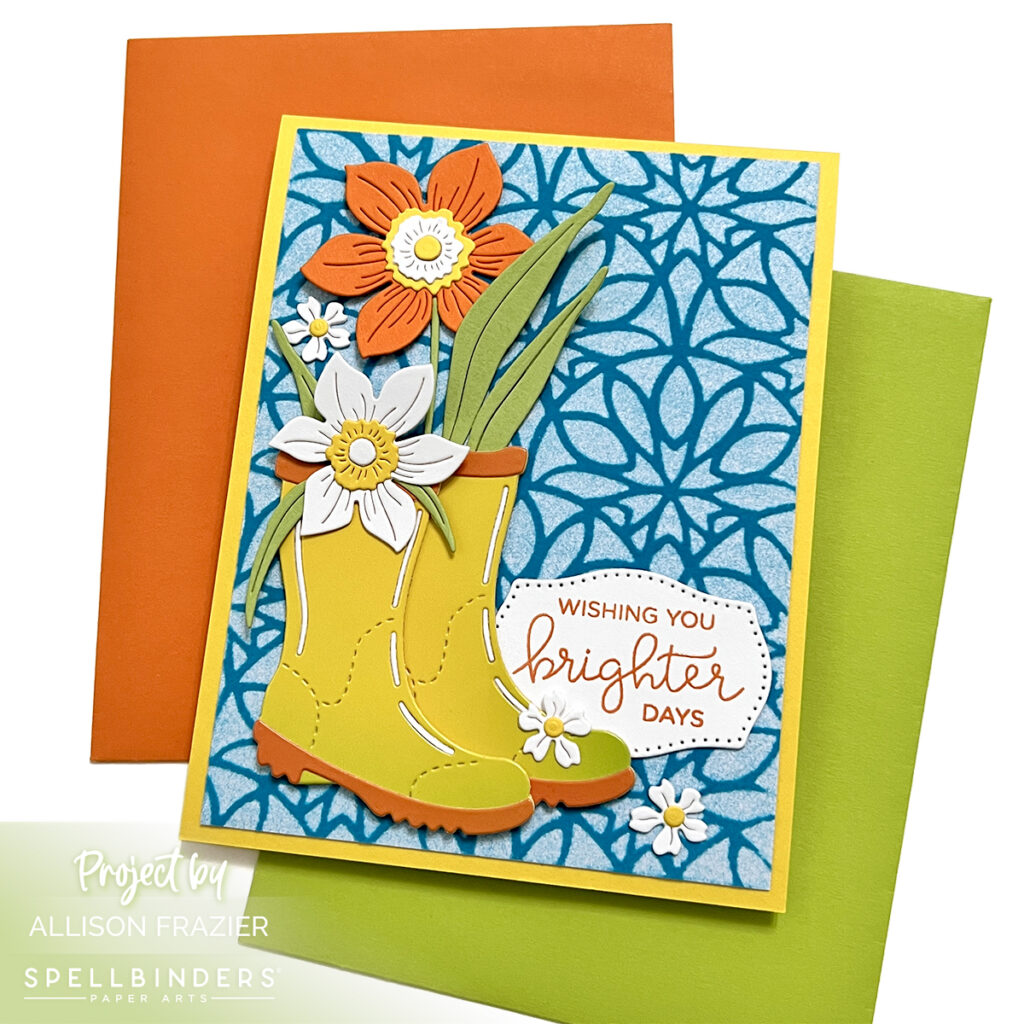
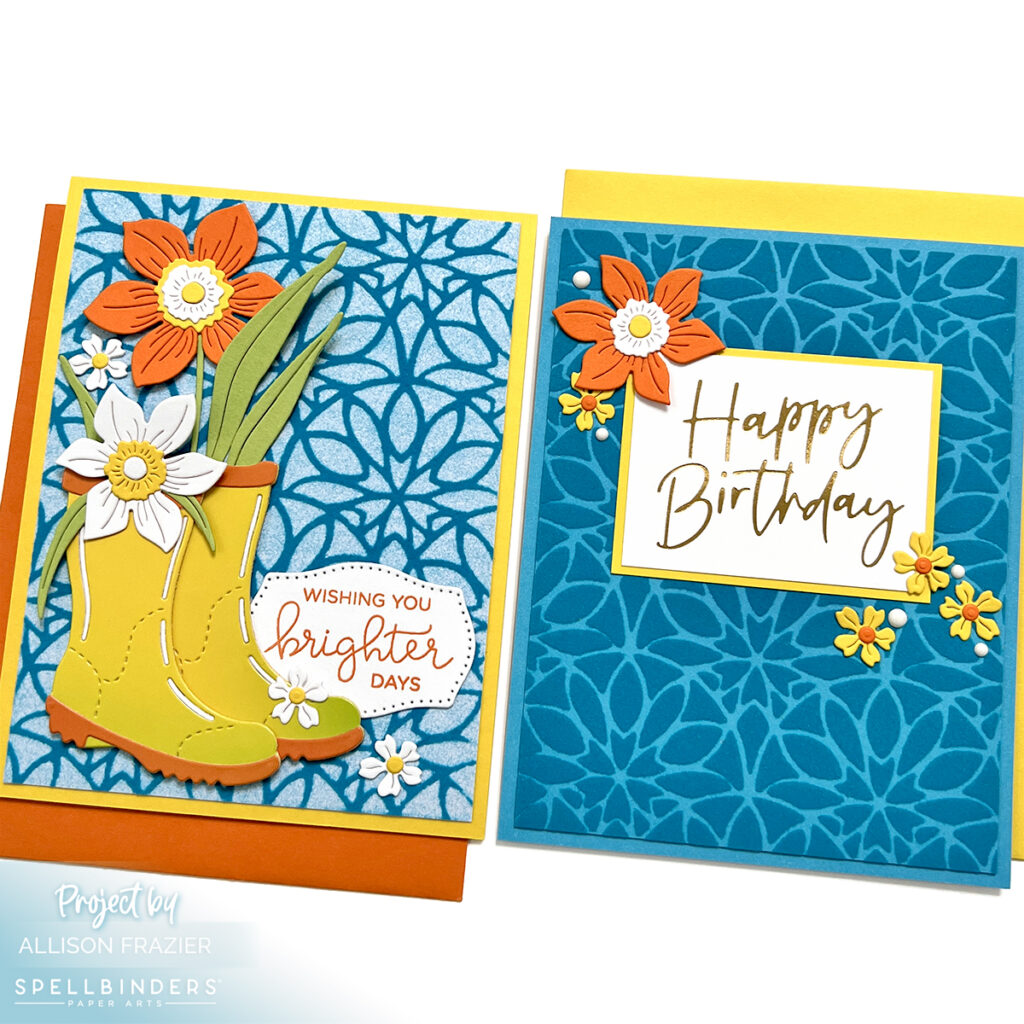
For this first card, I also used the boot and flowers from the February Small Die of the Month, which is called “Rain Boot Bouquet.” I die cut the boots from some glossy card stock to make them look like shiny, rubber boots. The sentiment comes from a fun stamp set from Hello Bluebird – it’s one of my go-to’s when I need something for rain/sunshine/rainbow category. I cut the sentiment out using a die from the Pierced Mini Labels set.
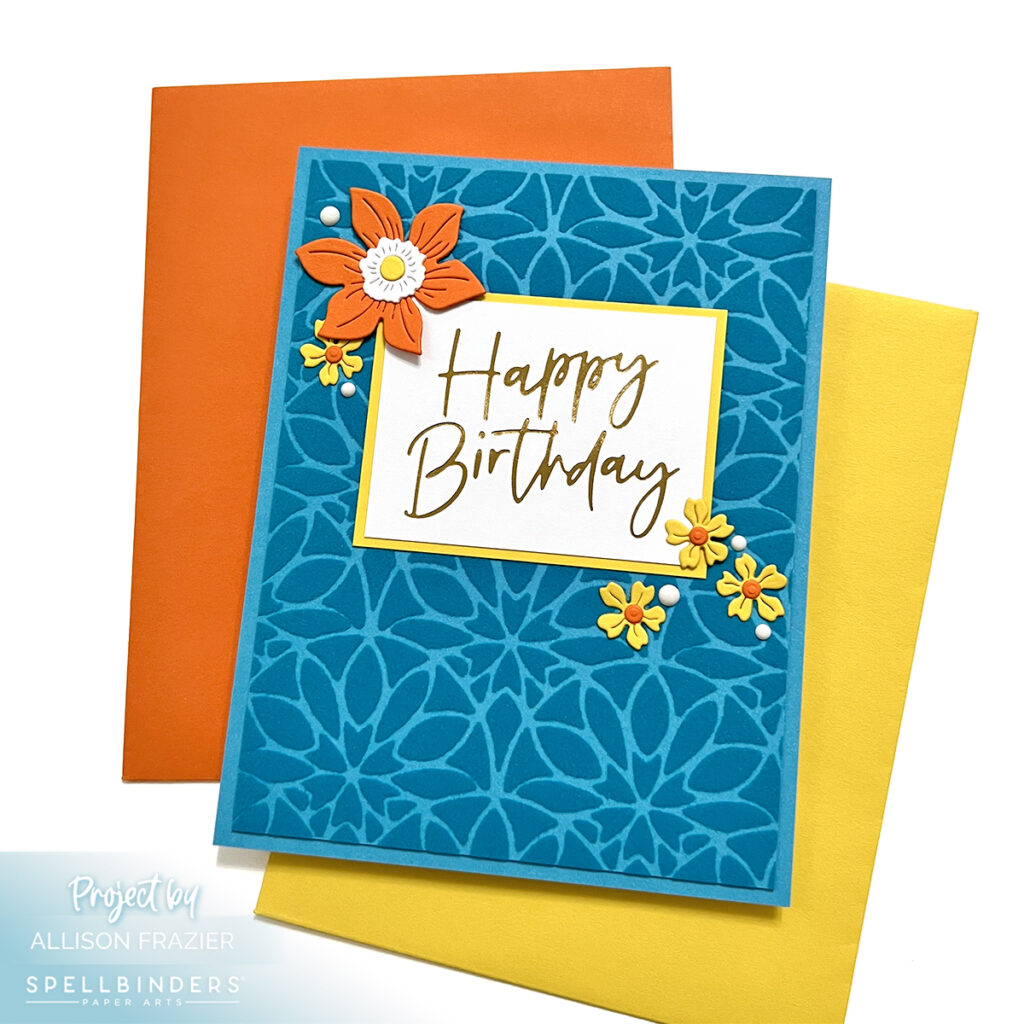
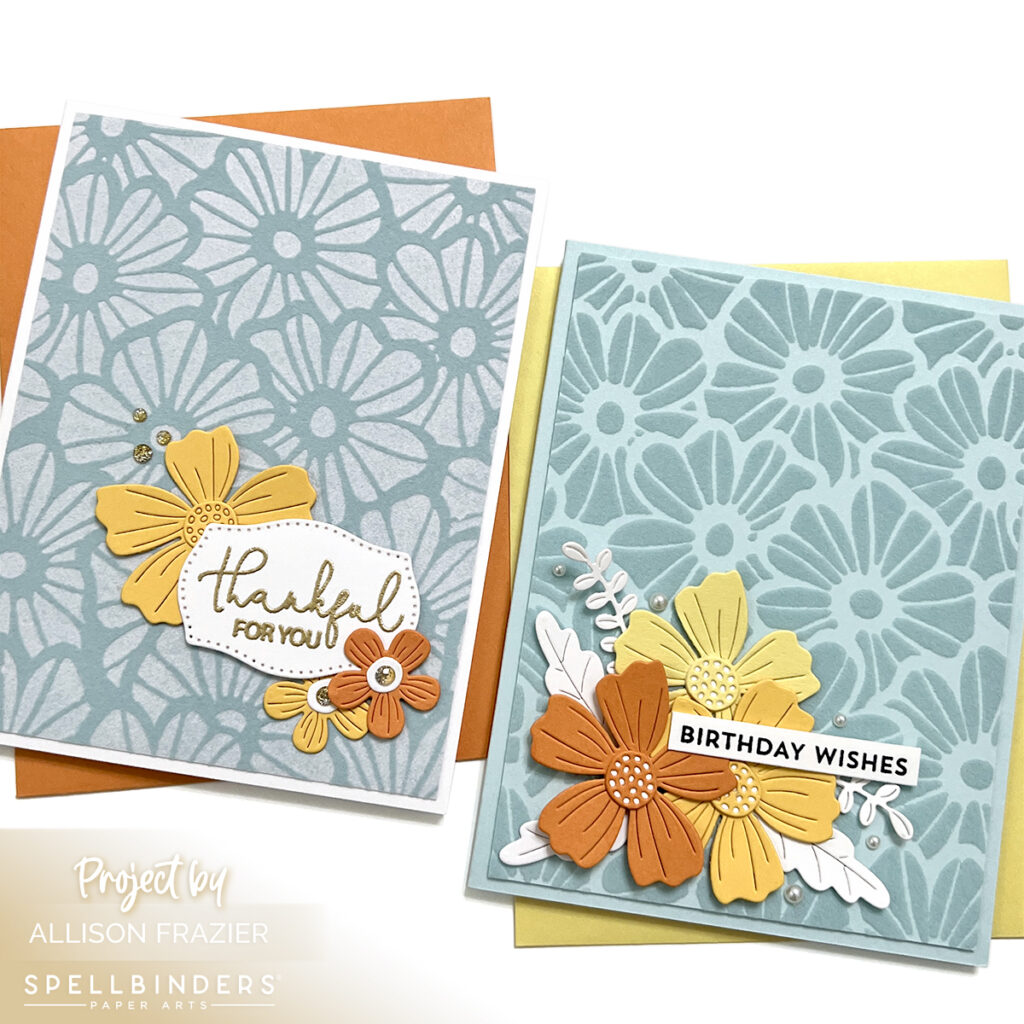
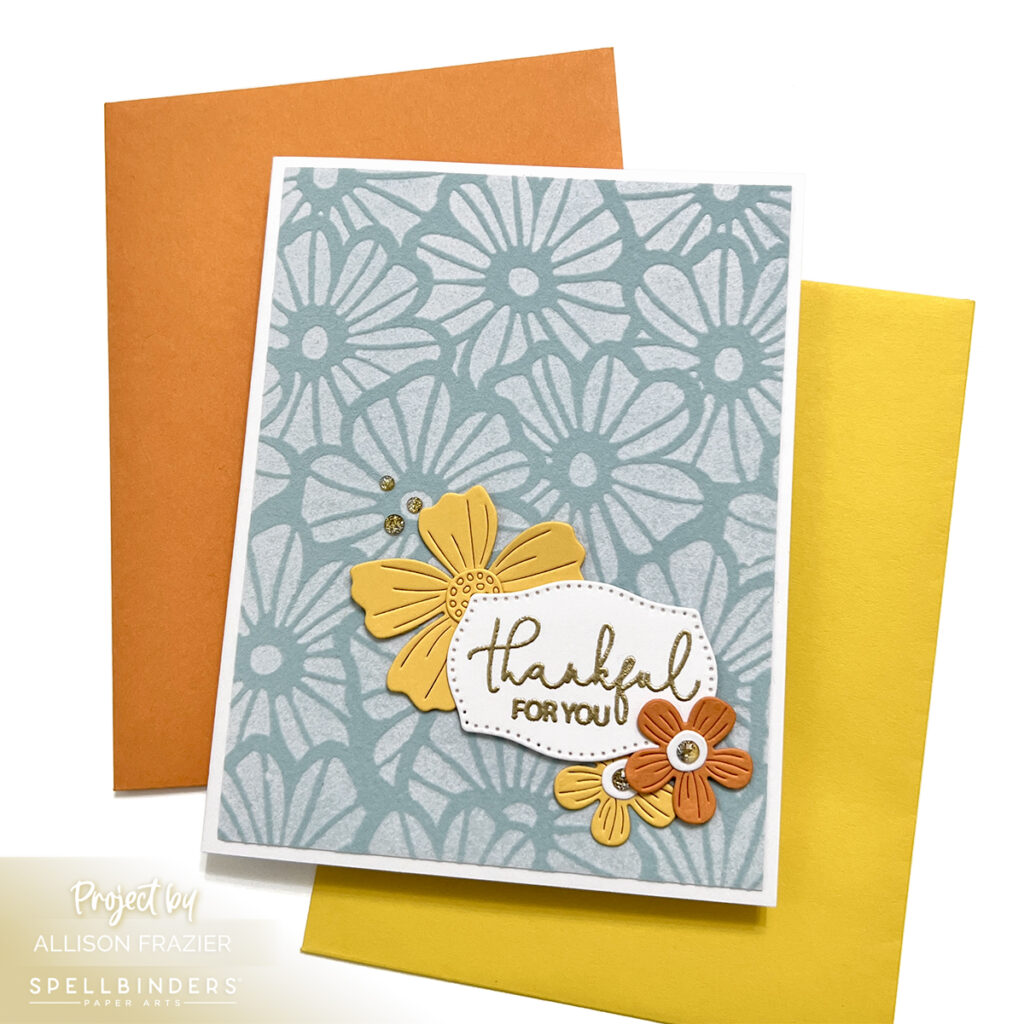
The card above features the actual flocked panel. I used some of the flowers from the Small Die of the Month, and I hot foiled a sentiment from the Thank You & Happy Birthday Glimmer Hot Foil Plate Set. Aside from the first card, I really wanted to keep my cards pretty simple, since the backgrounds have such a bold, textured design.
My second set of 2-For-1 cards features another stencil from the monthly club kit and a piece of the Blue Sky colored flock transfer sheet. I stenciled the design onto a piece of light blue card stock in order to get a tone-on-tone look. The first card (below) is the flocked piece.

I used the Be Bold Blooms die set to decorate this card. I used more muted colors for this second set of cards. I added a simple stamped sentiment and some white pearl embellishments to finish the card.
This last card uses the negative piece of flock. I again used the Be Bold Blooms set to create a simple design. I stamped the sentiment onto one of the Pierced Mini Labels and heat embossed it with gold embossing powder. I added some of my favorite embellishments from PinkFresh Studio.
I hope these cards put a smile on your face today. As always, I appreciate you visiting my blog.
Wishing you all a crafty day,
Allison
SUPPLY LIST
Note: External links on my blog may contain affiliate links. This gives me the opportunity to earn a small commission when you click on the links and place an order. This comes at no additional cost to you. Thank you so much for your support! You can see more information on my Affiliate Disclosure page.
Both terrific! I really like both the small and large die sets this month. I was drooling over all the stuff from SB this month. All fabulous! Thx for sharing your beautiful work.
Lori S in PA
Thank you so much, Lori! I appreciate your continuing support of my blog and YouTube channel!