Hello again, friends! I am excited to be able to share some cards that I made featuring the brand new Sweetheart Release from Simon Says Stamp! As with the Smitten release last month, this release is full of more love and amazing products.
I have a new video to share with you, which features my first card and the new Printmaking Hearts stamp set. For today’s video, you can CLICK HERE to view on YouTube or watch it below.
NOTE: All Supplies are linked to multiple sources in the thumbnails at the end of this blog post.
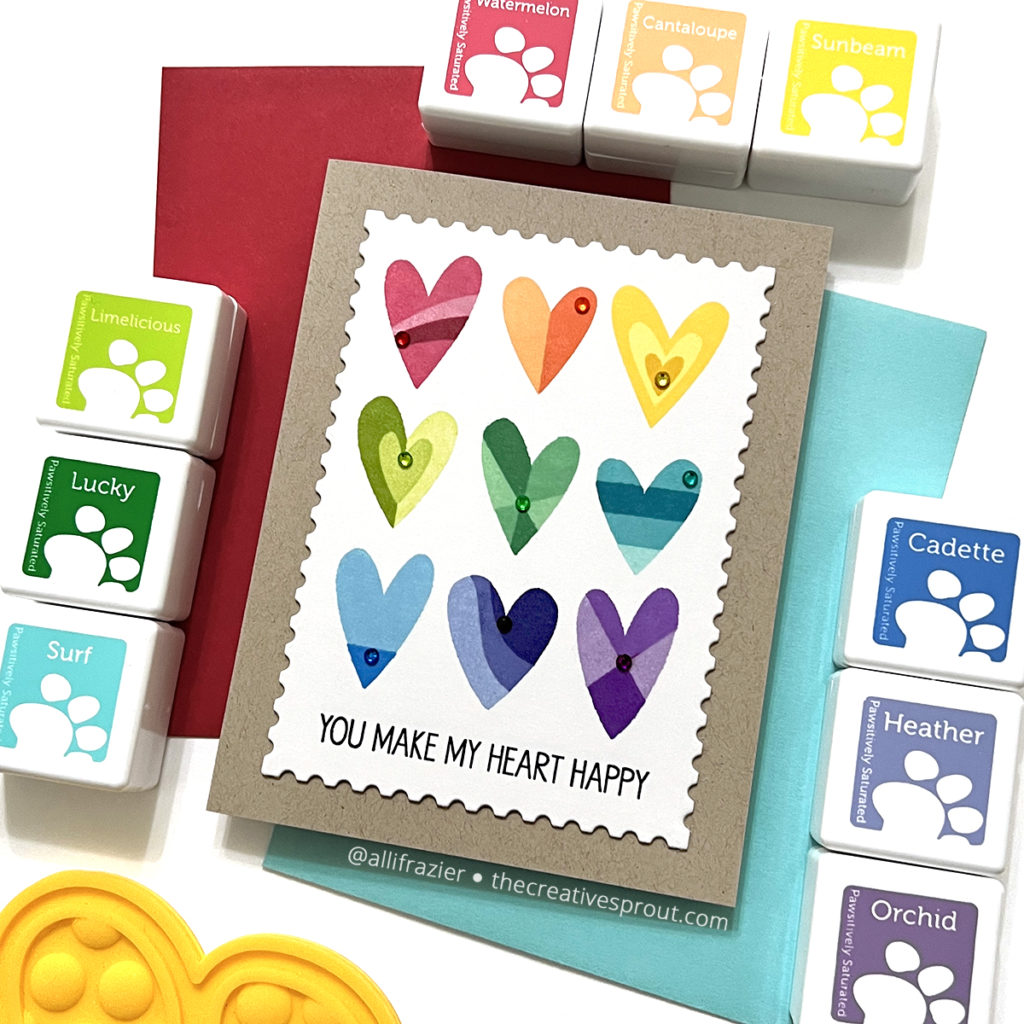
This first card, which I make in the video, features the Printmaking Hearts stamp set. I love how this set makes such a fabulous and easy one-layer card! This does have a matching die set, if you want to pop the hearts up. This set was perfect for stamping with the Pawsitively Saturated Ink Cubes, due to their size and the fact that they come in color trios. Watch the video to see which colors I used!
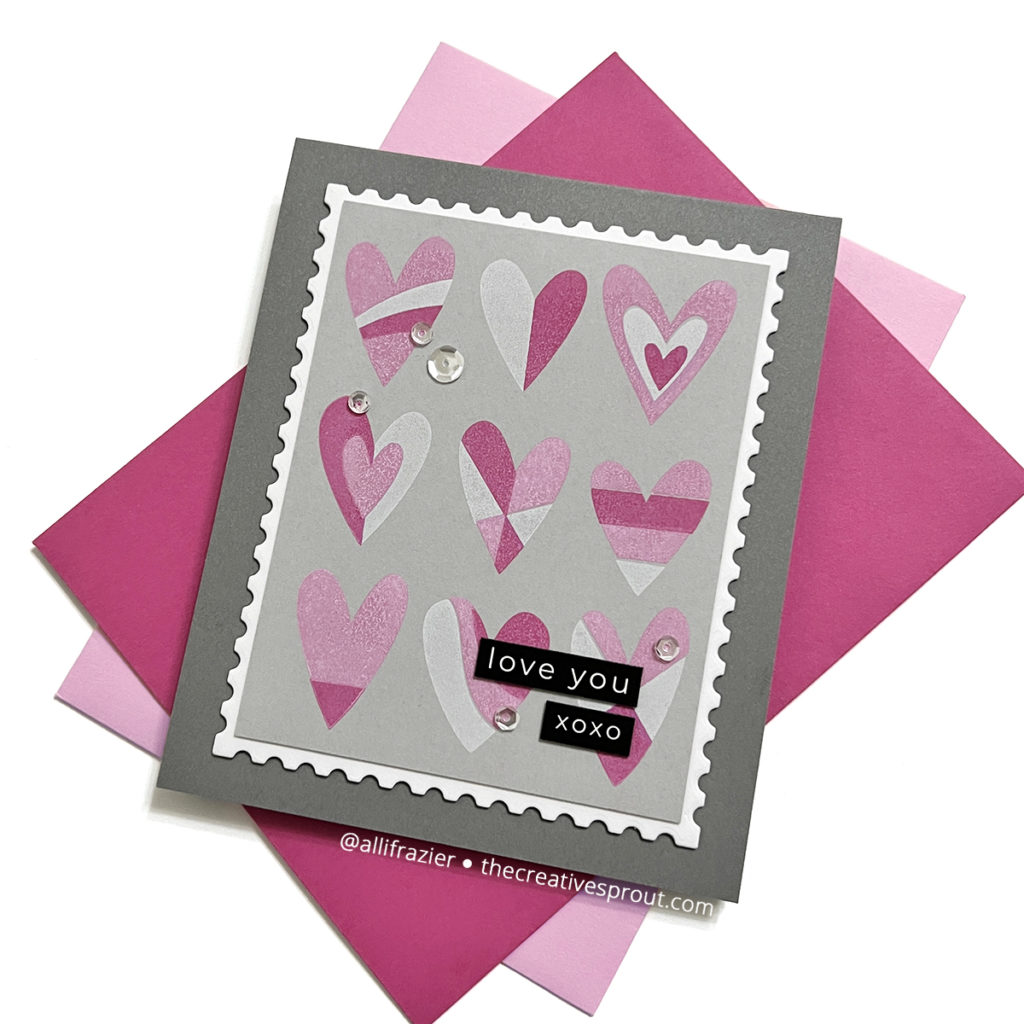
This second card also features the Printmaking Hearts, but in a much simpler way. You can see me make this card in the video, as well. Since there are three stamps in this printmaking set, using one color for each stamp makes a quick and easy one-layer card! Since I was stamping on colored card stock, I used white pigment ink and pink Distress Oxides. The sentiment comes from the Reverse All the Love Sentiment Strips. I used a die from the Postage Stamp Edge Frames set to cut the panel. For this card, I did some partial die cutting to make the panel smaller. I also used the same die for the rainbow hearts above.
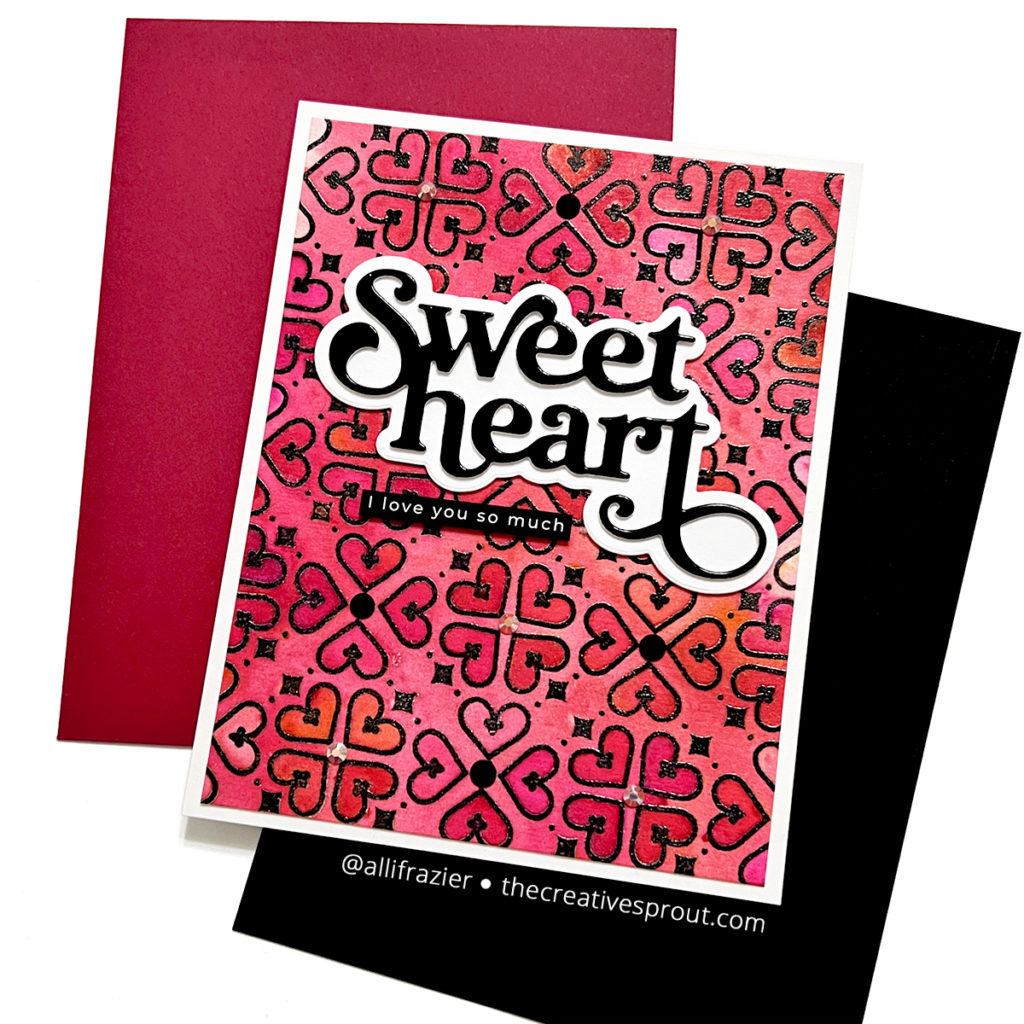
UPDATE: For the next three cards, where I use shimmer powders, I have a NEW VIDEO on YouTube showing how I made these. You can also see what colors of shimmer powders I used. One thing that I forgot to mention in my video is that I always spray my shimmer powder panels with a clear sealant before I start assembling cards.
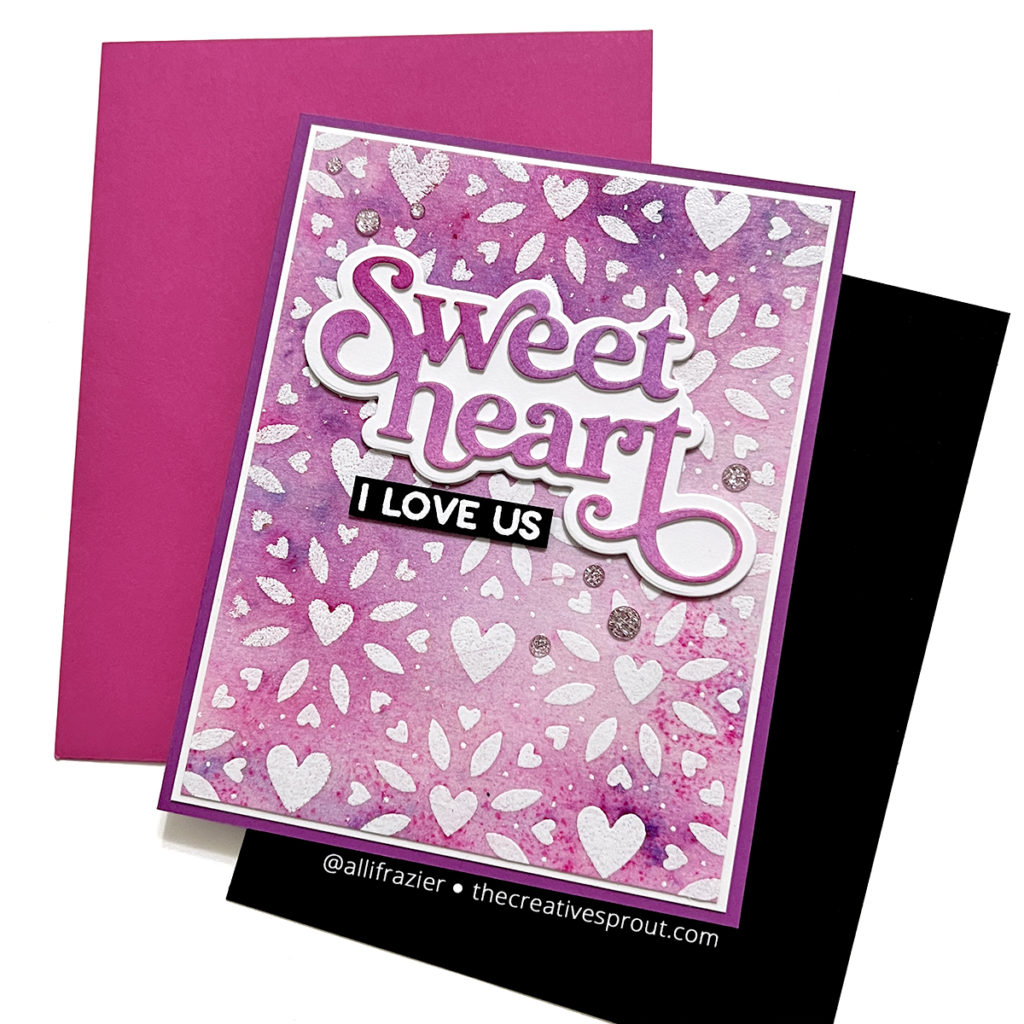
The card above features the Regal Hearts cling stamp. I stamped with black pigment ink, heat embossed with clear embossing powder and then used shimmer powders to create this amazing background. The word die is also new – the Fancy Sweetheart die is so gorgeous, right?? The subsentiment is from the Reverse All the Love Sentiment Strips.
My next card also features a shimmer powder background, but this time I used the new Heart Blooms Stencil. I pounced embossing ink through the stencil and then heat embossed with white embossing powder before adding the shimmer powders. I again used the Fancy Sweetheart die. The subsentiment is from the My Love Greetings Stamp Set.
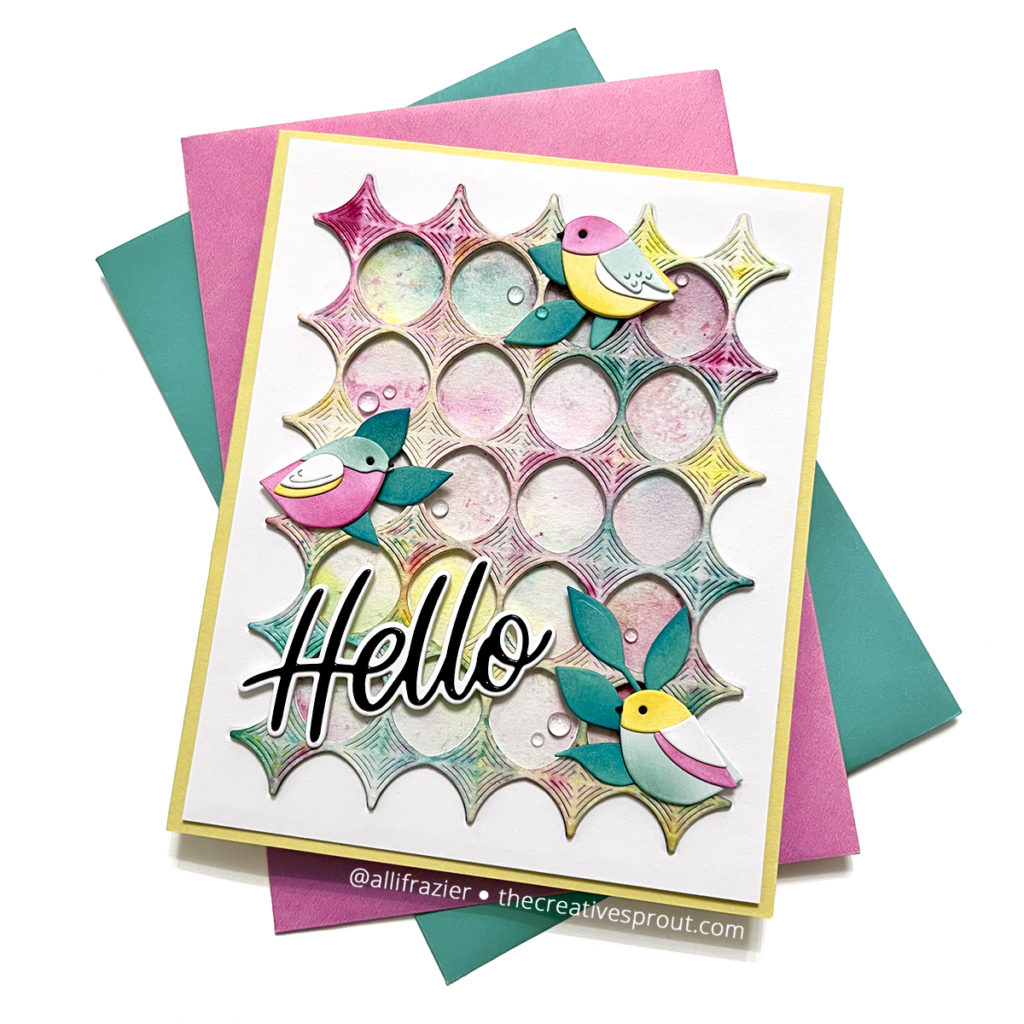
My next card also features shimmer powders, but this time I added the powders to a die cut, using the new Whirl Diamond Plate. The birds are from the Layered Bird Bunch Die Set, the leaves are from the Leafy Sprig die, and the sentiment is the Handwritten Hello Die.
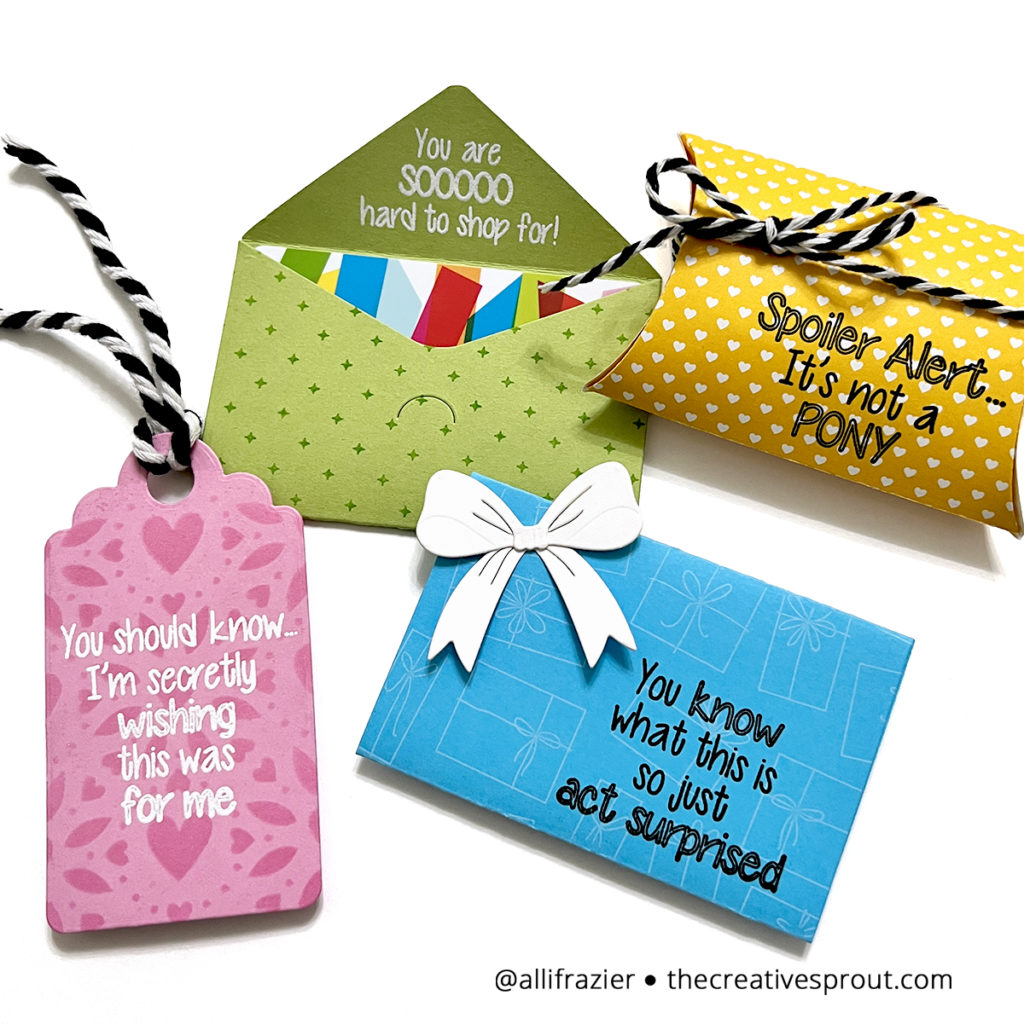
Finally, I played a little bit with the new Tag Lines stamp set. I used various dies to feature these fun sentiments, including the Gift Card Pocket Envelope Die and the Pillow Box Die. The tag comes from the Signature Tags Die Set from Alex Syberia Designs. Aside from the pillow box, for which I used patterned paper from my stash, I used various stamps and stencils to create the backgrounds. The pink tag features that new Heart Blooms Stencil. The blue gift card holder features the So Many Presents Cling Stamp. The green gift card holder features the Not Quite a Dot Cling Stamp. The white bow on the blue gift card holder comes from the Halloween Wreath Add-Ons Die Set set from Spellbinders. These were so easy and so much fun to make!
I hope these cards put a smile on your face! Be sure to check out all of the other products that are in the Sweetheart release. Thanks for visiting my blog today.
Wishing you all a crafty day,
Allison
SUPPLY LIST
Note: External links on my blog may contain affiliate links. This gives me the opportunity to earn a small commission when you click on the links and place an order. This comes at no additional cost to you. Thank you so much for your support! You can see more information on my Affiliate Disclosure page.

I like it all a lot. I love the printmaking hearts card!!
Lori S in PA
Thank you so much for visiting and leaving a comment, Lori! I appreciate it.
Just saw your bird card on teh SSS Brand Galleries page. Wow, it is amazing!