
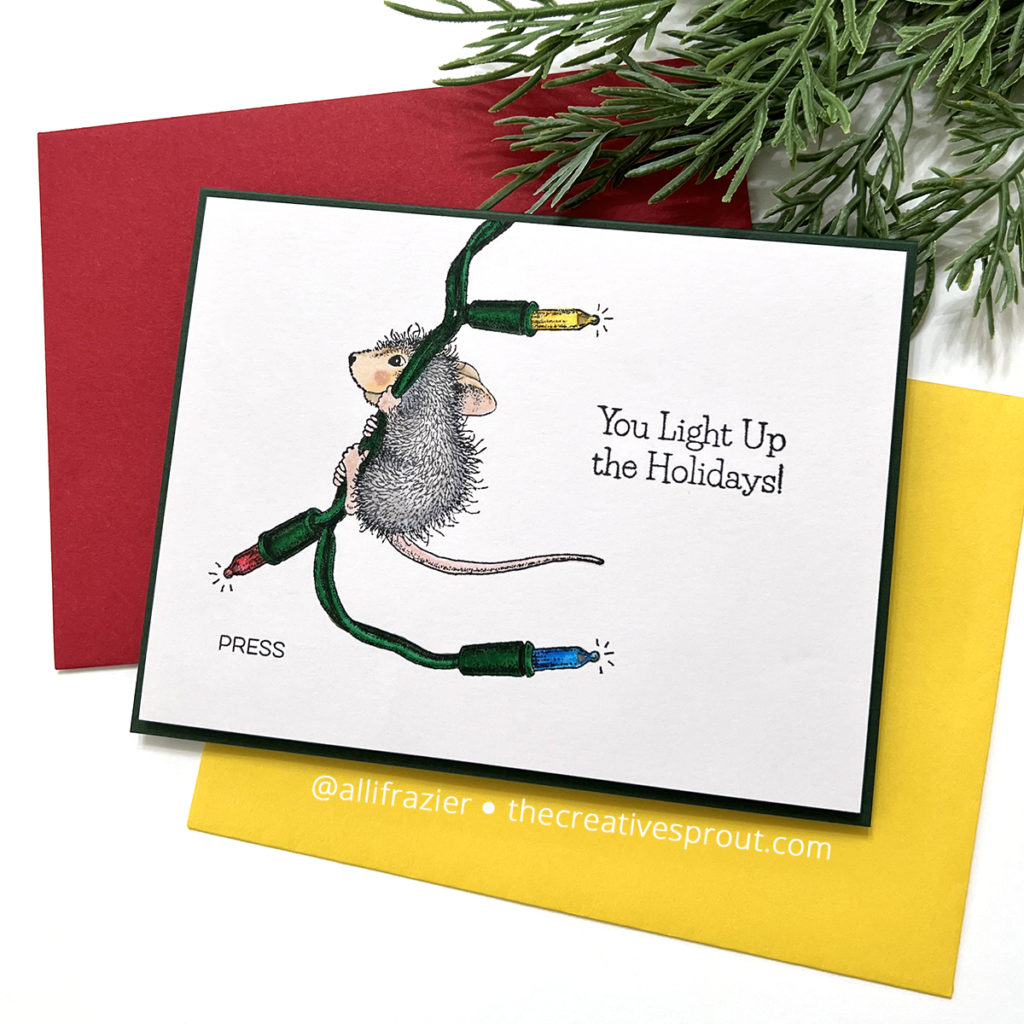
Hello, friends! Today, I have a really fun card to share with you. It’s an interactive, light-up card! As soon as I saw this adorable Merry & Bright stamp from the new House-Mouse Holiday Collection, I just knew that it was time to finally use the EZ-Lights that have been sitting in my drawer for over a year. Every time I had opened that drawer, I was reminded that I needed to find the right project to test them out. And, this was it! It was even easier to use the lights than I expected. You can see the card come together in my latest YouTube video. You can view that below or CLICK HERE to go directly to YouTube.
Note: all supplies are linked to multiple sources in the thumbnails at the end of this blog post.
For my card today, I used the EZ-Lights that have 3 separate lights attached, which is why I immediately thought of them when I saw this mouse hanging from the string of 3 Christmas lights! If you had an image with two things that you wanted to light up, then you could just cut off one of the bulbs from this particular EZ-Light. They’re really so easy to use, and it was fun to finally make something. One thing I did learn for next time is that I probably want to cut a larger hole for the light to show through. I think I would have been able to achieve more of a colored light effect if I had done that. Or, this just occurred to me: maybe if I had just offset the little bulbs themselves from the actual holes, that would have done the trick. Don’t get me wrong, though. I am absolutely thrilled with how it turned out, and I know that whoever I choose as the recipient of this card will adore it.
By the way, I used my ZIG brush markers to color this little mouse. For the lights, I used 029 and 022 for the reds, 050 and 051 for the yellows, and 031 and 032 for the blues. For the light strand, I used 040 and 044. For the body of the mouse, I used 904 and 901. For the face, I used 074, 076 and 064. For the tail, feet and other pink details, I used 028.
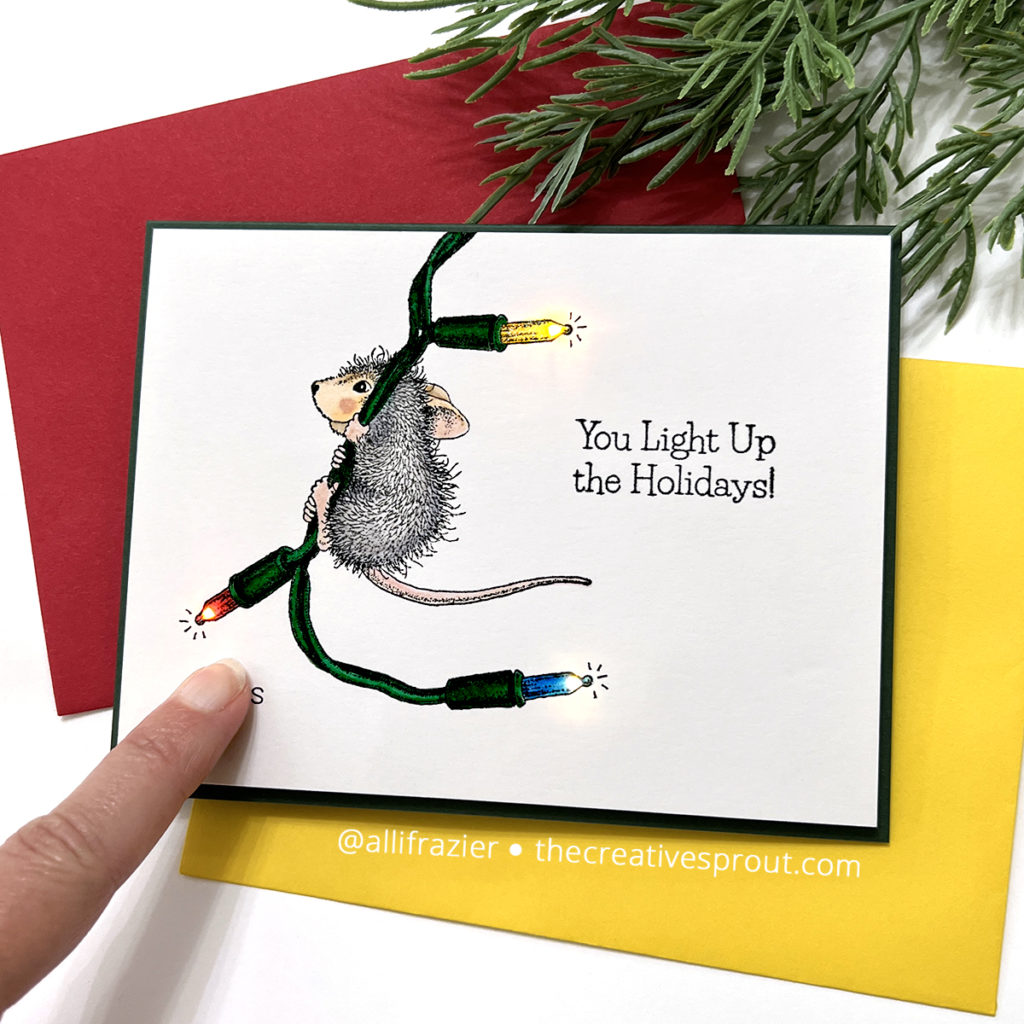
I did add the little black marks at the end of each bulb with a black pen. I just wanted to give it a little more detail, but I do love the clean and simple look of the card. I think it makes the lights even that much more of a surprise! I hope this card puts a smile on your face today. Have you tried adding lights to any of your cards? Let me know in the comments. Thanks for visiting today.
Wishing you all a crafty day,
Allison
SUPPLY LIST
Note: External links on my blog may contain affiliate links. This gives me the opportunity to earn a small commission when you click on the links and place an order. This comes at no additional cost to you. Thank you so much for your support! You can see more information on my Affiliate Disclosure page.

Very cute card. This one looks like it’s simple. I have seen some where the wiring kind of made my head spin and I discarded any hope of ever making this type of card. Thanks for re-encouraging / re-empowering me. I love House Mouse stamps, too. I have a bunch that have lights on them w/ the mice.
Lori S in PA
Thanks for the comment, Lori! It really was easy. I do think I will do it differently next time, but that doesn’t mean that I did it “wrong” or that it was hard. I am looking forward to doing it again, so now it’s just a matter of keeping my eye out for another product to use the lights with. Honestly, it’s no harder than making a traditional shaker card.
OMGosh, this is the cutest, and what a great idea to add a light – YOU ROCK
Thank you so much, Sandi!!