Hello, Everyone. Today, I am sharing these adorable gift card holders that are perfect for giving to teachers for the holidays.
Supplies
Concord & 9th – Color Me Happy Dies
Concord & 9th – Color Me Happy Stamp Set
Concord & 9th – Mini Gift Box Dies
Concord & 9th – Iconic Christmas Dies
Lawn Fawn – Simple Gift Card Slots
Lawn Fawn – Tiny Tag Sayings Stamp Set
Hello Bluebird – Holly and Pine Die
The Stamp Market – 1/8″ Quick Strips Die
The Stamp Market – 1/4″ Quick Strips Die
The Stamp Market – 1/2″ Quick Strips Die
Process
I have had these supplies from Concord & 9th for awhile now, but like many other things piling up in my craft room, I had yet to use them. Of course I had to have them when I saw Jennifer McGuire playing with them in one of her videos. An idea popped into my head to use them as gift card holders for teachers at the holidays. So, like Jennifer did, I also adapted the Mini Gift Box Dies.
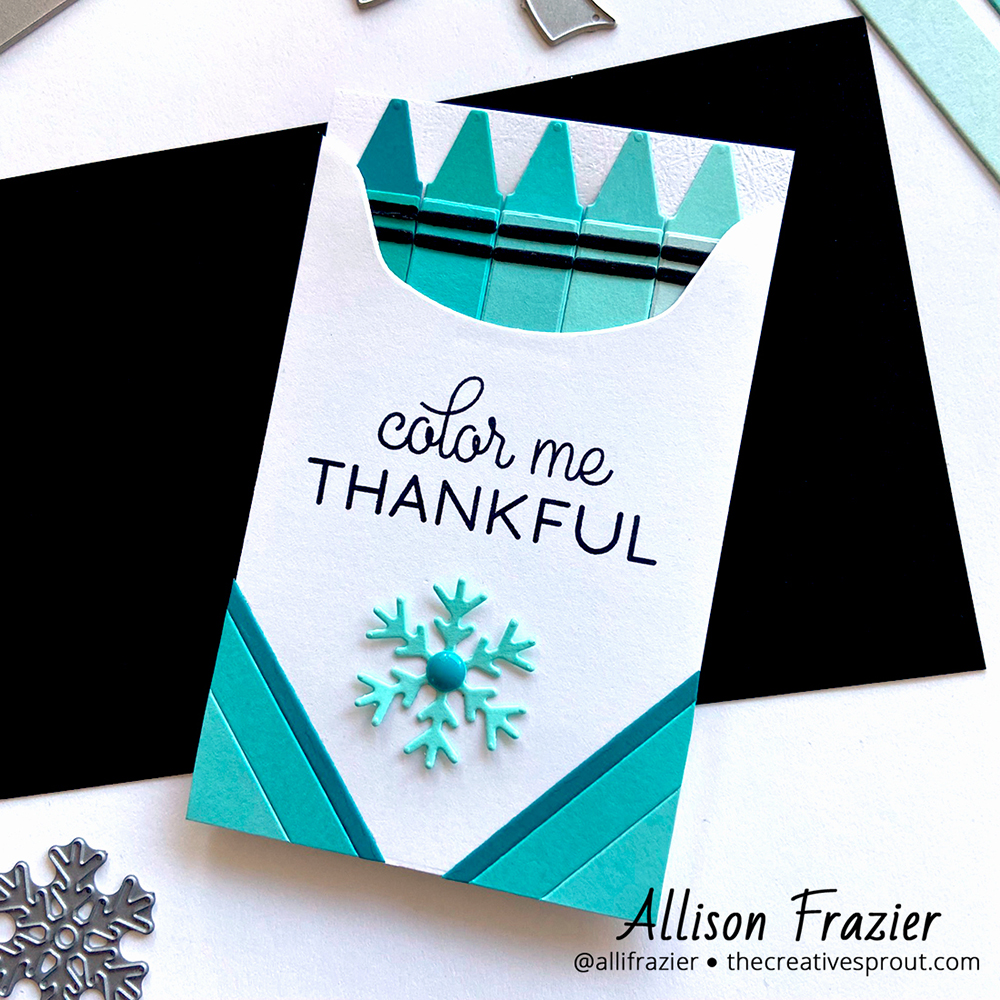
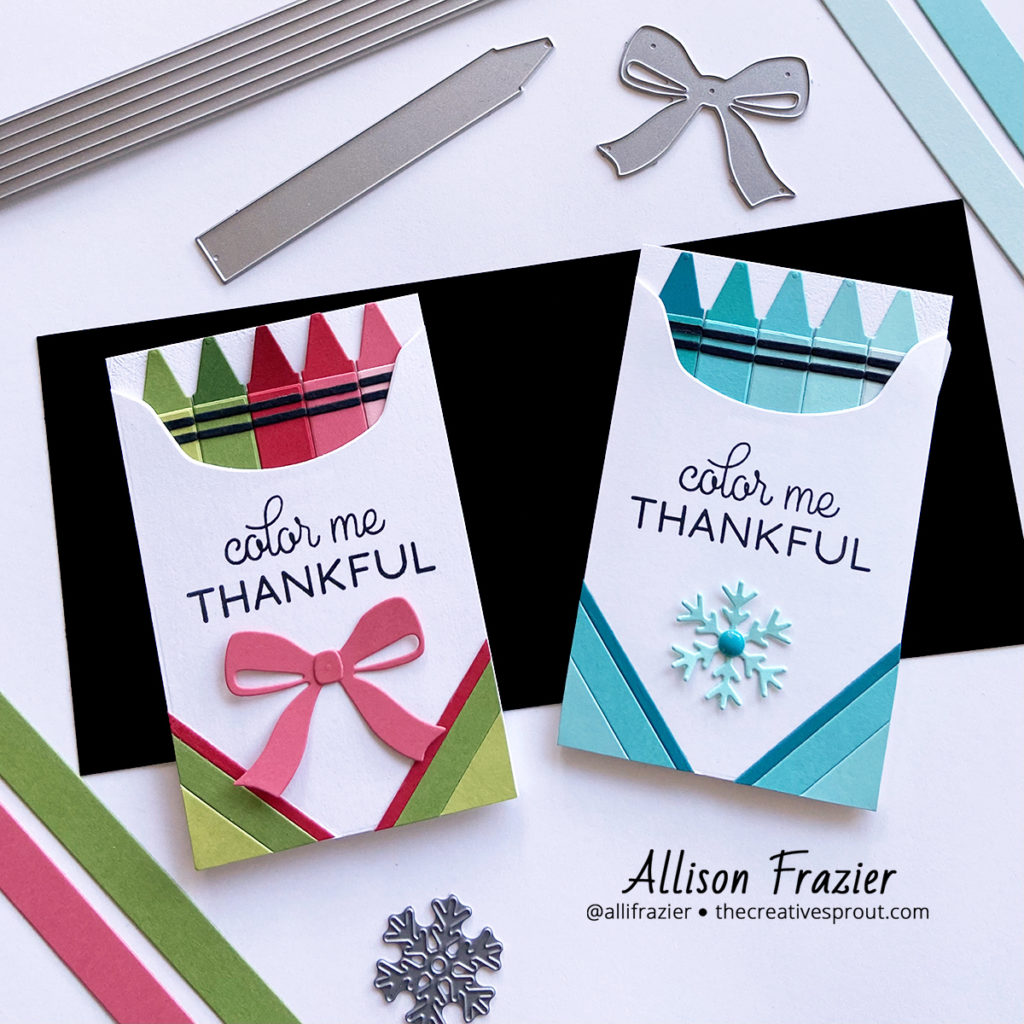
I started out with the easy part – die cutting and assembling the crayons. Of course, it wasn’t exactly easy narrowing down the color choices! I wanted to use holiday colors, so one card features shades of green and red, and the other features shades of turquoise.
Next, I took the front piece of the Mini Gift Box die set and used it to cut some white card stock. I did do some partial die cutting because I did not want the slit to be on the front of my project. I then trimmed it down to get a flat basic shape that would still give the illusion of a crayon box. This was, of course, inspired by the Jennifer McGuire video. I stamped the sentiments onto this front piece with VersaFine Onyx Black Ink.
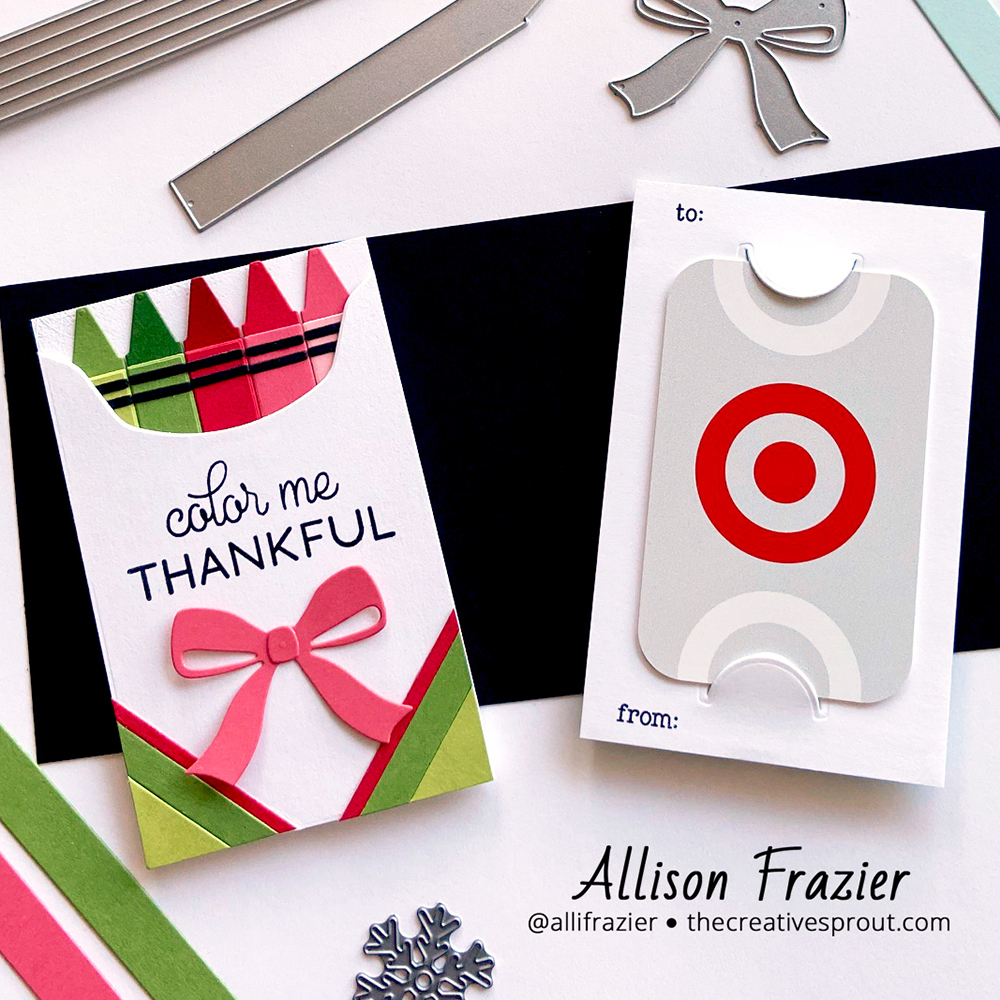
Next, I cut a piece of white card stock for the back. This piece is just a rectangle – it measures roughly 4.5″ x 2.75″. I cut the gift card slots into the middle of this piece and then stamped the “to/from” sentiments above and below where the gift card would sit. I then adhered the crayons to the other side of this rectangle so that the tips of the crayons lined up with the top, making sure not to put glue anywhere that would interfere with the gift card slots.
On to final assembly. I needed the front piece to sit flush on top of the crayons once I attached the two pieces together, so I built up the sides using thin strips of paper. I cut 1/8″ strips from white paper to do this. I then glued the front and back together, again making sure not to interfere with the gift card slots.
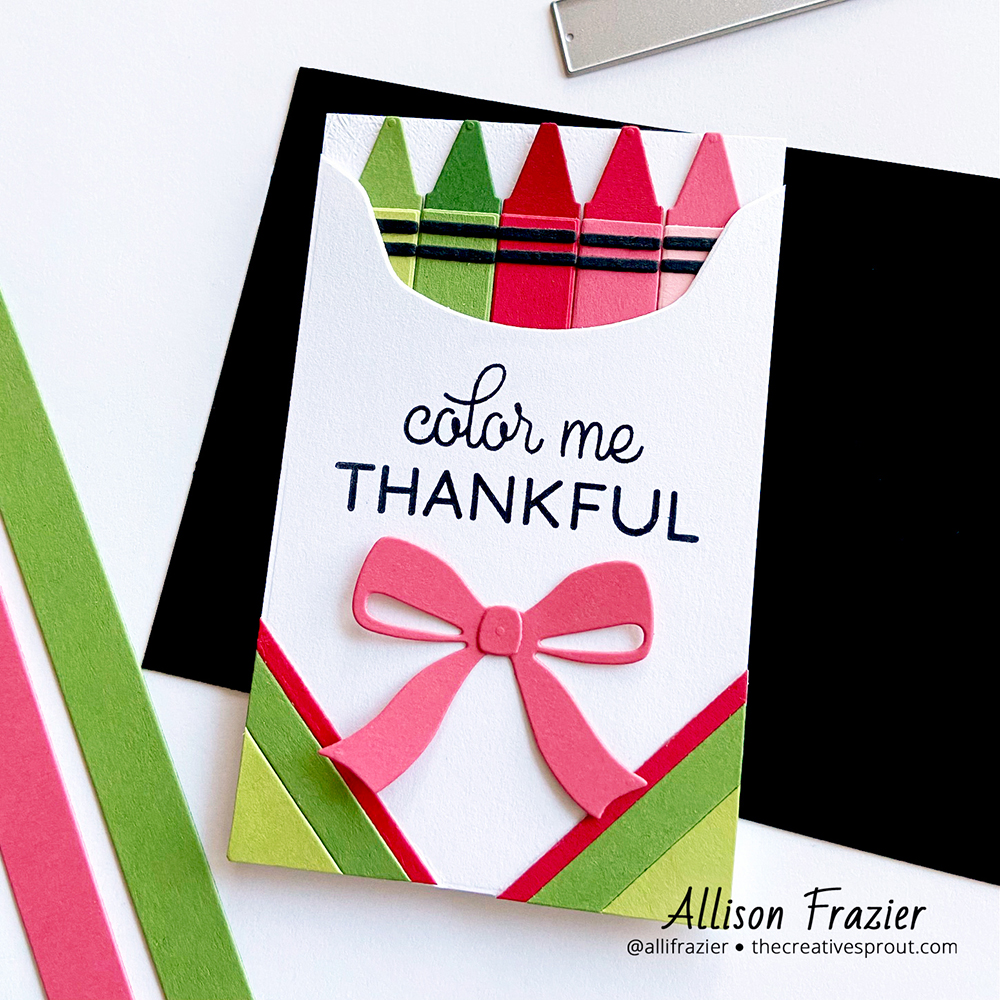
To decorate the front of the “box,” I used strips of paper that I die cut with the three sizes of strips dies from The Stamp Market. These dies really are awesome. For the red and green box, I added a bow, and for the blue box, I added a snowflake. The Mini Gift Box Dies actually come with a die that cuts a bow, but I felt like it was a little too big for the look I wanted.
I am so in love with how these turned out. It’s a very unique gift card holder in that you just flip it over to find the card. I could have made an actual card and put the gift card on the inside, but I wanted to try something different. This is a great little gift card holder to throw into a gift bag.
Thanks so much for joining me today – I appreciate you visiting! Leave a comment and let me know which color combo you liked best.
Wishing you all a crafty day!
Allison
Note: External links on my blog may contain affiliate links. This gives me the opportunity to earn a small commission when you click on the links and place an order. This comes at no additional cost to you. Thank you so much for your support, as this helps me bring you more content.