Hello, friends! I hope this finds all of you staying warm! Right now, it is -7 degrees where I am, and it’s snowing. I am not sure that the snow will stick around for Christmas, but I’d rather have no snow than frigid weather! Who am I kidding – the only time I go outside these days is when my husband drives me to to the doctor or PT for my ankle! Good news is that the fracture is healed. Now it’s just a matter of getting through physical therapy and out of my boot.
I finally sent my holiday cards out, so now I’m just trying to have fun and use some products that I’ve been wanting to use for awhile. That includes this adorable Candy Pops Rectangle Die from The Greetery. When I bought it, I was hoping that I could use it with some existing products that I have from My Favorite Things, and it turns out that you can! Both the lip balm pouches and the nugget pouches (and matching dies) work with this fun treat-shaped die. And, if you saw my recent post featuring the Money Card Die-namics, that set includes the lip balm dies, so you don’t have to buy them separately.
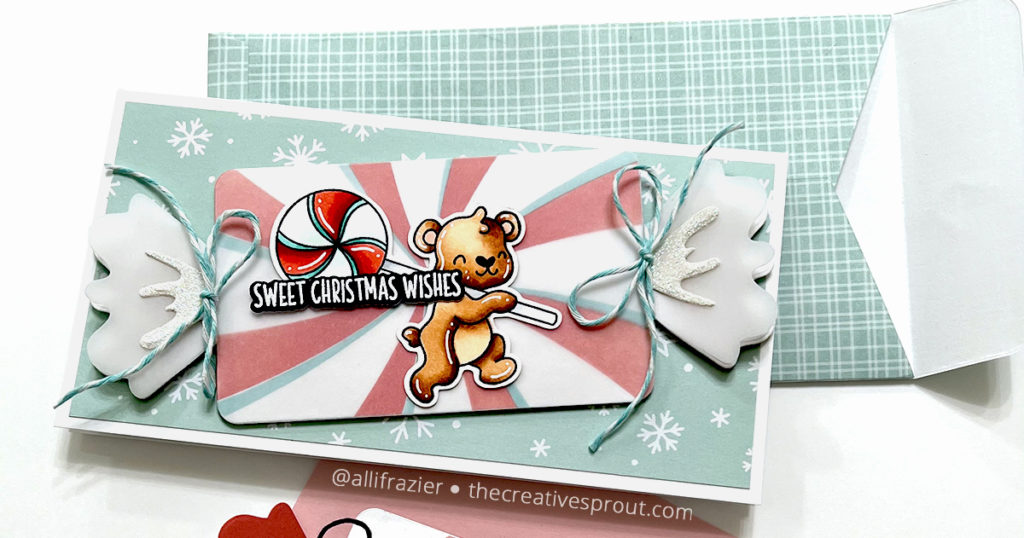
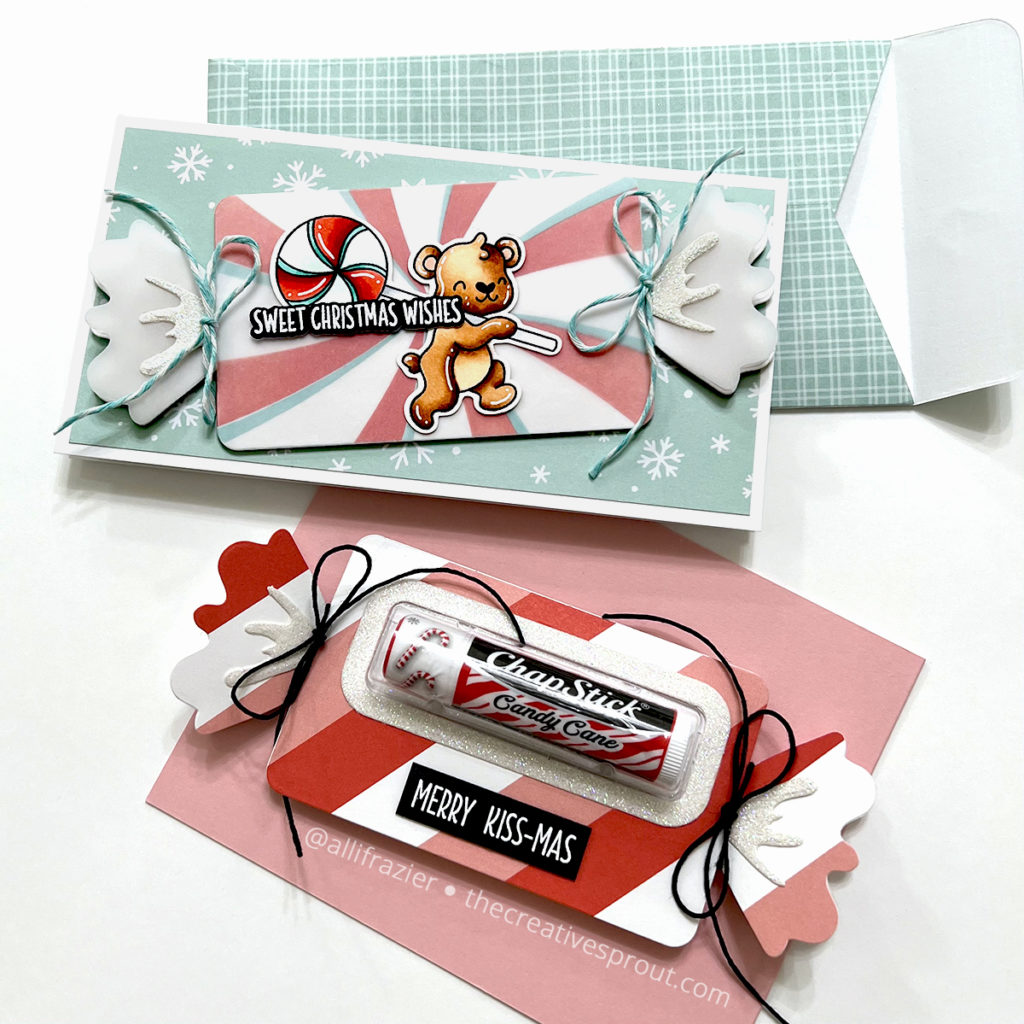
Card 1
The Greetery – Candy Pops Rectangle Die
Simon Says Stamp – Sweet Tooth Bears Stamp Set
Pinkfresh Studio – Swirl Background Layering Stencil Set
Pink & Main – Gingerbread Kisses Stamp Set
Pink & Main – Gingerbread Kisses Die Set
Pinkfresh Studio – Mini Slimline Envelope Die Set
Making the Card
I was inspired to make this card after I recently colored this adorable bear using my new OLO markers. I’m really enjoying my OLOs, especially every time I pick up one of my Copic markers, and it’s completely dried out! After I finished coloring, I thought it would be fun to create a matching background using the Swirl Background Layering Stencils. I used Distress Oxides to ink up the background (Salvaged Patina and Festive Berries). Instead of using the swirl background as a background, I decided to use it as the actual candy “wrapper”, so I used the Candy Pops die to cut it out. And then, to make it look more like a candy wrapper (and to soften things so that my bear would pop out more), I cut a second layer of the Candy Pops die from vellum. I adhered the vellum layer on top, using glue in strategic places, and then I tied some string around the ends. I also added the small wrapper details that I cut from white glitter card stock.
This card is a mini slimline card. The base measures 3.25″x6.25″. I cut a 3×6 panel of snowflake patterned paper and adhered that to the card base. I popped my “candy” up on foam tape. I added the bear, as well as the sentiment that I heat embossed on black paper and cut with the matching die. I’m not sure what got into me, but I was a bit of an overachiever and made a matching envelope for this card! Actually, this envelope die is just another product that has been sitting around my craft room feeling neglected. It’s so easy to use, and I love how I got to use an old piece of scrapbook paper from my stash to make it!
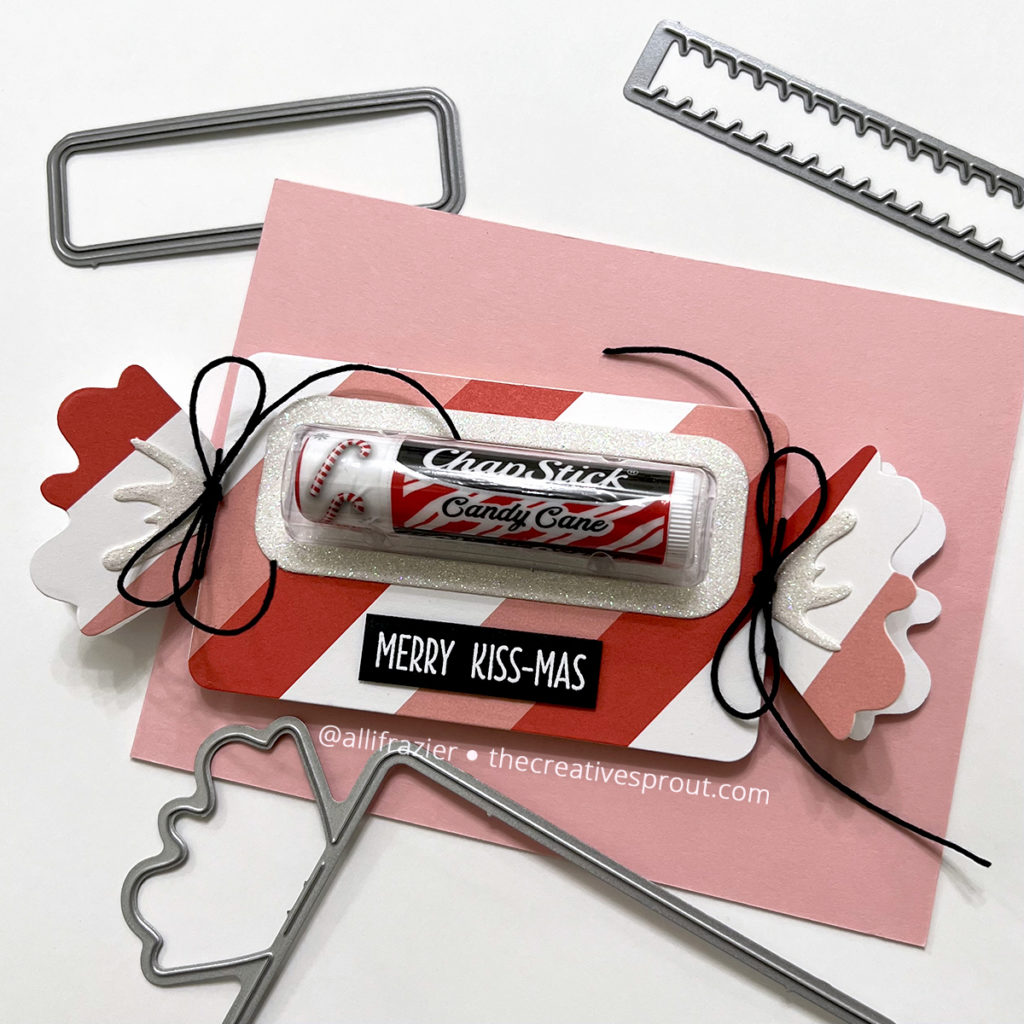
Lip Balm Holder
The Greetery – Candy Pops Rectangle Die
My Favorite Things – Lip Balm Pouches
My Favorite Things – Lip Balm Window & Frame Die-namics
My Favorite Things – Sending Smooches Stamp Set
My Favorite Things – Rip Strips Die-namics
Waffle Flower – Christmas Stripes Paper Pad
Making the Lip Balm Holder
If you saw my recent post where I made the cash holders for Christmas and Chanukah, the process for making this was very similar. Instead of cash, I used chapstick (which is what the original intention was for MFT’s lip balm pouches). I started by die cutting a piece of patterned paper using the Candy Pops die. I used the lip balm window die to cut the opening for my pouch, and then I attached the pouch using Scor-tape. I used the Candy Pops die to cut a piece of white card stock. I lined up the two pieces so that I could position my Rip Strips die onto the white piece. This die creates easy access to the chapstick. I then attached the front and back pieces together with Scor-tape. I added some white glitter card stock details, as well as some string. I finished by adding a cute sentiment.
I love how these turned out, but more importantly, I had fun making them! I hope they put a smile on your face. Thank you so much for stopping by today. Stay warm!
Wishing you all a crafty day,
Allison
Note: External links on my blog may contain affiliate links. This gives me the opportunity to earn a small commission when you click on the links and place an order. This comes at no additional cost to you. Thank you so much for your support, as this helps me bring you more content.