Hello, Friends! I am sharing another new Spellbinders collection that was released today called Holiday Cheer Enclosed. If you like dogs and cats (and who doesn’t), you’ll adore this collection as much as I do. There are so many fun ways to use these cute animals – just use your imagination! I mentioned in my previous post that I really enjoyed using a fixed color palette for a set of cards, and that’s what I did here, too. I chose red, Kraft, brown, turquoise, and teal.
Card 1 Supplies
Spellbinders – Special Pet Delivery Die Set
Spellbinders – Surprise Box Die Set
Spellbinders – Parcel & Post Christmas Decorations Die Set
Spellbinders – Mini Christmas Sentiment Strips Glimmer Hot Foil & Die Set
Spellbinders – Radiant Burst Embossing Folder
Spellbinders – Hot Foil – Teal
Spellbinders – Glimmer Hot Foil System
Making the First Card
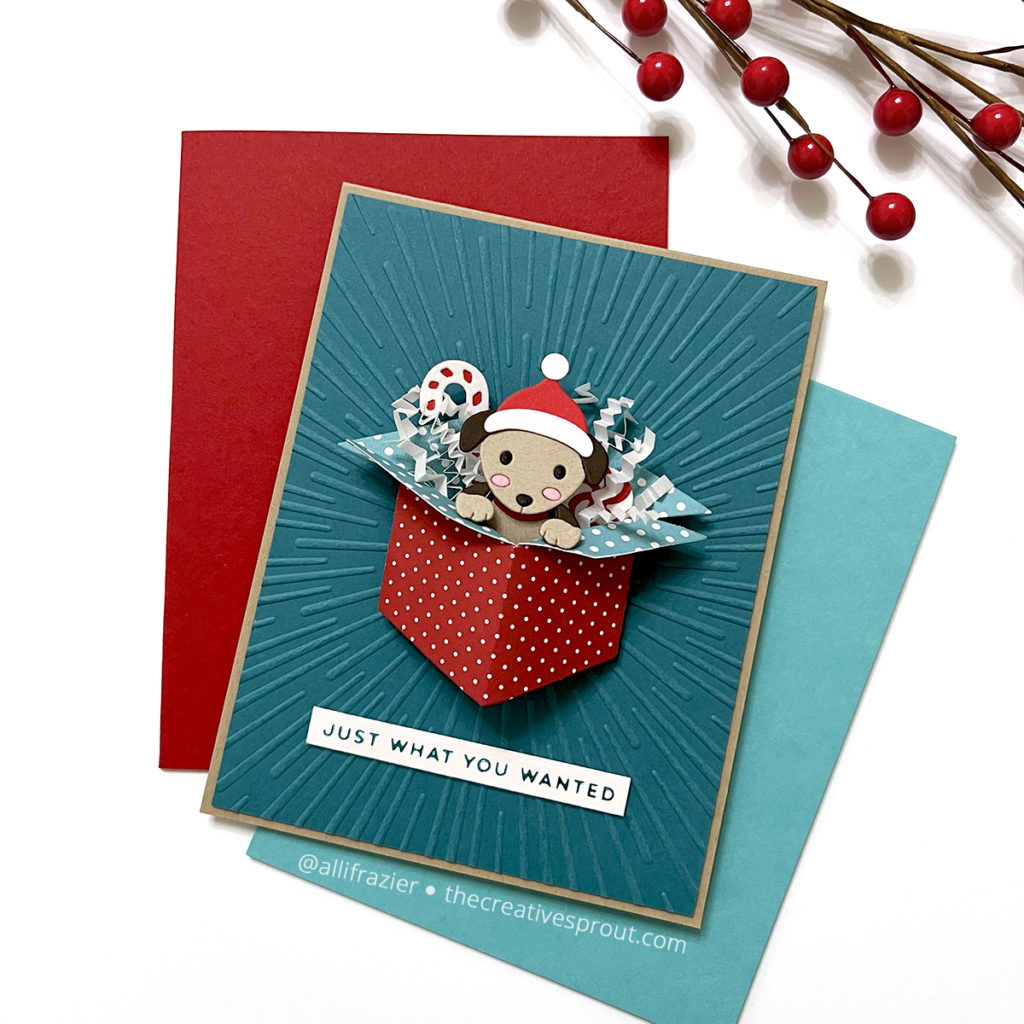
These animals are so perfect for pairing with the Surprise Box Die Set that was released several months ago. In fact, there is a brand new holiday themed stamp set that coordinates with the Surprise Box die. I don’t have this set yet, but it’s super cute. Just like with the original stamp set, you can stamp words on the sides of the box. I used patterned paper for the inside and outside of my box. I assembled the pieces of the puppy but didn’t glue them together until I figured out how I wanted him to fit inside the box. The bottom of his head is not adhered to the body, as I have him kind of leaning forward inside of the box. Instead, I have the top of his head taped to the body along the back. This allows him to hinge forward. I stuffed the box with some white crinkle paper shreds from my gift wrap stash and added a candy cane and a piece of candy from the Parcel & Post Christmas Decorations Die Set.
I embossed a piece of teal card stock with the Radiant Burst Embossing Folder and then adhered that to a Kraft A2 card base. (NOTE: This embossing folder was subsequently removed from the website – I guess it’s not available anymore.) I hot foiled my sentiment with teal foil. I glued the box to the card panel, only putting glue in a vertical stripe along the back, so that it would keep some dimension. Who wouldn’t want to open up a box and find this cutie waiting for a big hug?
Card 2 Supplies
Spellbinders – Special Pet Delivery Die Set
Spellbinders – Holiday Express Die Set
Spellbinders – Christmas Magic Glimmer Hot Foil Plate
Spellbinders – Mini Christmas Sentiment Strips Glimmer Hot Foil & Die Set
Spellbinders – Blizzard Stencil
Spellbinders – Glimmer Hot Foil System
Making the Second Card
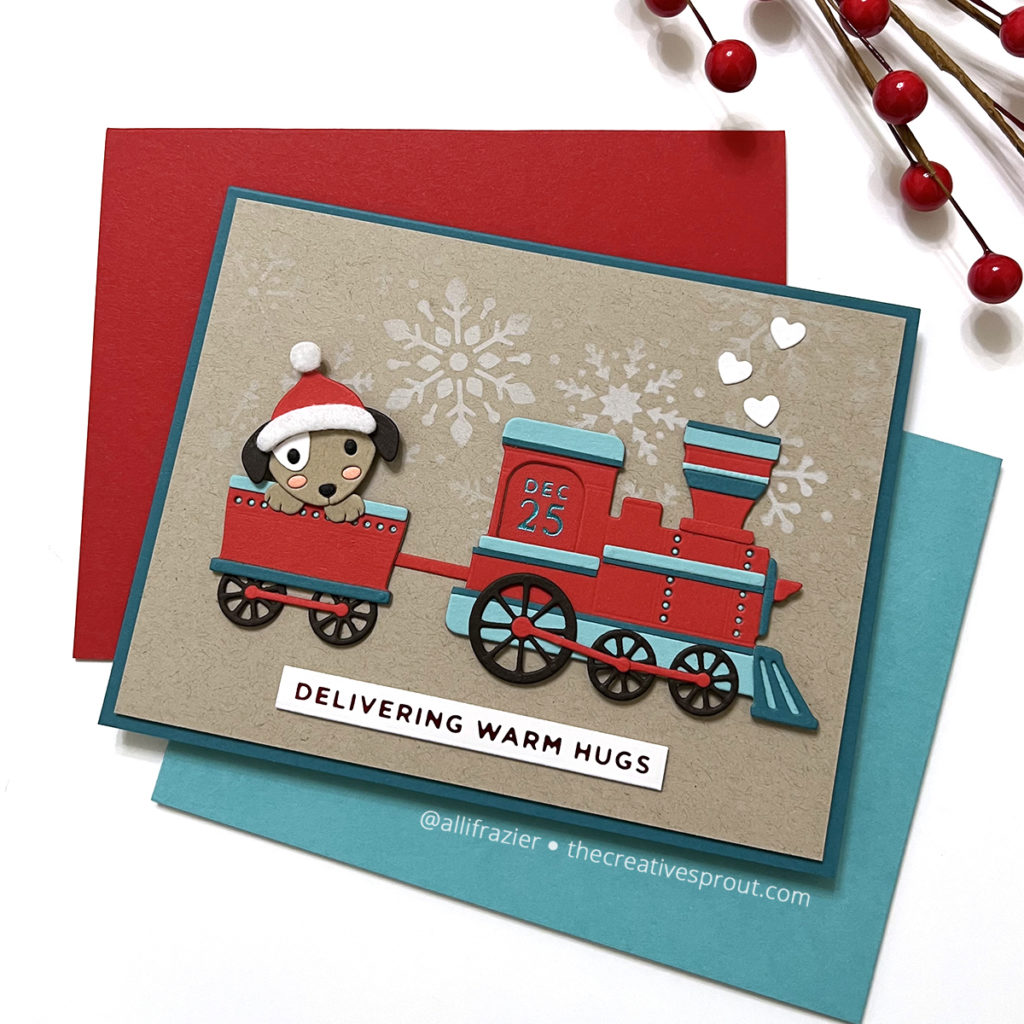
When I first saw this Pet Delivery set, I immediately thought of the Holiday Express set. I envisioned a cat driving the train with a couple dogs peeking out of the train car. But, it turns out that the pets are a bit too big to do that. Still, I wasn’t going to give up that easily!
I first assembled the train and the train car. The “Dec 25” sentiment in the window was hot foiled with teal foil. I then cut the pieces for the dog’s head and paws. I cut the white pieces of the hat from white felt. I glued the paws directly to the front of the train car. Then it was time to prepare my card base. I cut a piece of Kraft card stock to 4″x5.25″ and then I blended some white pigment ink through the Blizzard Stencil along the top of the panel. I blended heavier towards the middle and then lighter towards the outside so that it just faded out. I glued that panel to a teal A2 card base. I adhered the train and train car to the center of the panel and then popped the dog’s head up on foam tape to have him peeking out of the train car. I hot foiled the sentiment with red foil. Finally, I added a few white hearts to make it look like steam coming out of the chimney stack. These hearts were cut from a die from the Nordic Ornaments set.
Card 3 Supplies
Spellbinders – Special Pet Delivery
Spellbinders – It’s Not a Puppy word dies
Spellbinders – Create a Decorative Tag Die Set
Spellbinders – Mini Bow Die Set
Spellbinders – Diamond Plaid Embossing Folder
Making the Third Card
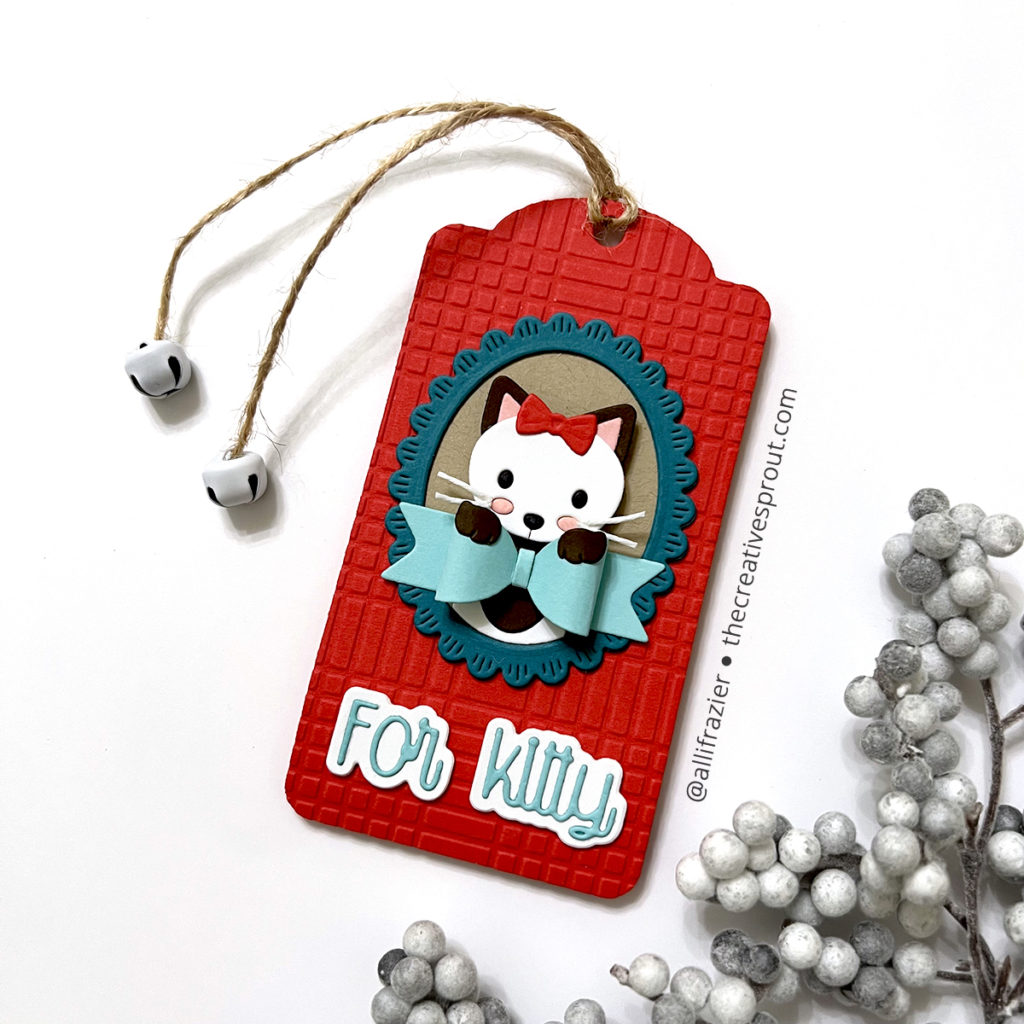
It’s not a card – it’s a tag! I created the cat very similar to what you’ll find on the packaging. But instead of holding a little banner, I have the cat holding onto a bow that I made with the Mini Bow die set. I also added a few whiskers that I made out of some thick white string.
I cut a piece of red card stock with the tag die and then embossed it with the Diamond Plaid embossing folder. It doesn’t look like the diamond plaid because I positioned the tag in the folder so that the lines would be up and down instead of diagonal.
I hope these cards (and tag) put a smile on your face today! Be sure to check out all the new collections from Spellbinders. And thank you so much for visiting today – I always appreciate you stopping by.
Wishing you all a crafty day,
Allison
Note: External links on my blog may contain affiliate links. This gives me the opportunity to earn a small commission when you click on the links and place an order. This comes at no additional cost to you. Thank you so much for your support, as this helps me bring you more content.