Hello, Friends! I am sharing a really exciting release from Spellbinders today called Layered Diamond. It consists of a fabulous stitching die set and a complementary stamp set. These two products are ONLY available on the Spellbinders website, and I believe that quantities may be limited.
Card 1 Supplies
Spellbinders – Layered Stitched Diamonds Die Set
Spellbinders – Christmas Mailbox Greetings Glimmer Hot Foil Plate
Spellbinders – Fashion Gold Embellishments
Spellbinders – Hot Foil – Aura
Spellbinders – Glimmer Hot Foil System
Making the First Card
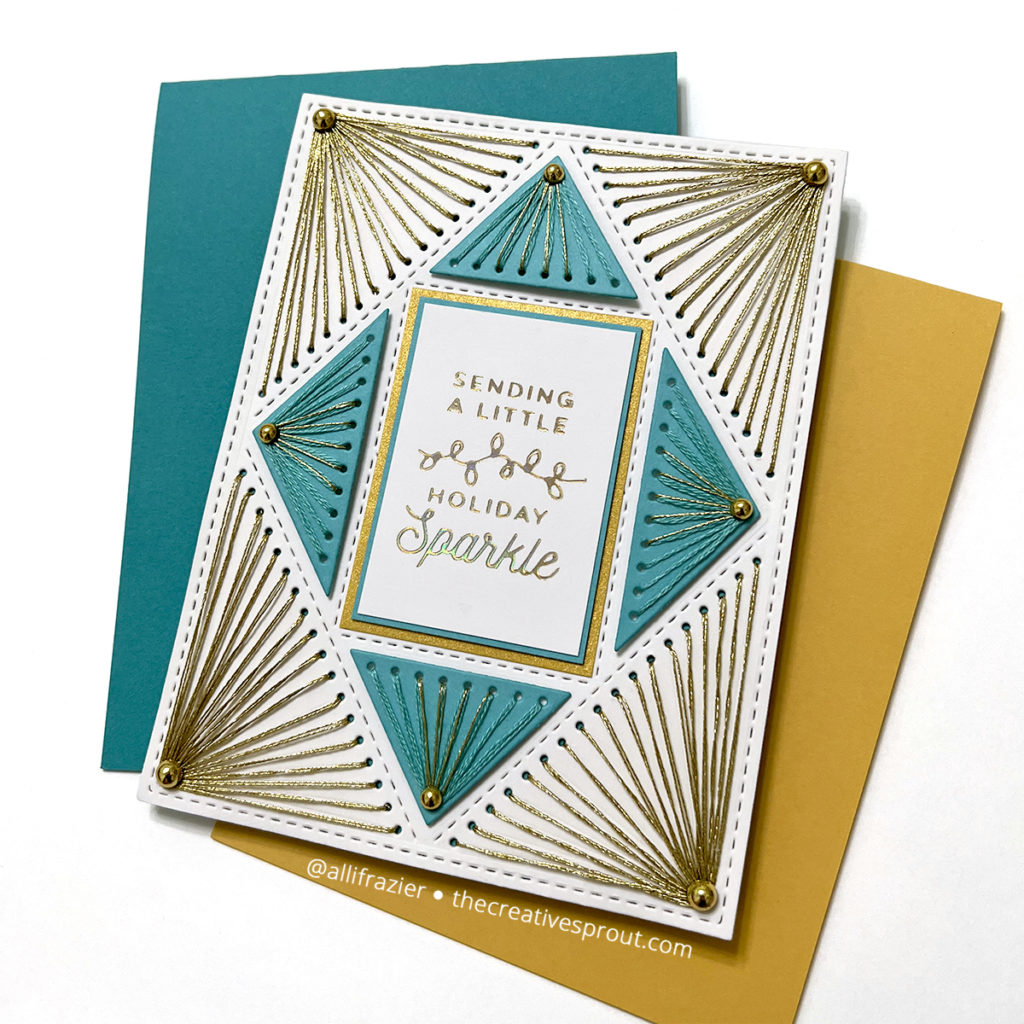
I mentioned that this new die set is fabulous, right? And that is due to its versatility. Normally I look at large stitching dies and think they’re versatile because you can use them either with or without stitching. But this set comes with not only the main stitching panel, but also six small die pieces that you can use to change things up. And when I say change things up, wait until you see my third card! But first, we’re going to stitch the main panel in the somewhat intended way. You know me – I had to be a little different.
I used gold metallic thread to stitch the four corners of my panel, which I had cut from white card stock. I then cut the four small pieces that you see from turquoise card stock, and I stitched those with turquoise embroidery floss. I came back in with some gold thread, as well. I glued those pieces over the corresponding areas of the main panel. I could have just stitched these same shapes on the main panel, but I wanted the added dimension and color. That’s one of the really fun things about this set.
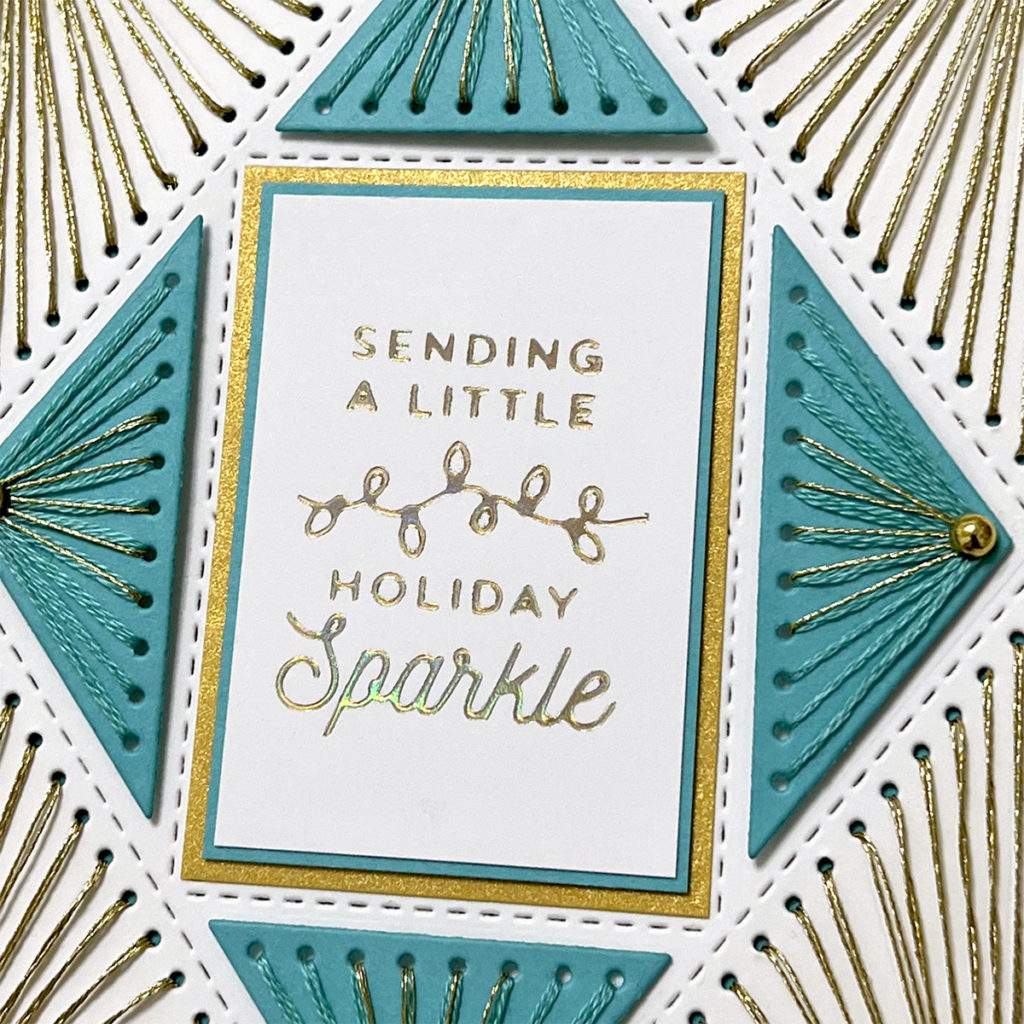
The area in the middle where I attached my sentiment is also an area with more stitching opportunity, but this is where I chose to make my card different. I foiled the sentiment onto white card stock with Aura foil. I knew I wanted my sentiment to be layered, so I kind of worked backwards in figuring out what size to make my layers. I wanted the gold layer to sit just inside of the stitched rectangle detail of the panel, so that’s where I started with my measurements. To finish the card, I added some gold embellishments to the corners of all the stitched details.
Card 2 Supplies
Spellbinders – Layered Stitched Diamonds Die Set
Spellbinders – Layered Diamond Sentiments Stamp Set
Spellbinders – Stitched Diamond Argyle Die
Spellbinders – Essential Diamonds Die Set
Tim Holtz – Distress Oxide Ink
Making the Second Card
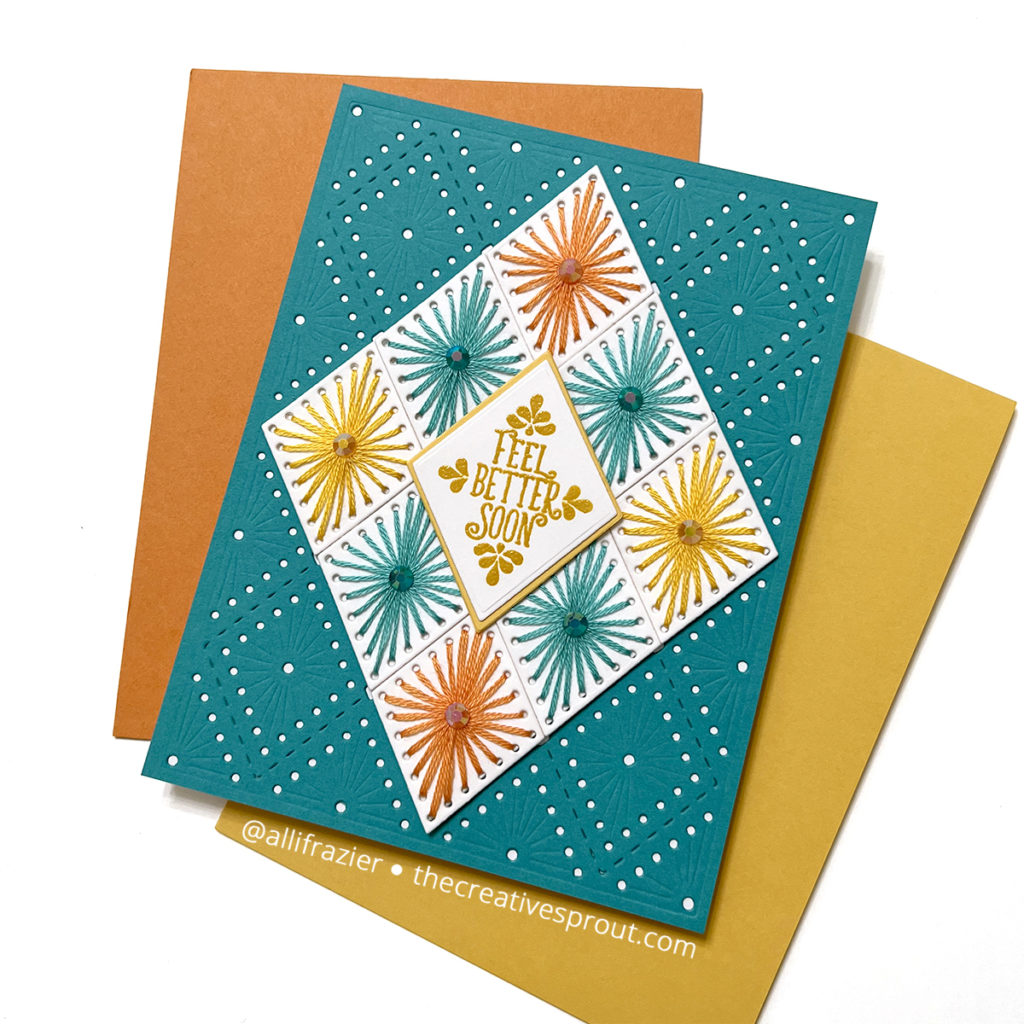
This card is a prime example of this new die set‘s versatility. It works with so many other existing products! In fact, the small diamond dies that are in the new set are a perfect match for the pattern in the previously released Stitched Diamond Argyle Die. And, all of those little dies are layered on top of a large diamond that I cut from the Essential Diamonds die set! I love how thoughtful Spellbinders is in terms of releasing products that work with previously released products.
I started this card by cutting a panel of teal card stock with the Stitched Diamond Argyle Die and adhering that to a white A2 card base. I then cut 8 small stitching diamonds from white card stock using the die from the Layered Stitched Diamonds set. I stitched those diamonds with turquoise, yellow and orange embroidery floss. I used three strands when stitching these. When I was done stitching, I adhered them to a large white diamond that I had cut with the Essential Diamonds set.
I stamped my sentiment with Mustard Seed Distress Oxide Ink and then heat embossed with clear embossing powder. One of the dies from the Layered Stitched Diamonds set is a solid diamond that you can use to cut out the sentiments from this stamp set. I also used a slightly larger diamond die from the Essential Diamonds set to make the yellow diamond that I mounted behind my sentiment. I fit this large diamond design right onto my main panel. See how it fits perfectly within the design of that background?! I finished the card by adding a corresponding colored jewel to the center of my stitched diamonds.
Card 3 Supplies
Spellbinders – Layered Stitched Diamonds Die Set
Spellbinders – Radiant Burst Embossing Folder – discontinued?
Spellbinders – Fall Greetings Stamp Set
Tim Holtz – Distress Oxide Ink
Spellbinders – Clear Embossing Powder
Making the Third Card
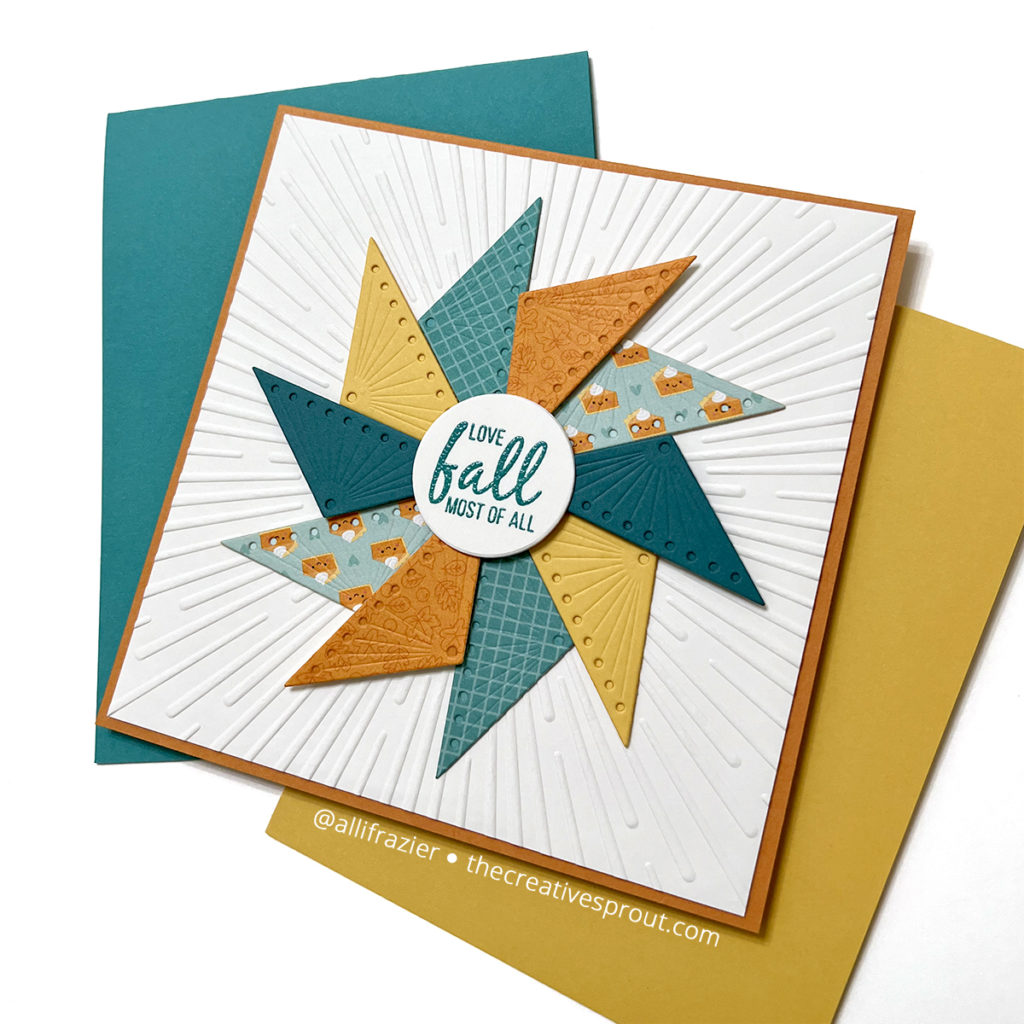
Okay, so here we go! This card was so fun, and like I said before, it shows how totally versatile this Stitched Diamonds set really is.
I used just one of the little shapes from the set to cut pieces from different colors and patterns of card stock. Although this is just one shape, the die set actually has two of these particular dies. So, it doesn’t take as long to die cut!
As you can see, I did not stitch these little dies. I wanted to create somewhat of a quilting pattern look, and it was fun playing around with the pieces until I had what I wanted. I mounted the pieces onto a white panel that I had embossed with the Radiant Burst Embossing Folder. So, I just now discovered that this embossing folder is no longer on the website. Boo! This was an embossing folder of the month from several months ago and it had been available for some time afterwards – even up until a few weeks ago. Hmmm. Anyway, there are so many other fabulous embossing folders on the website, so I’ll just get over it.
I stamped my sentiment with Peacock Feathers Distress Oxide Ink, clear heat embossed it, and then cut it out with a circle die. I thought this design would look good on a square card, so I mounted the panel onto a square orange card base.
I hope these cards put a smile on your face today! Be sure to check out the new collection from Spellbinders. Remember, it’s only available on the website. The website says that quantities are limited, so…hurry? Thank you so much for visiting today – I appreciate you all so much.
Wishing you all a crafty day,
Allison
Note: External links on my blog may contain affiliate links. This gives me the opportunity to earn a small commission when you click on the links and place an order. This comes at no additional cost to you. Thank you so much for your support, as this helps me bring you more content.