Hello, everyone! I hope you all had a wonderful weekend. I wiped myself out pulling weeds on Saturday, so I spent a good chunk of time after that in my craft room – hot foiling! I used some new hot foil plates that are part of the Stitched Alphabet Collection from Spellbinders and my favorite rainbow hot foil.
Card 1 Supplies
Spellbinders – Stitched Alphabet Glimmer Descriptors Hot Foil Plates
Spellbinders – Diamond Plaid Embossing Folder
Honey Bee Stamps – Rainbow Gems
Spellbinders – Glimmer Hot Foil System
Spellbinders – Rainbow Hot Foil
Spellbinders – Solid Hot Foil Plate
Making the Card
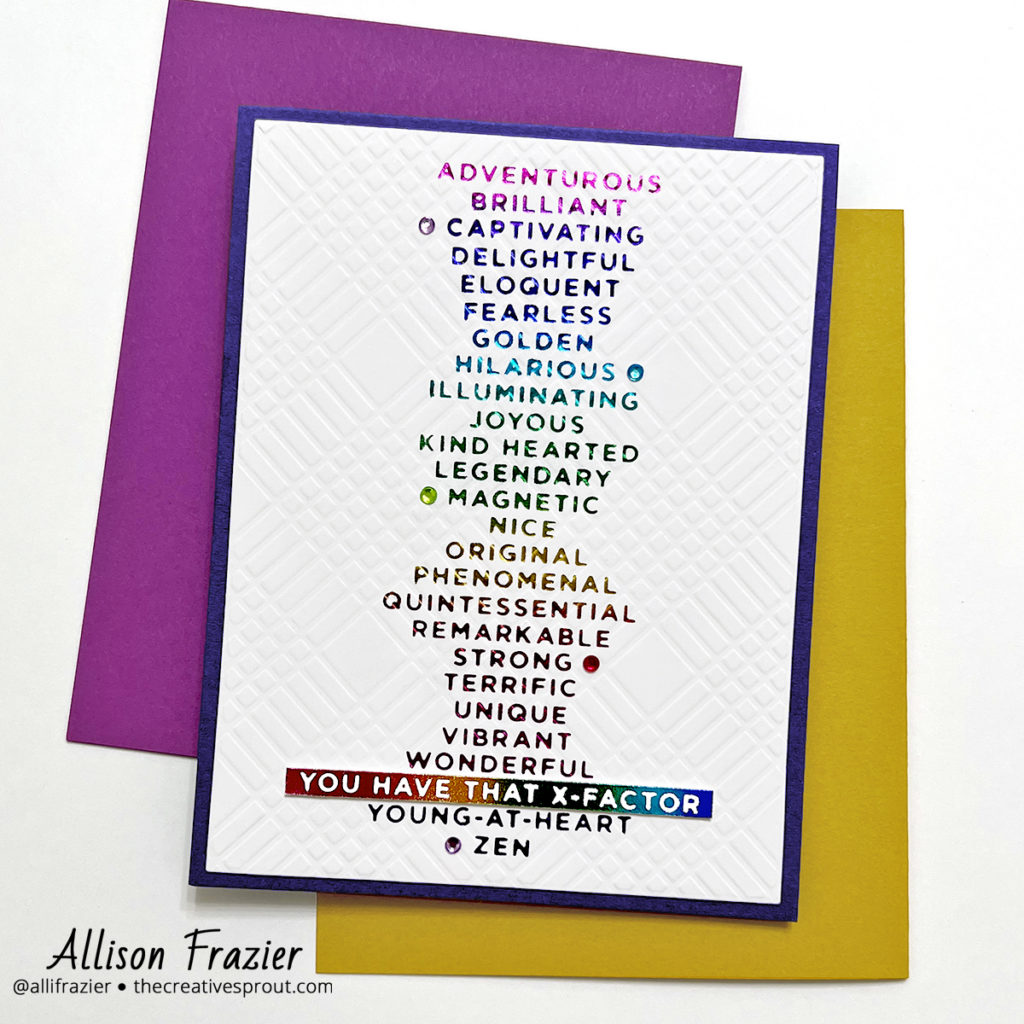
I started with a panel of white card stock measuring 4″x5.25″ – this is my go-to size when I want to mount a panel onto a card base and have a nice margin around it. I then took all of the hot foil plates from the Stitched Alphabet Descriptors set and lined them up upside-down (and alphabetically) on my glass mat. I made sure they were all centered and squeezed together with no space in between each word. I then put a long piece of washi tape on top of the plates to connect them all. This way, I could tape them all to my card stock and lay the rainbow foil in between without the words shifting. I then proceeded to hot foil it with my Glimmer machine and Platinum 6. I was so pleased with the results, as each word is almost a different color thanks to that amazing foil!

After all that work lining everything up and praying to the hot foil gods and actually ending up with what I had envisioned, would I dare risk it by running it through an embossing folder? You betcha! I “think” I like how it turned out, although it may have looked just as good without being embossed. But, I really just wanted to experiment and see if you could actually run a hot foiled image through an embossing folder. And, it did work! By the way, I did run it through the embossing folder on the “debossed” side.
As part of my second card (see below), I separately hot foiled the “x factor” sentiment with the rainbow foil. The cool thing is that once you hot foil it, you’re left with the negative piece of foil. If you have a solid hot foil plate in your stash, then you can foil that negative onto a piece of card stock. That is where this popped-up “x factor” sentiment comes from for my first card.
Card 2 Supplies
Spellbinders – Stitched Alphabet Glimmer Descriptors Hot Foil Plates
Spellbinders – Faux Stitch Embossing Folder
Spellbinders – Rainbow Hot Foil
Simon Says Stamp – Holographic Card Stock
Spellbinders – Glimmer Hot Foil System
Making the Card
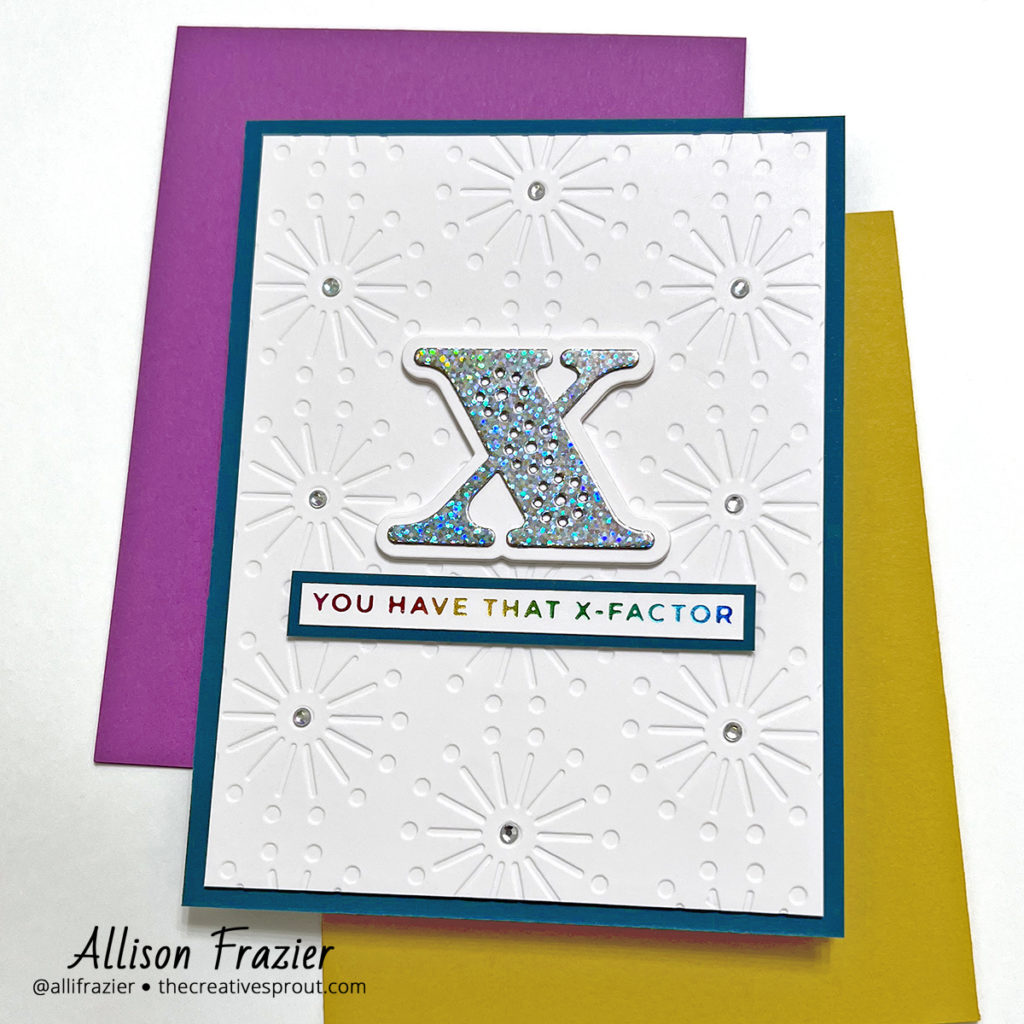
I started with a panel of white card stock and ran that through the new Faux Stitch embossing folder (on the debossed side). This folder is the brand new Embossing Folder of the Month for May. It should be available to purchase separately next month, or you can join the club now to get it. One thing I love about the club is that you get free shipping without having to meet a minimum purchase. And, you can cancel at any time! All of the monthly clubs from Spellbinders are really fun.
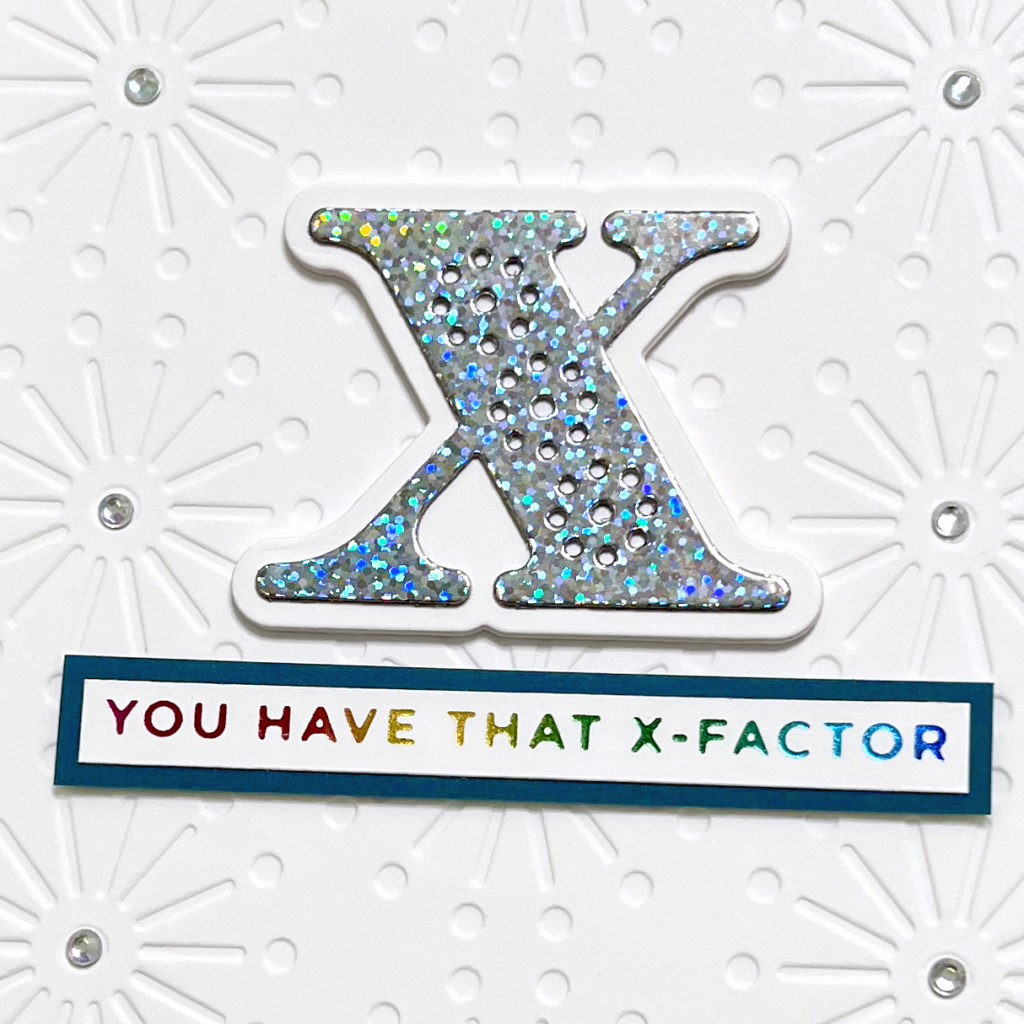
I die cut the “X” out of holographic card stock and mounted it onto the shadow, which I had die cut from several layers of white card stock. I love how the holographic card stock changes color in the light. Like I mentioned above, I hot foiled the “x factor” sentiment with the rainbow foil.
As you can see, this was a pretty clean and simple card to put together. I trimmed the sentiment down and mounted it onto the same color card stock as my card base to give it a border. I finished the card with some clear gems in the middle of the burst shapes on my panel.
These cards were a lot of fun to make, and I love how they turned out. I hope they put a smile on your face! Thanks so much for joining me today.
Wishing you all a crafty day,
Allison
Note: External links on my blog may contain affiliate links. This gives me the opportunity to earn a small commission when you click on the links and place an order. This comes at no additional cost to you. Thank you so much for your support, as this helps me bring you more content. https://shrsl.com/3irec