Hello, crafty friends! I am back today sharing some more inspiration from the Simon Says Stamp release called Holiday Sparkle. I took the sparkle to heart when I made these cards!
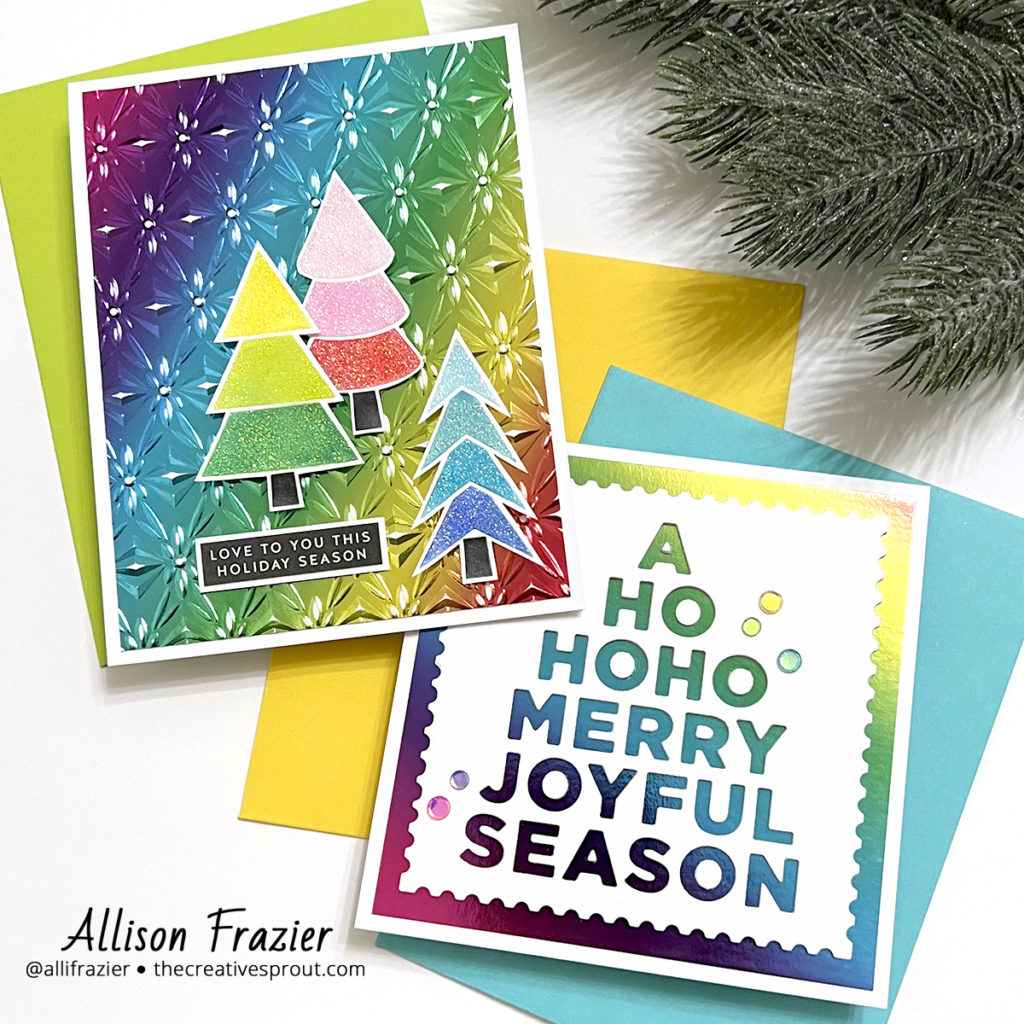
I have used holographic card stock before, as well as holographic foil, rainbow foil – you name it. But this is the first time that I have used Holographic Rainbow card stock, and I am in love!
Card 1 Supplies
Simon Says Stamp – Tree Lot Stencil
Simon Says Stamp – Holographic Rainbow Card Stock
Simon Says Stamp – Sparkling Facets Embossing Folder
Simon Says Stamp – Love Peace Joy Reverse Sentiment Strips
Tim Holtz – Distress Mini Ink Pads
Tonic Studios – Nuvo Glimmer Paste
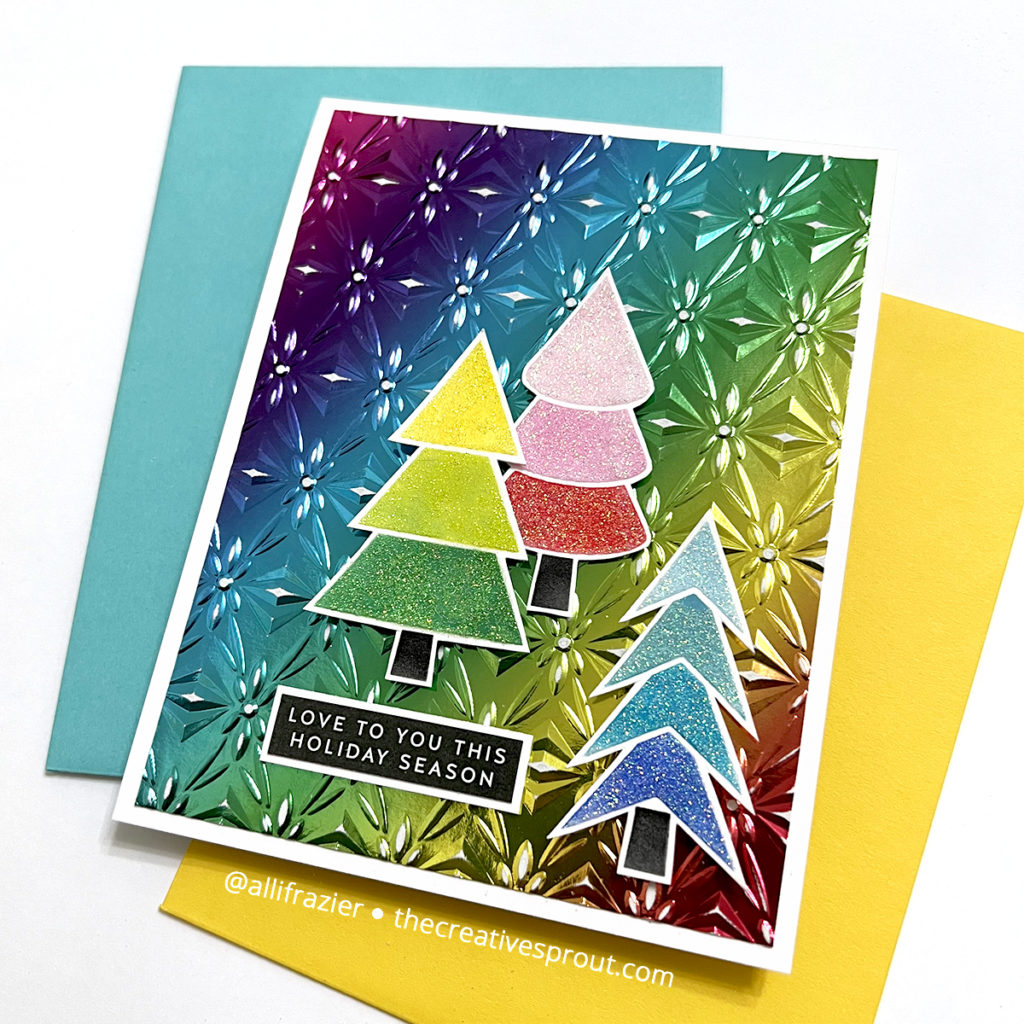
Making the First Card
I started by inking up my trees on some white card stock. To get the different colors of ink on the tree sections, I just used washi tape to mask off the nearest section so that the colors wouldn’t mix. I used various colors of Distress Ink and my small blending brushes. Using my Stencil Pal, I then spread Nuvo Glimmer Paste through the stencil to make the trees sparkly. The Moonstone paste is my favorite because it is clear and lets the color underneath shine through. Once the paste was dry, I fussy cut the trees.
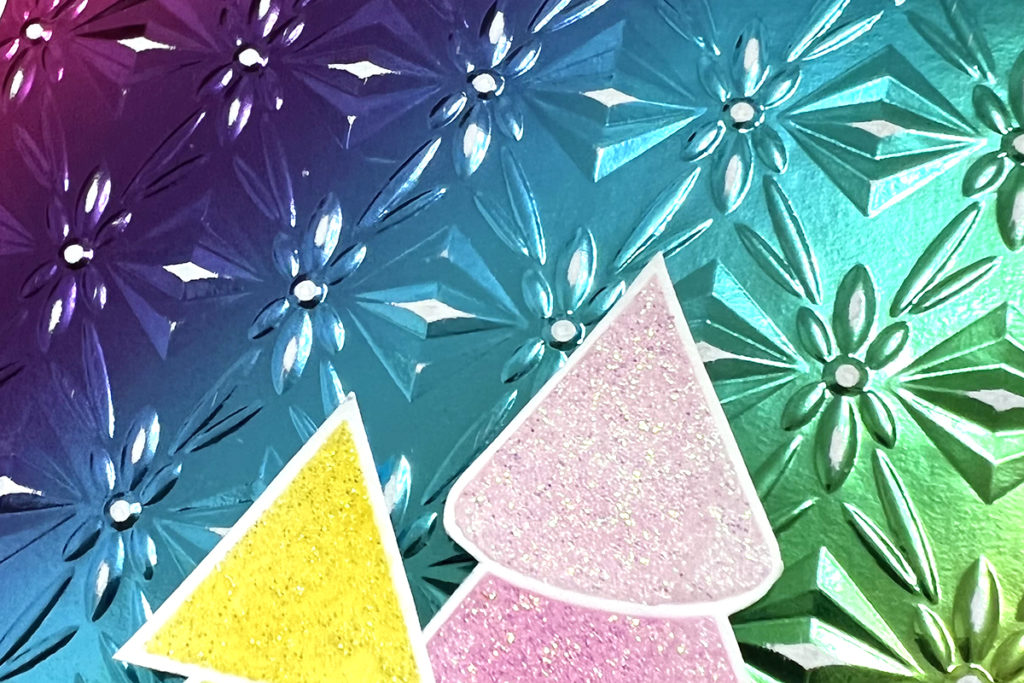
Time for that sparkly background! I took a panel of the Holographic Rainbow card stock and embossed it with the Sparkling Facets Embossing Folder. If you’ve never embossed metallic paper, you really should give it a try! Because it has a white core (the back of the paper is white), you can sand some of the raised areas off in order to expose that white core. I did that using one of my sanding blocks. When you sand it down, it really helps bring out the design and tone down some of the shininess. To finish the card, I just popped the trees and sentiment up on foam tape. I did mount my sentiment on a piece of white card stock in order to give it a border to match the border around the trees.

Card 2 Supplies
Simon Says Stamp – Holographic Rainbow Card Stock
Simon Says Stamp – Postage Stamp Edge Frames Die Set
Studio Katia – Crystal Rainbow Confetti
Making the Second Card
This card was easy to make! I first trimmed my Holographic Rainbow card stock down to a 4.25″ square. I then trimmed a white piece of card stock to 3.75″ square and die cut it with the Holiday Stack die. There is a “trunk” on this die, which I eliminated by making sure that the top plate of my die cutting “sandwich” covered the entire die EXCEPT for the trunk. Whatever the top plate is covering will cut – whatever it is not covering will not cut.
Once I had my square element, I decided I wanted a decorative border. I don’t have a lot of square dies, but I do have a lot of rectangular dies. It’s easy to change the shape of your rectangular dies by doing some partial die cutting. Partial die cutting uses the same methodology that I just explained: whatever the top plate is covering will cut – whatever it is not covering will not cut. So, I took my rectangular postage stamp die and die cut the square panel that I had already created – I just made sure that the top plate only covered half of the die. Then I moved the die so that I could cut the other half of my square. This kind of partial die cutting works with dies like this because you can snap the die into position using the postage edge that it creates. It also works great with just a plain, straight rectangular die.
Once I had my square element complete, I then die cut the Holiday Stack two more times out of white card stock. I didn’t bother with the postage edge for these – I just made sure that I cut the edges back far enough that they wouldn’t show when I stacked these behind the original one. By stacking three, it gives the element some really great dimension when placed over the rainbow background. You could put foam tape behind the main panel, but because of all the little details end edges that the letters create, layered card stock gives it more stability. To finish the card, I added some shiny rainbow confetti.
That’s it for my cards today. I love, love, love how they turned out! I hope they put a smile on your face, too. Thank you so much for visiting my blog today and be sure to check out all of the other fun new products in the Holiday Sparkle Release!
Wishing you all a crafty day,
Allison
Note: External links on my blog may contain affiliate links. This gives me the opportunity to earn a small commission when you click on the links and place an order. This comes at no additional cost to you. Thank you so much for your support, as this helps me bring you more content.