Hello, friends! Yesterday was a productive day in my craft room. Things are still pretty inefficiently organized considering my ankle fracture, but I basically bounce around between my knee scooter and two rolling chairs. I created a few cards using the fun, new Striped Stocking die from The Stamp Market.

Supplies
The Stamp Market – Striped Stocking Die
The Stamp Market – Holly & Berry Die Set
Pinkfresh Studio – Slim Stitches Die
Sunny Studio – Quilted Hearts Embossing Folder
Spellbinders – Faux Stitch Embossing Folder
Process
The basic stocking is easy to assemble. I used the die to cut one red and several turquoise shades of card stock. Once you cut one color, you have stripes to fill in on another stocking. In order to have a “back” to the stocking, which is useful when you want to glue in different colored stripes, there are two ways that I did it. First, I just traced one of the stockings onto another piece of card stock and fussy cut it out. Second, I found that sometimes the stripes would stay intact when you removed the stocking from the die cutting machine. When that happened, I would just turn it over and use regular tape to keep all the stripes in place.
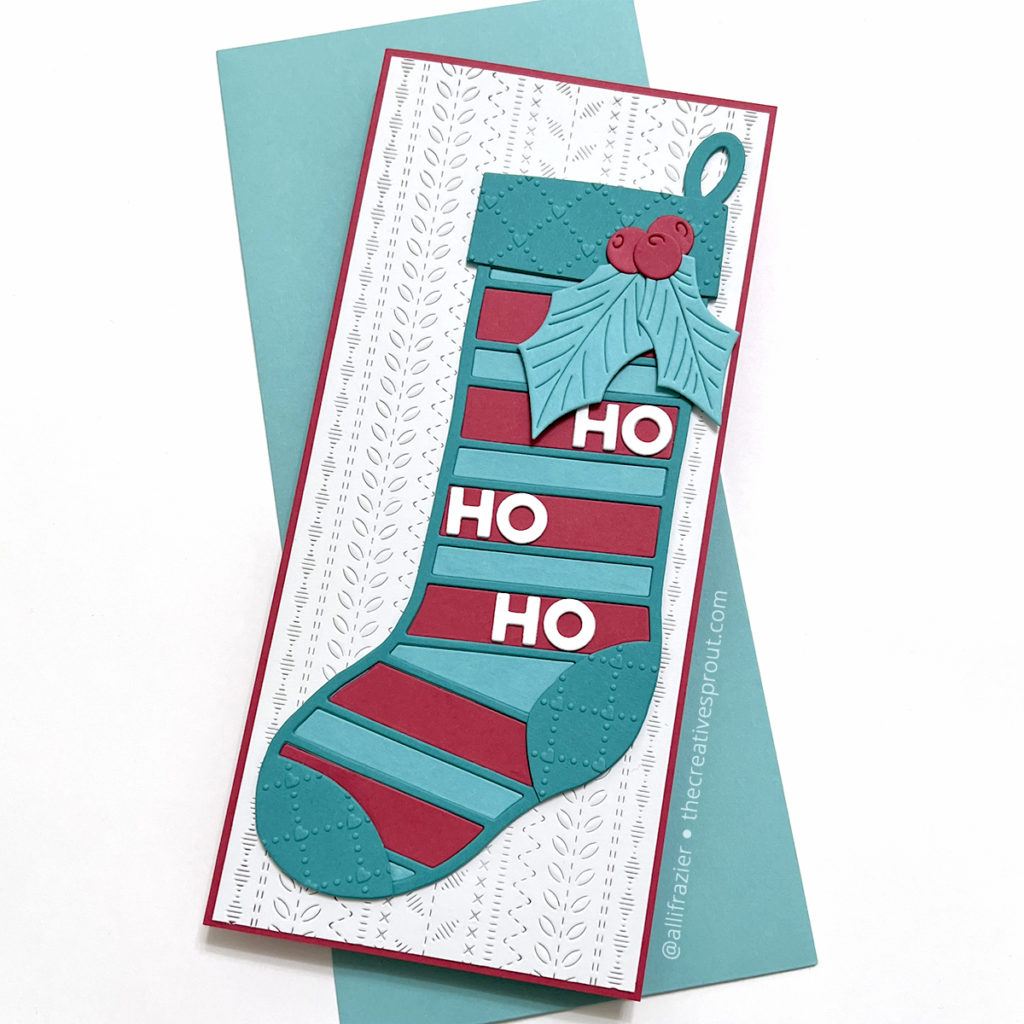
One little extra thing that I did was to create little pieces for the toe and heal. I would simply use the die to cut a partial stocking, and then I would cut those pieces out. For the Ho Ho Ho card, I also embossed those pieces with the Quilted Hearts Embossing Folder.
For the shaker card, I cut the stocking from four pieces of heavy white card stock and stacked those together with liquid glue. I fussy cut a piece of acetate to put on top. This created separate wells for me to pour my sequins into. Once I was done filling the wells, I just adhered a “back” to it to enclose the sequins, and then a red stocking cutout on top.
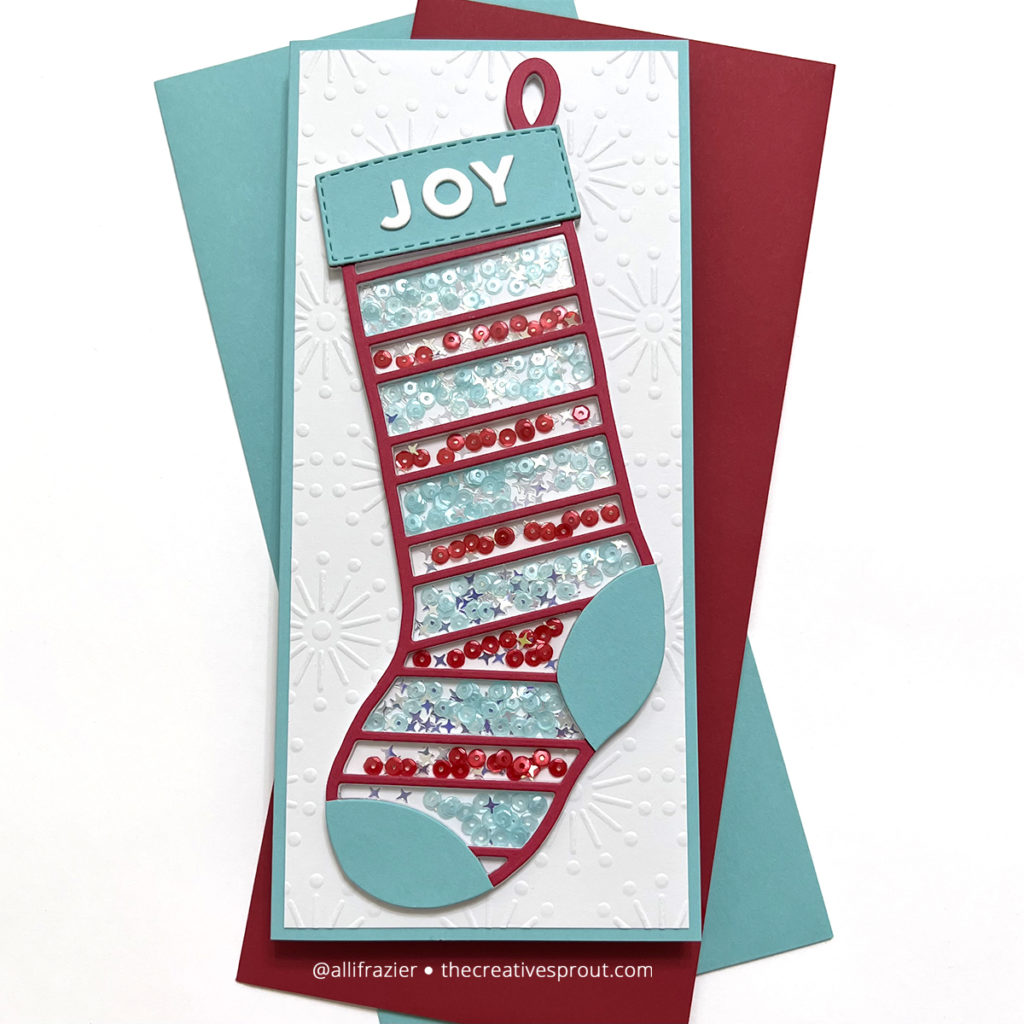
I am working on another project right now that resulted in all of these letters/words that turned out to be the perfect size to create sentiments for these stockings. These come from the Holiday Stack die from CZ Design. Bonus is that these little letters didn’t go to waste! The finishing touch for the two cards was giving the background some texture. I used the Faux Stitch Embossing Folder and the Slim Stitches Die for that. For the little stocking in the middle, I just added the word “Merry” and tied some little bells to it – I think this will make the cutest tag to attach to a gift!
That’s it for my cards today. I really love how they turned out, and I hope they put a smile on your face! Leave a comment and let me know which one is your favorite. Thank you so much for visiting me today – I appreciate you all!
Wishing you all a crafty day,
Allison
Note: External links on my blog may contain affiliate links. This gives me the opportunity to earn a small commission when you click on the links and place an order. This comes at no additional cost to you. Thank you so much for your support, as this helps me bring you more content.