Hello, crafty friends! Today, we are leaving the hot foil systems behind and going “old school” with the laminator. That poor neglected machine that only gets pulled out when you want to make some fancy dividers for your craft room organization. Even Therm O Web retired the laminator when they created their Transfer Gel Duo product that doesn’t even require heat! Still, I pulled my laminator out for today’s cards, along with some products from Simon Says Stamp, and I’m glad I did. I forgot how much fun it is to flock all the things!
Aside from the flocking, my card designs are pretty straightforward, so I’ll explain the flocking process and then list the products I used below. Therm O Web sells flock transfer sheets that are pretty versatile little products. You might see people die cutting white flock to use for Santa’s beard. It has kind of a velvety/fuzzy textured look and feel to it. And, when you use it in conjunction with the Transfer Gel Duo, you can flock a stenciled design onto paper the same way that you would with foil. You simply choose your stencil, spread the Transfer Gel Duo through the stencil design onto card stock, and let it dry. Once it’s dry, you put a piece of the flock over the paper and run it through the laminator.
A few important things to note. First, the Transfer Gel Duo is the updated version of the original Gel, which required heat. The Duo product allows you to transfer foil and flock with either heat or pressure. This means that you can use a laminator OR a die cutting machine. I chose to use my laminator today, so I can’t speak to the efficacy of using a die cutting machine with the Duo product and flock. I have, however, used the Duo product with Deco Foil and my die cutting machine, and I found no difference in results between that and using my laminator.
Second, there is a difference in how foil and flock transfer to your stenciled paper. With foil, you lay it over your paper with the shiny (foiled) side facing up. With flock, you do the opposite. You lay the fuzzy side down on the paper. And, with either foil or flock, you want to send it through your machine in a “sleeve” of some sort. Some people use parchment paper. I just use a piece of copy paper folded in half, with my flock and card stock inside.
Last, but not least. Just like with foil, you will end up with a “negative” piece. And I think the negative piece of flock is just as cool as the original (positive?) piece. Plus, it’s ready to go all on its own without having to be sent back through a machine like a negative piece of foil would.

Card 1 Supplies
Simon Says Stamp – Holiday Foliage Stencil
Simon Says Stamp – Etched Berry Branch Die
Simon Says Stamp – Large Joy Die
Therm O Web – Green Envy Flock Transfer Sheets
Therm O Web – Transfer Gel Duo
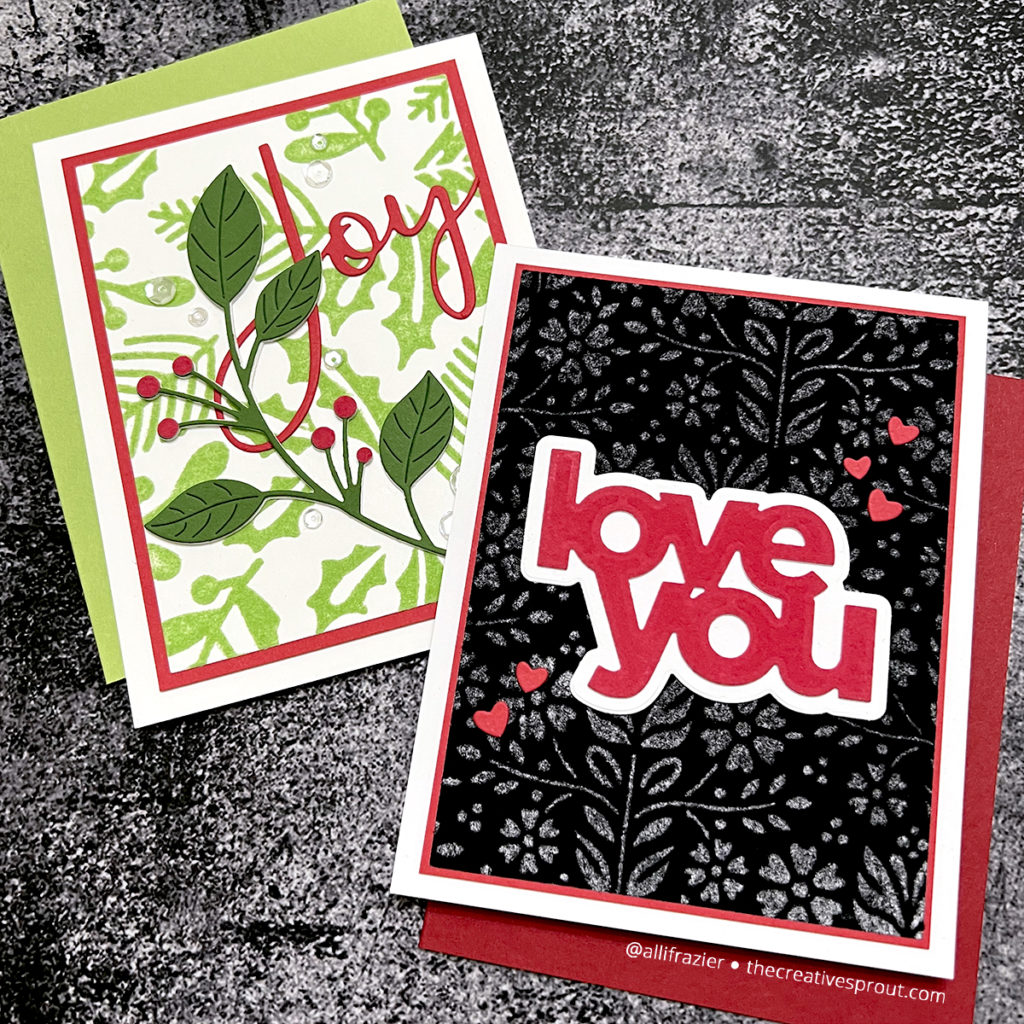
Making the First Card
Like I said before, the card design was pretty easy once the flocking was done. One thing to note about this card has to do with the stencil itself. The design has bunches of circles scattered throughout that are meant to be berries. I had originally intended on using gems or die cut circles of red flock for my berries, so I intentionally covered up these circular holes in the stencil with washi tape before I spread the Gel Duo. Speaking of spreading, I cannot recommend the Stencil Pal enough. It is the greatest tool for getting smooth applications of product such as the gel, texture pastes, embossing pastes, etc. By the way, if you look at the picture above, you’ll see the negative piece of flock underneath my card. That will make a quick card, as well – I just love the 2 for 1 nature of flocking!
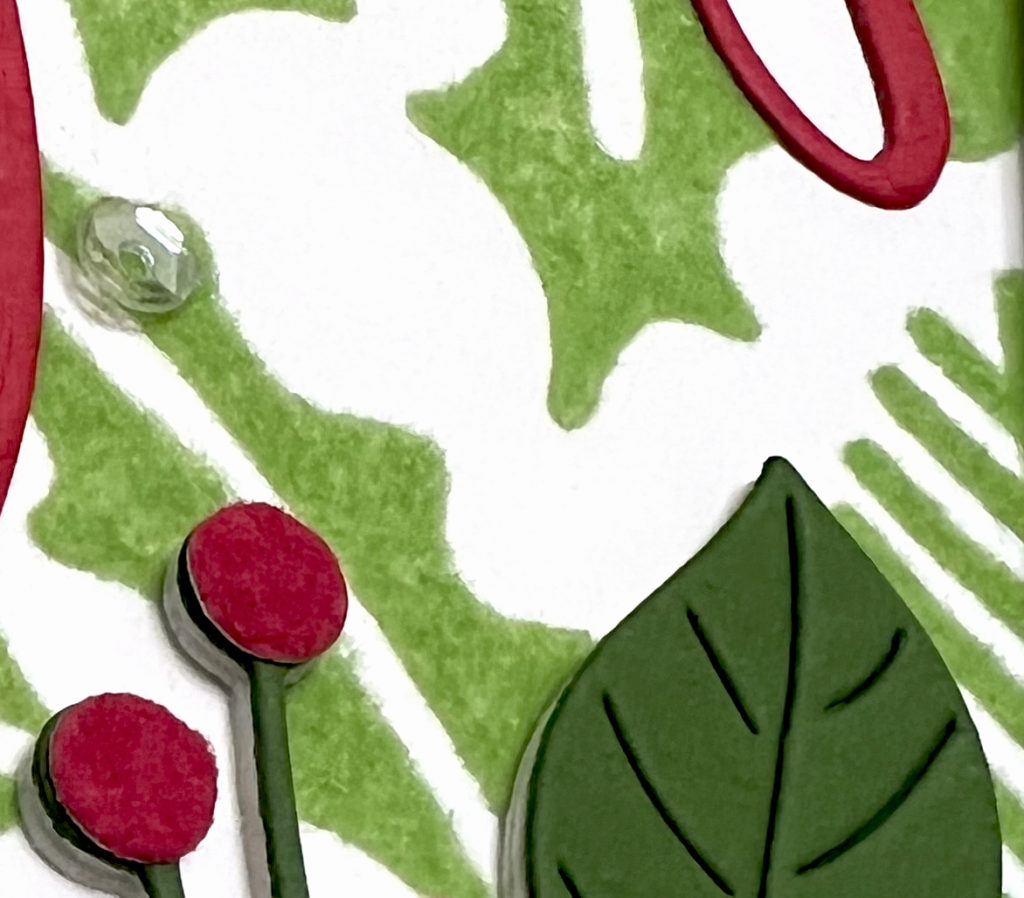
In the picture above, you can see the texture of the flock compared to the regular card stock that I used for my branch. You’ll also see that I used red flock for the berries on my die cut. This is from the scrap that was created from my second card – I just ran the branch die through my die cutting machine using the flock instead of paper.

Card 2 Supplies
Simon Says Stamp – Folk Dance Stencil
Therm O Web – Black Velvet Flock Transfer Sheets
Therm O Web – Ruby Red Flock Transfer Sheets
Therm O Web – Transfer Gel Duo
Making the Second Card
The background on my second card is the negative piece. The negative pieces of flock are not as stark as a negative piece of foil. Flock has a paper backing to it that does not go away, and just a tiny bit of texture stays behind in the “white spaces.” So, the negative pieces of flock are usually more subtle than their counterpart. And I love that. And like I said before, you can just die cut flock, which is what I did with the red flock and my sentiment on this card.
I hope these cards put a smile on your face today! Let me know if you have any questions about flocking or foiling, or you can just share your own experience with these products. Thank you so much for visiting today – I always appreciate you stopping by.
Wishing you all a crafty day,
Allison
Note: External links on my blog may contain affiliate links. This gives me the opportunity to earn a small commission when you click on the links and place an order. This comes at no additional cost to you. Thank you so much for your support, as this helps me bring you more content.