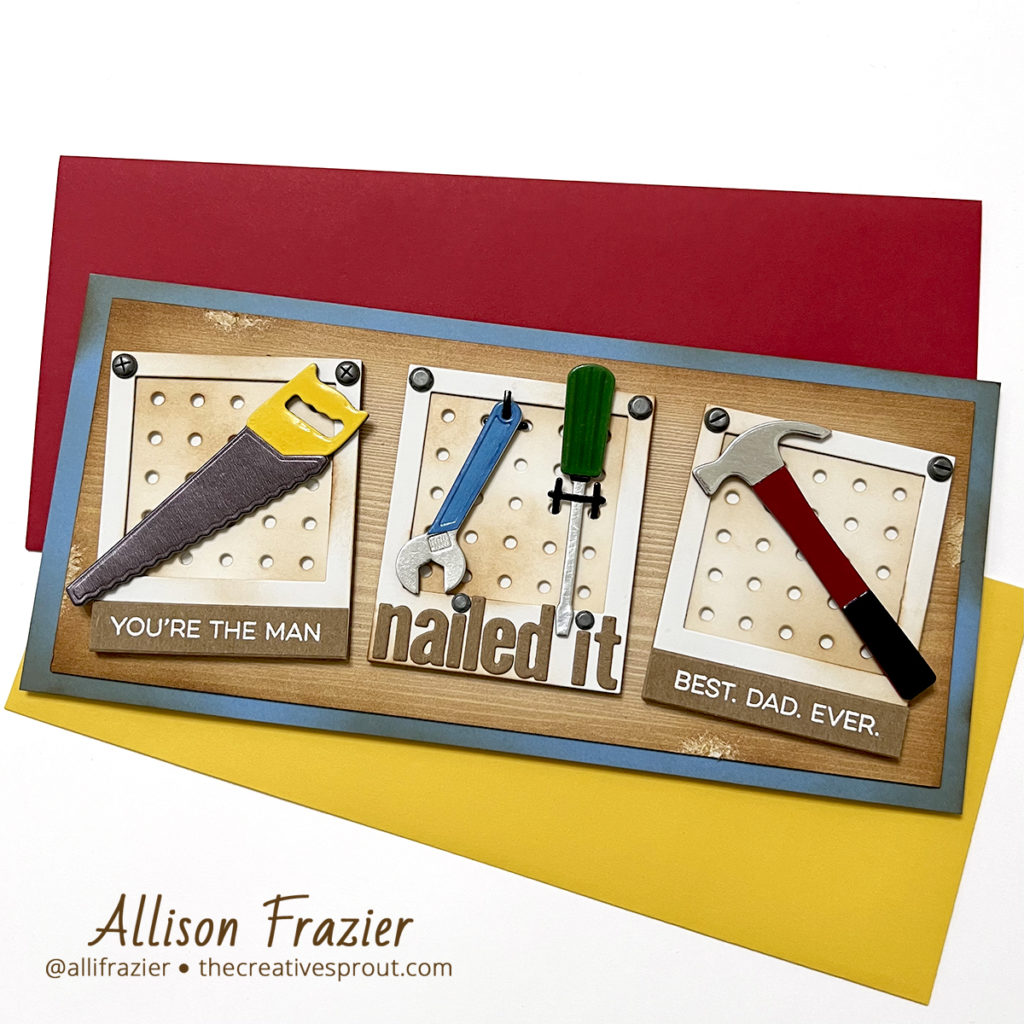
Hello, Friends! It is Father’s Day, and I went big for this card! My husband is extremely handy (lucky me) and not afraid to take on big projects. We have actually designed and built several pieces of furniture together, including some pieces in my craft room. I design, he builds, and then I sand and paint. We even took apart our dryer the other day and fixed the horrendous noise that it was making. Of course, now it’s making another noise, so there may be a new dryer in the future anyway. But, we tried! I should preface this card by saying that, yes, he actually did frame the pegboard in our garage. And he loves the show “Nailed It” on Netflix, so it was fun combining all of these things into one card. My Favorite Things definitely knocked it out of the park with these products.
Supplies
MFT – Pegboard Cover-up Die-namics
MFT – Polaroid Shaker Frame Die-namics
MFT – All About Dad Stamp Set (Retired)
MFT – Little Lowercase Letters Die Set (Retired)
Tim Holtz – Vintage Photo Distress Ink
Tim Holtz – idea-ology Metallic Paper Pad
Tim Holtz – idea-ology Metallic 3 Paper Pad
Memory Box – Black glossy card stock
Making the Card
As is very common with me, I didn’t necessarily plan this card from the beginning. In fact, the idea to frame the pegboard came because I messed up some partial die-cutting and I didn’t want to discard the pegboard that I had made. It’s just a happy accident that my husband framed our pegboard. My pegboard started out with white card stock, and then I blended some Vintage Photo Distress Ink to give it that roughed up look. The Vintage Photo ink was used throughout the entire process for this card. I think this ink is a must-have in any craft room – it is so versatile.
I cut the polaroid frames first out of white card stock, and then several layers of a really thick Kraft card stock that I had in my stash. I cut the pegboard pieces so that the holes would be centered in the frame. These frames are really thick to give it dimension. At the very back of the frame is a plain piece of white paper.
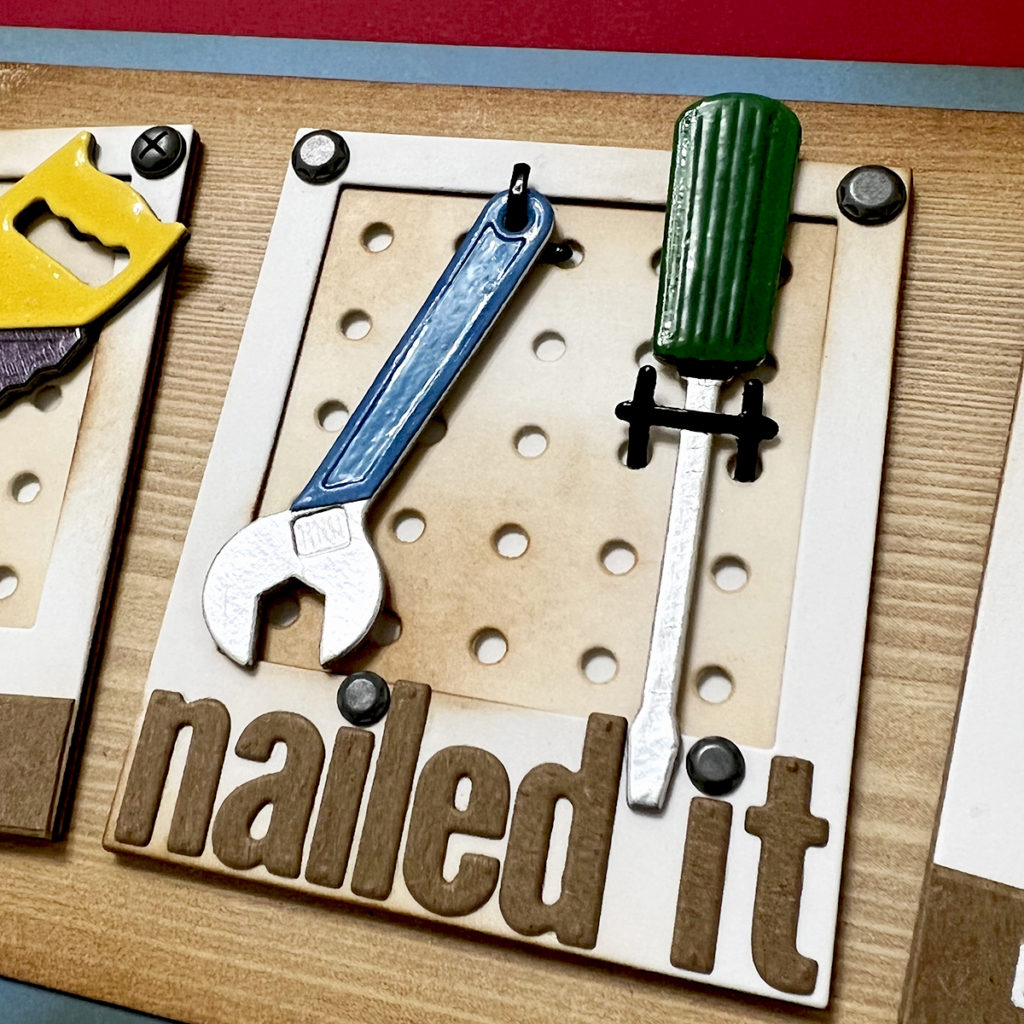
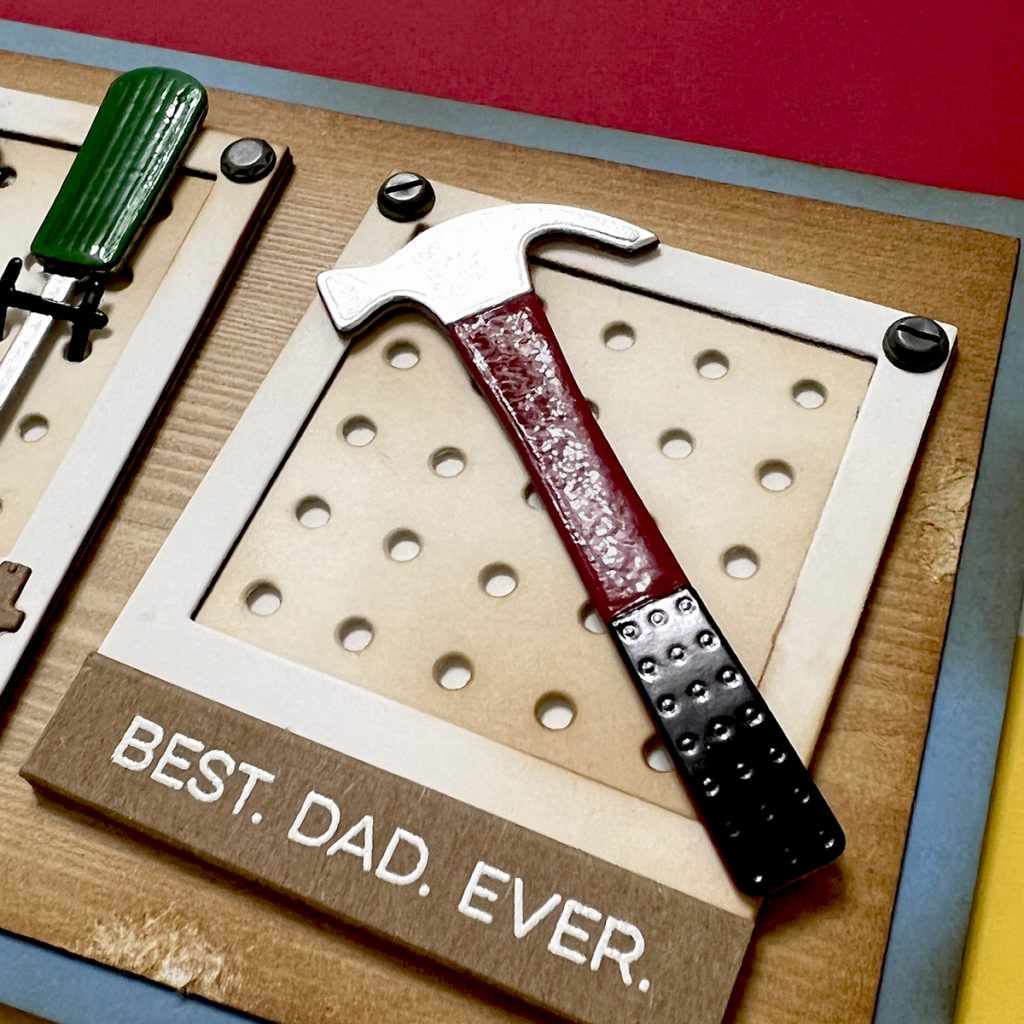
The tools were a lot of fun to make. I used silver card stock for the main part of all the tools, except for the saw, for which I used a gunmetal looking metallic paper. The color is called Onyx. I cut the handles out of colored card stock. I added several layers of the main tool shape together in order to give them stability. Once they were assembled, I added Glossy Accents to the colored card stock, which makes them look more true to life. The little hooks for the wrench and screwdriver were cut from glossy black card stock. And those nails and screws? Those are flat and can just be glued on anything. They look so real, don’t they?!
The background of this card started with a piece of woodgrain scrapbook paper from my stash. I blended the Vintage Photo around the edges, and then I mounted it onto a 9″x4″ blue card base, which I also darkened up with the Vintage Photo. The few distressed areas around the woodgrain paper were again a happy mistake. I was trying to wipe off a smudge and didn’t realize how damp my paper towel was. It tore the top layer of the paper off, and I just went with it by repeating it around each side of the panel. I actually love how it looks!
The sentiments are from two retired sets from My Favorite Things. I can’t tell you how often I use the “All About Dad” stamp set – MFT needs to bring this one back in one of their vault releases! The little letter dies are also retired, and I’m glad to have them in my stash.
That’s it for my card today. I hope it put a smile on your face, and if you are celebrating Father’s Day, I wish you a very happy one!
Wishing you all a crafty day,
Allison
Note: External links on my blog may contain affiliate links. This gives me the opportunity to earn a small commission when you click on the links and place an order. This comes at no additional cost to you. Thank you so much for your support, as this helps me bring you more content.