Hello, crafty friends! I have a new card to share with you today featuring a new-to-me die from The Stamp Market.
Supplies
The Stamp Market – Scalloped For You Frame Die
Waffle Flower – JJ’s Rainbows Paper Pad
CZ Design – Reverse Sentiment Strips – Happy
Mama Elephant – Family Time Stamp Set
Pretty Pink Posh – Sparkling Clear Sequins
Making the Card
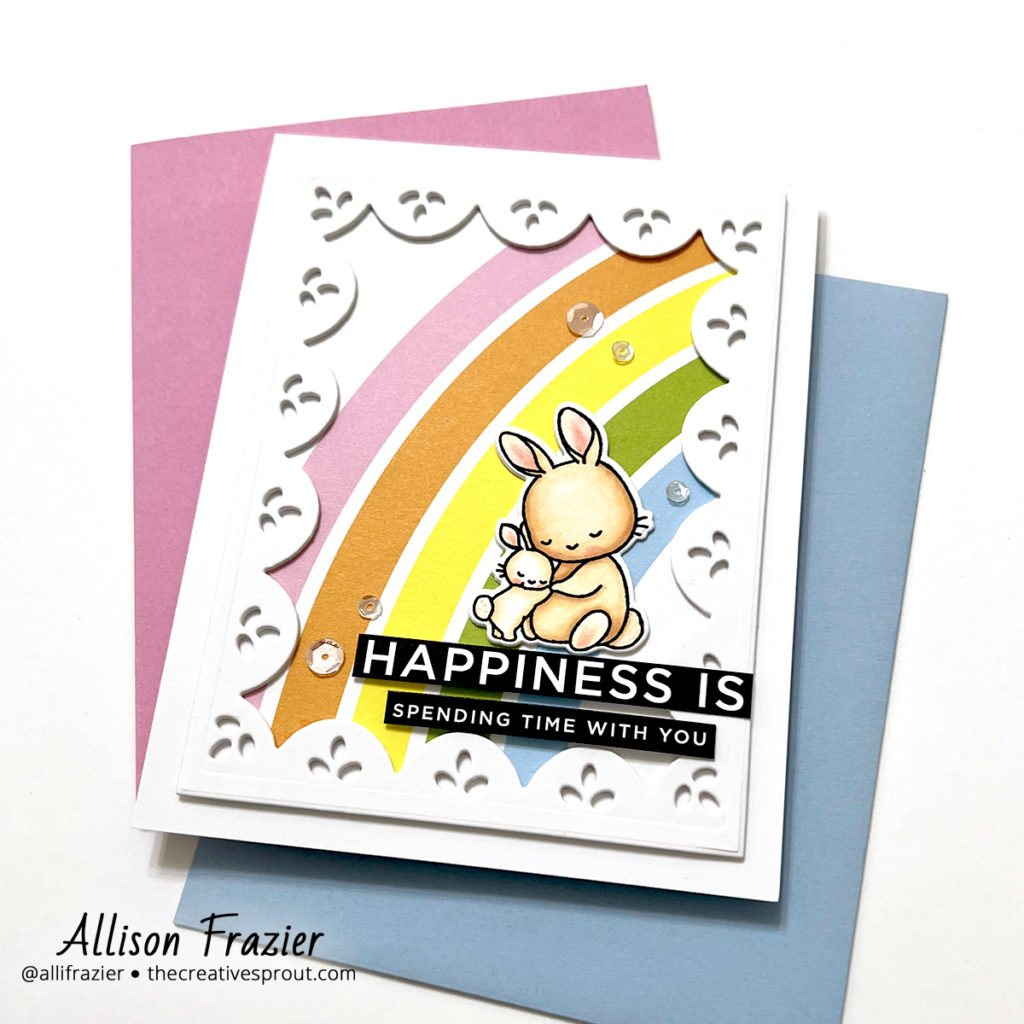
This card was pretty simple to put together. I was definitely inspired by my recent purchase of this scalloped frame die. There are so many ways to use it, but I decided to go for happy and cute today. The die does not cut the outside edges, so you can have this frame be the center of a full A2 panel. I wanted to pop it up, so I cut three panels of white card stock with the die and then cut the outside edges so that the frames measured 3.75″x5″. I then glued them all together to get the dimension that I wanted.
Speaking of die cutting, I wanted to give you a heads up that the Platinum 6 is currently on sale at Spellbinders right now. So, if you’ve been on the fence about needing/wanting a new die cutting machine, now is a great time. I love my Platinum 6.
For the background, I went to one of my favorite paper pads ever – JJ’s Rainbows Paper Pad. It has the most perfect rainbow patterns, and I’m here for quick and easy! To make sure that the rainbow paper didn’t show through the little holes on the edge of the frame, I just traced the inside of the frame onto the back of the rainbow paper and then fussy cut it. I centered the frame over the rainbow and adhered it all to a white A2 card base.

I chose the cute bunnies from the Family Time stamp set from Mama Elephant, stamped them with Copic-friendly ink, and colored them with my Copic markers. I used the matching die to cut them out.
For my sentiments, I again chose a quick and easy option by using some ready-made sentiments from CZ Design and Simon Says Stamp. There are many different themed sets of these sentiments, and they come in either white with black writing or the reverse, like the ones I used. One of the cool things about both is that you can foil them! After trimming down the sentiments that I chose, I did outline the edges with a black marker to hide the white core.
To finish the card, I sprinkled a few clear sequins around the focal point. And that’s it! It’s nice to ease back into card making with a quick and easy card. Thank you so much for visiting.
Wishing you all a crafty day,
Allison
Note: External links on my blog may contain affiliate links. This gives me the opportunity to earn a small commission when you click on the links and place an order. This comes at no additional cost to you. Thank you so much for your support, as this helps me bring you more content.