Hello, friends! I hope your weekend is off to a great start. It is time for the September monthly club kits from Spellbinders. The clubs this month are full of autumn inspiration, and I am here for it! I love autumn more than any other time of the year, and I have been busy making all sorts of cards in hopes that it will bring cooler weather here to Colorado.
One of my favorite aspects of Spellbinders clubs is that you can cancel at any time. I just like the flexibility that offers! If you don’t like the club kit next month, just cancel it. The subscription window for new members ends on the 27th of the month, assuming that the club kit(s) has not already sold out.
EARLY ACCESS
Are you already a club member or thinking of joining one of the clubs? One of the other great benefits to being a club member is that you have early access to new products before they become available to the general public! CLICK HERE to see all the collections for September. There are so many great things coming up this month, and I’ll be sharing some of my favorites over the next few weeks.
SPELLBINDERS BOGO SALE
BOGO: Buy ONE participating item and get ONE participating item of EQUAL OR LESS value FREE. Hurry, though, because the sale ends September 7, 2025.
Let’s move on to my cards for today. I do have a new YouTube video sharing these cards. You can CLICK HERE to view it on YouTube, or you can view it below.

NOTE: all supplies are linked to multiple sources in the thumbnails at the end of this blog post.
If you live outside of the United States/North America, you might want to head over to the Spellbinders UK website.
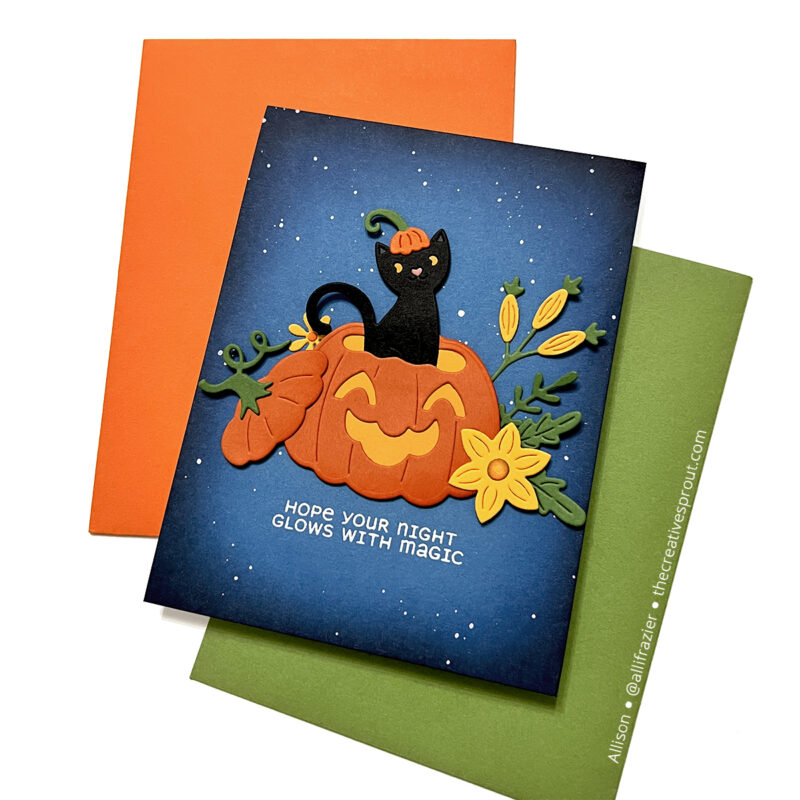
The Small Die of the Month for September is called “Harvest Magic,” and it’s a really cute set. There are other Halloween themed dies in this set that I have not used yet, including a ghost and skull. For my sentiment, I used one of the stamps from the Clear Stamp & Die of the Month, which is called “Autumn Whim.” This is the same as the Clear Stamp of the Month, especially since I didn’t use a matching die for this card. Lots of great autumn sentiments in this set, but I thought the one I picked worked perfectly with my scene. You can see how I created the glow in the middle with ink blending in my video.
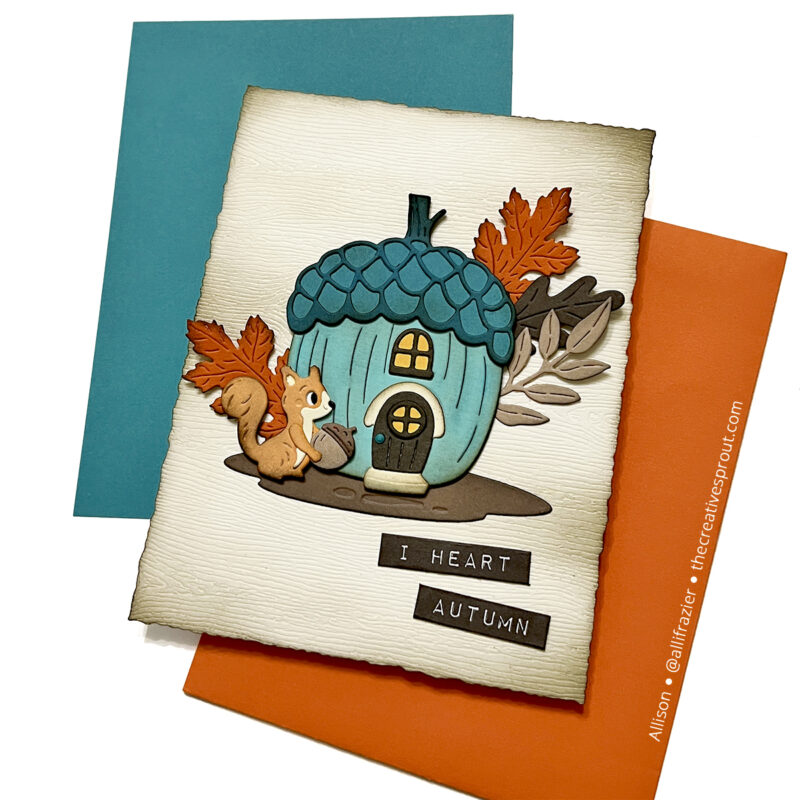
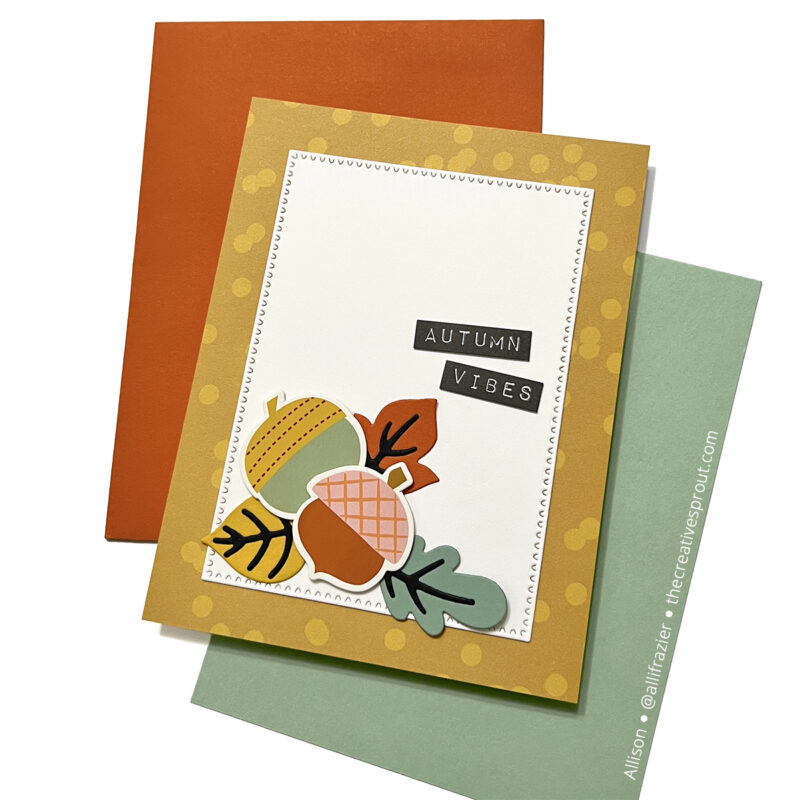
The Large Die of the Month is called “Acorn Acres” and how adorable is this little scene that you can create? There are a few sentiments along with a “happy” word die, but I chose to create a sentiment with the Autumn Archives Paper Pack. There are so many sentiments in this paper pack that look like they come from those old label makers. I used some woodgrain paper and my deckle trimmer to create the A2 card panel.
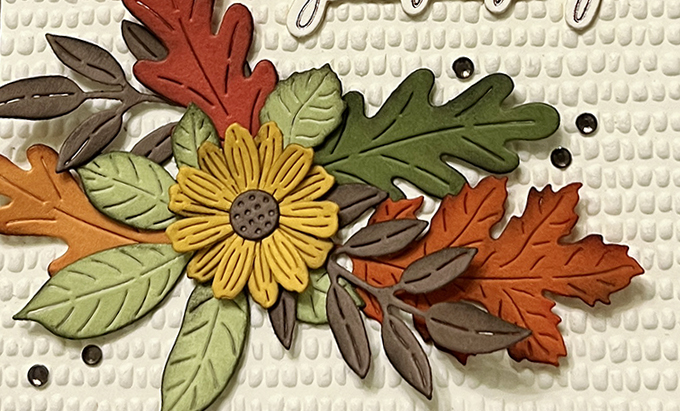
My next card features just the leaves from the Large Die of the Month. They are so pretty, so I really wanted to create a simple card highlighting them. I used the Dimpled 3D Embossing Folder to create texture in the background. The sentiment comes from the Autumn Sentiments BetterPress Plate & Die Set. I chose to hot foil the sentiment onto the same paper I used for the background using Pewter foil.
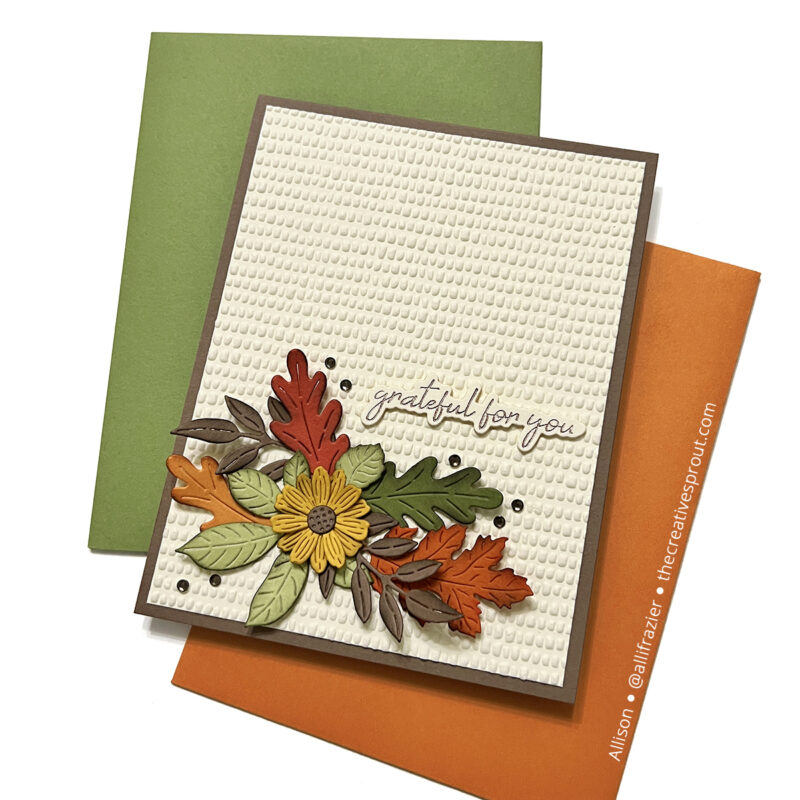
My next three cards feature dies, patterned paper, and ephemera from the Autumn Archives Collection. This card features the following products:
- Falling Leaves Die Set
- Autumn Archives 12 x 12 Paper Pack
- Autumn Archives Chipboard Die Cut Stickers
- Perfect Touch Rectangles
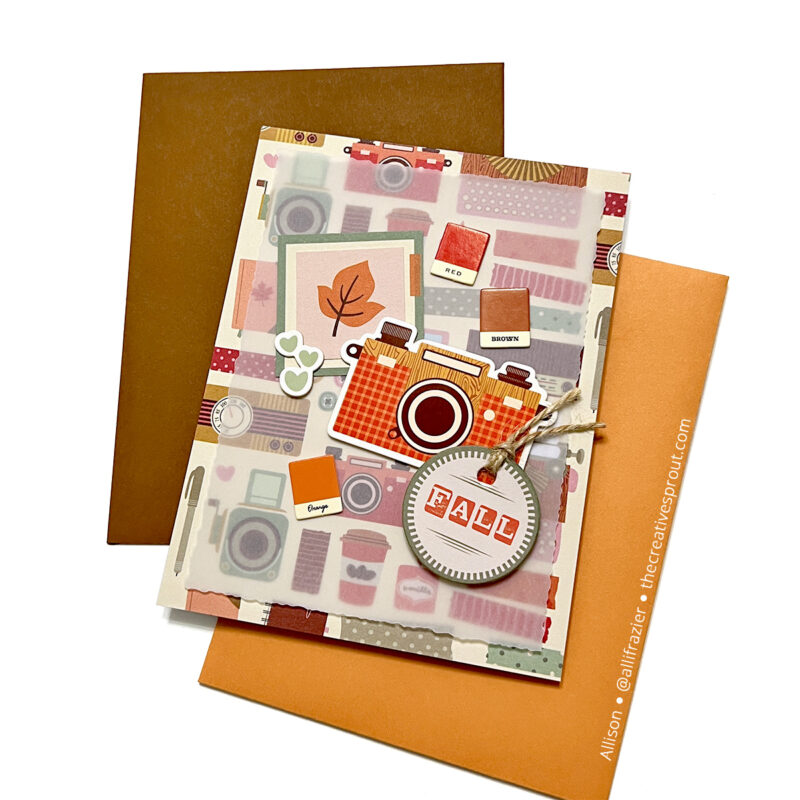
This card features the following products:
- Autumn Archives 12 x 12 Paper Pack
- Autumn Archives Chipboard Die Cut Stickers
- Documenting Labels Die Set
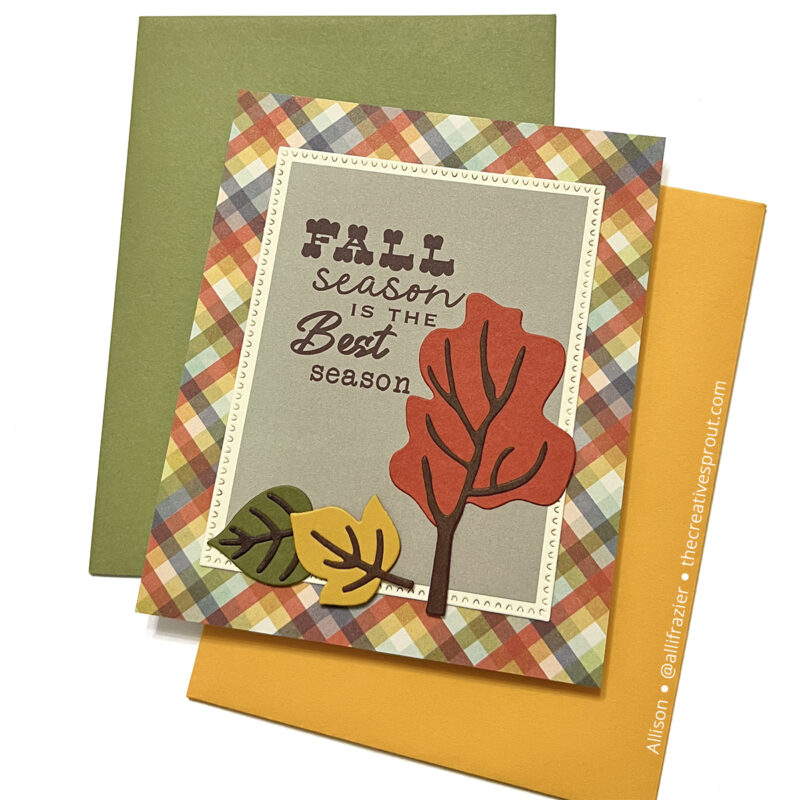
For this last card, I found a cute panel in the Autumn Archives Paper Pack that featured a tree at the bottom. It matched up with the shape of this tree from the Changing Trees set, so I added the die cut tree to kick it up a notch. I did want to frame this panel with a rectangle from the Perfect Touch Rectangles, but the size didn’t match up with any of the rectangles. This is something I forgot to mention in the video, although I did mention in the video that I’m very forgetful, so there is that! Anyway, I did some partial die cutting in order to get the white panel to be shorter. Given that the Perfect Touch Rectangles are sized appropriately to fit an A2 card, this meant that my panel was no longer consistent with an A2 card. So, I just trimmed my card base. Easy peasy! The final card size is 4.25 x 5.125. I am never tied to a set size for my cards, even though the majority of them do end up being A2 cards.
I hope these cards bring a smile to your face today. Leave me a comment and let me know which card is your favorite! As always, I appreciate you visiting my blog.
Wishing you all a crafty day,
Allison
SUPPLY LIST
Note: External links on my blog may contain affiliate links. This gives me the opportunity to earn a small commission when you click on the links and place an order. This comes at no additional cost to you. Thank you so much for your support! You can see more information on my Affiliate Disclosure page.
I love ALL of these! Thanks for sharing this artistry to inspire us. I’m so overwhelmed w/ school just now that it will be a miracle if I have any time to do any crafting. Send me luck!
Lori S in PA