Hello, friends! It’s the 6th of the month, and that is a new important date when it comes to the Spellbinders Monthly Clubs. The clubs have become so popular that Spellbinders has changed the way they’re releasing them. Naturally, they want to make sure that their current subscribers are taken care of in terms of having enough inventory. Once current subscribers are fulfilled, Spellbinders will release the rest of the inventory to potential new subscribers on the 6th of each month. So, if you’ve seen something you like being shared on social media the past several days, now is the time to jump on those club kits. Remember that one of the major benefits of the Spellbinders clubs is that you can cancel at any time and rejoin if/when you want (assuming there is enough inventory when you want to rejoin).
NOTE: If you are in the UK, you can order monthly clubs through the UK website – CLICK HERE.
I have been sharing some ideas over the past several days on my Instagram page using both the Small Die of the Month and the 3D Embossing Folder of the Month. I also have some brand new cards that I’m sharing today! Details for all cards are below.
3D Embossing Folder of the Month
Card 1 Supplies
Spellbinders – 3D Embossing Folder of the Month – Spring Burst
Spellbinders – Sealed Wildflowers Die Set
Spellbinders – Yana’s Special Sentiments Hot Foil Plate and Die Set
Spellbinders – Hot Foil – Matte Gold
Hero Arts – Unicorn White Pigment Ink
Spellbinders – Fashion Gold Embellishments
Spellbinders – Glimmer Hot Foil System
Spellbinders – Universal Plate System
Making the First Card
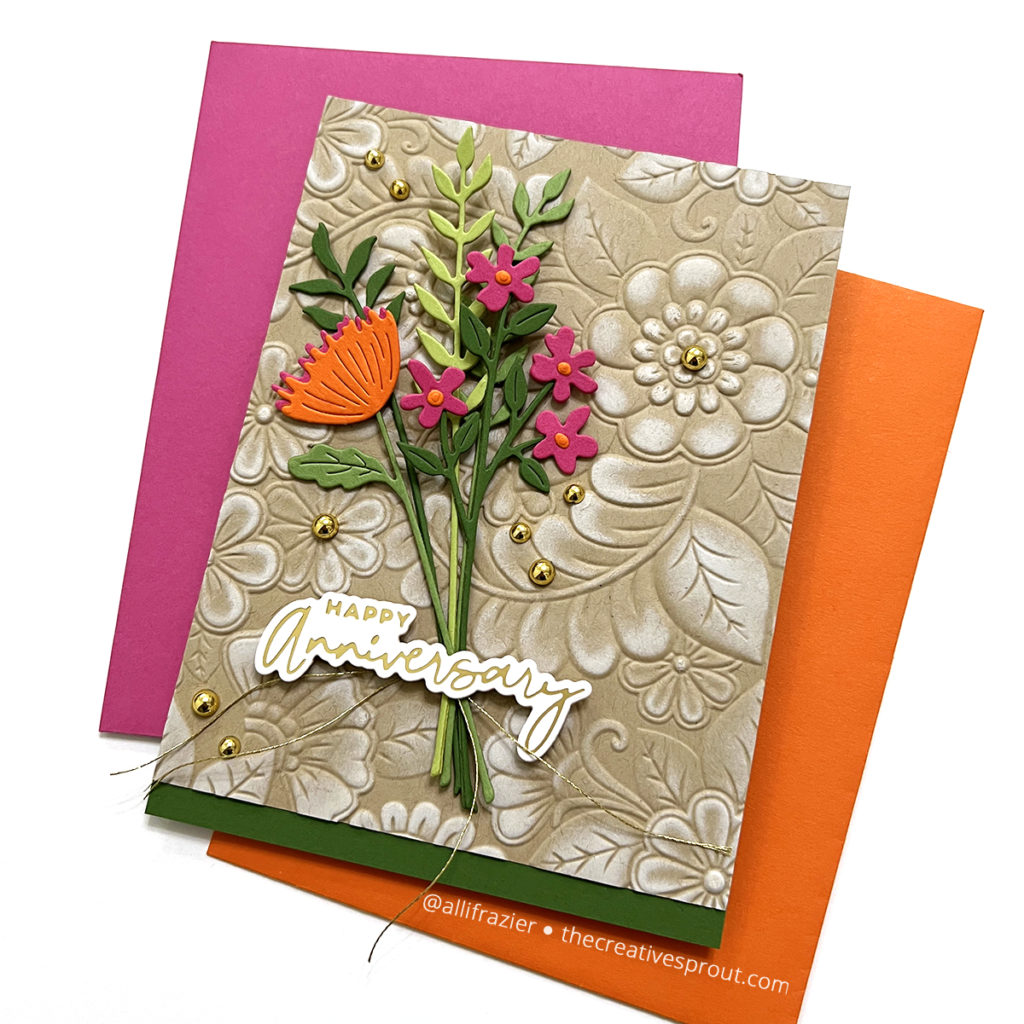
The 3D Embossing Folder of the Month for February is called Spring Burst, and it’s a beauty! You really don’t even need to add much to a card once you emboss your paper with this folder. For this card, I embossed a panel of Kraft card stock and then I swiped my white pigment ink over the raised edges to make them really pop. My floral bouquet is from the Sealed Wildflowers Die Set. I gathered all of these die cuts towards the bottom and tied some metallic thread around them. I then adhered it down to my panel right where that thread is tied, while also attaching the florals in just a couple places up top. I hot foiled my sentiment with matte gold foil and cut it with the matching die. I popped that up on foam tape so that it could sit right on top of where I had adhered the bouquet. Finally, I scattered some gold embellishments around the design, I love how this turned out!
If you haven’t seen me mention this before, I wanted to just point something out regarding 3D folders. You can play around with the sandwich that you use in your die cutting machine. But, if you want the best results, the Universal Plate System is great and removes the guesswork. These plates are sold separately if you already have a Platinum 6 machine. They are also included with the new machines.
Card 2 Supplies
Spellbinders – 3D Embossing Folder of the Month – Spring Burst
Spellbinders – Wonderful Script Sentiments Die Set
Spellbinders – Spectrum AB Color Essentials Gems
Spellbinders – Universal Plate System
Tim Holtz – Alcohol Blending Solution
Making the Second Card
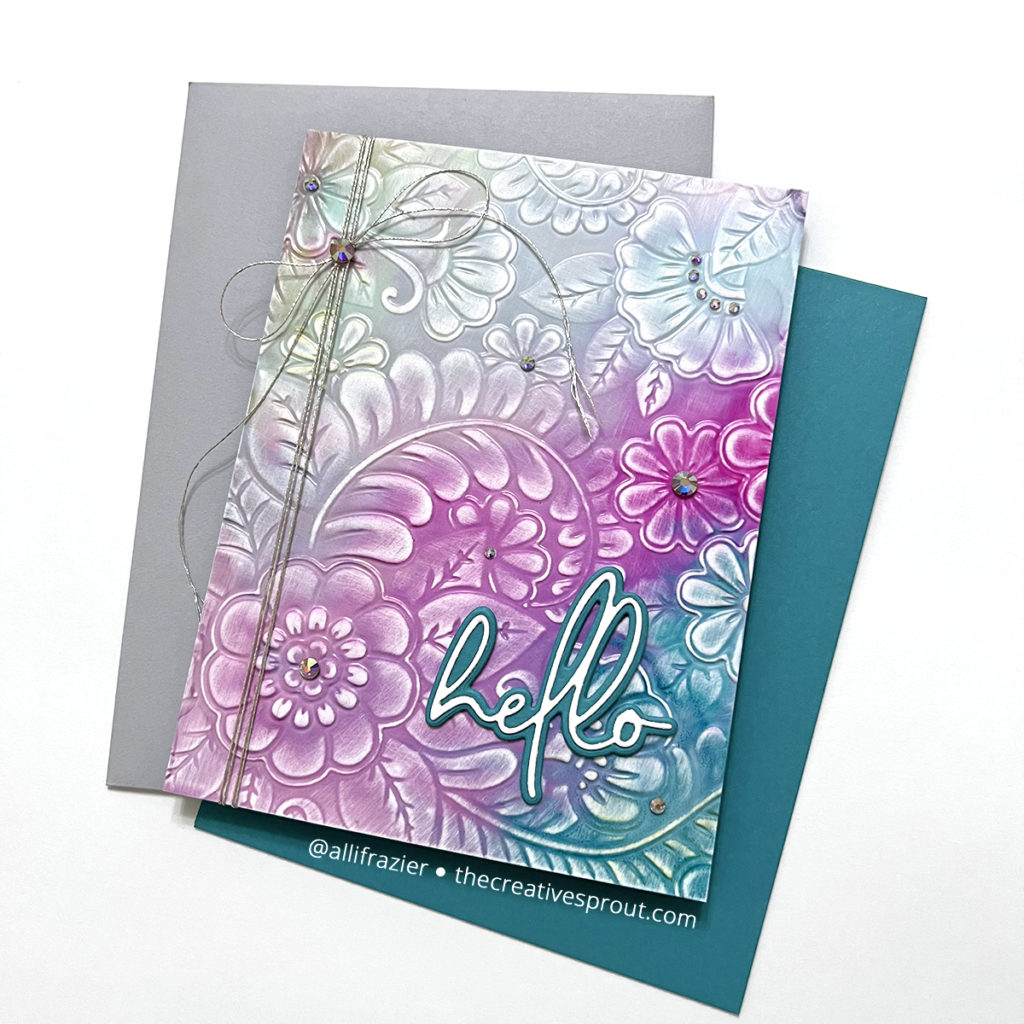
This card shows that you don’t need much to make this 3D folder shine. The look of this particular card could easily be achieved with some ink blending. But, I used an alcohol inked background that I created last week. If you’ve never tried embossing with Yupo paper, you should definitely give it a try! It works, although because the paper has a totally different consistency (it’s more plastic than paper), the raised edges aren’t as high. But that doesn’t mean that you can’t still enhance those high spots. All you need is a sanding block. You can also try regular sandpaper. For this particular panel, I used just two colors of alcohol ink – Turquoise and Purple Twilight.
To let the background be the star, I attached a simple greeting from the Wonderful Script Sentiments Die Set and tied some metallic thread around the side of the panel. To finish the card, I sprinkled some gems around the design.
Small Die of the Month

Card 3 Supplies
Spellbinders – Small Die of the Month – Floral Mini Tiles
Spellbinders – Essential Glimmer Sentiments
Spellbinders – Essential Glimmer Rectangles
Spellbinders – Hot Foil – Opaque Black
Spellbinders – Glimmer Hot Foil System
Making the Third Card
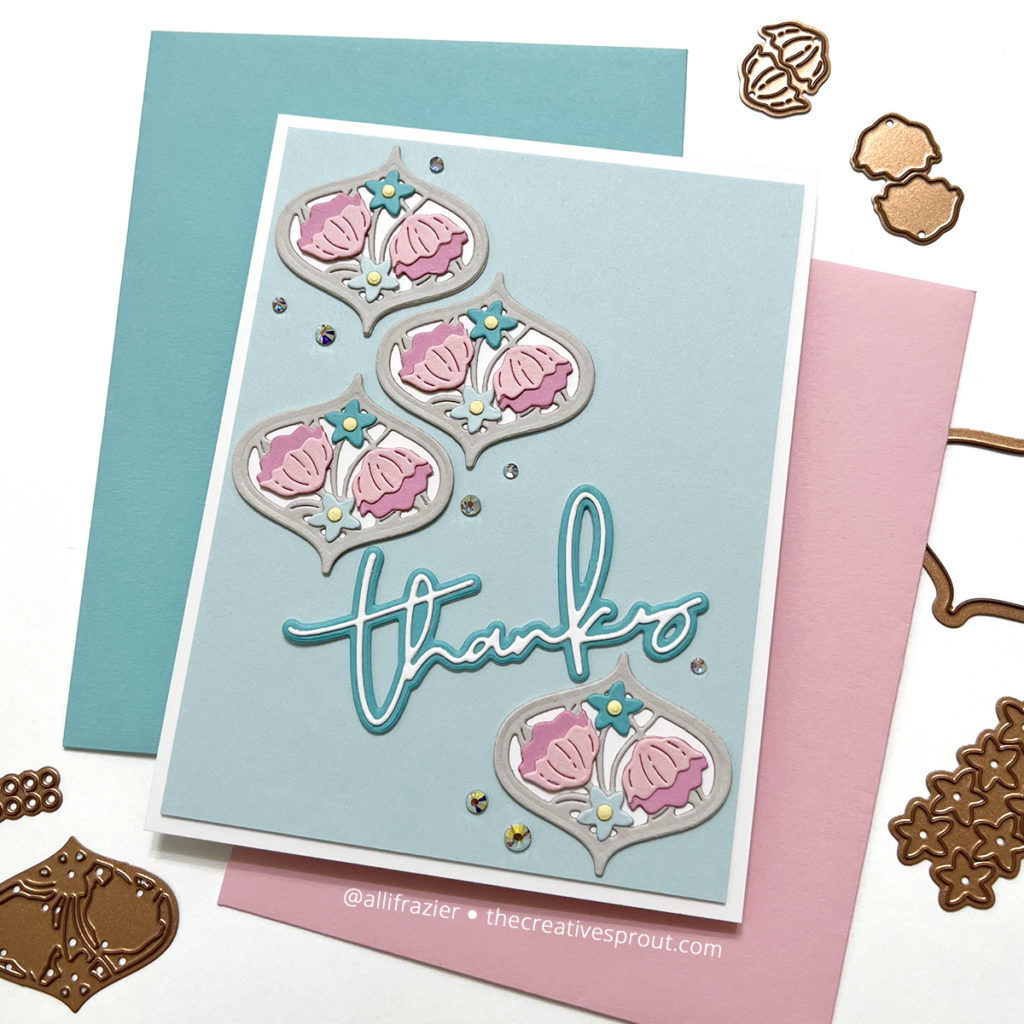
The February Small Die of the Month Club is called Floral Mini Tiles, and it comes with several basic shapes, along with detailed cutout shapes that accommodate all of the little floral dies in the set. So, you can go for simple geometric designs or for more floral designs. This first card combines the two into a fairly clean and simple design. I chose to use the teardrop shape for this card. This is smaller than an A2 card because, well…it’s just a note! The sentiment comes from the Essential Glimmer Sentiments set, and I used opaque black foil for the first time. It is so awesome! I also used that foil for the dotted rectangular outline, which comes from the Essential Glimmer Rectangles.
Card 4 Supplies
Spellbinders – Small Die of the Month – Floral Mini Tiles
Spellbinders – Yana’s Layered Script Dies
Spellbinders – Spectrum AB Color Essentials Gems
Making the Fourth Card
My fourth card is another clean and simple design, this time using one of the other shapes from the Floral Mini Tiles Small Die of the Month. I cut the shape in white and the detailed shape in a pale gray. The detailed piece makes it clear which flowers from the set go where. It’s really easy and fast to put together. My sentiment is from Yana’s Layered Script Dies. Again, I scattered some gems to finish the card.
Card 5 Supplies
Spellbinders – Small Die of the Month – Floral Mini Tiles
Spellbinders – 3D Embossing Folder of the Month – Spring Burst
Spellbinders – Mini Blooms and Sprigs Die Set
Spellbinders – Nesting Circle Dies
Spellbinders – Universal Plate System
Making the Fifth Card
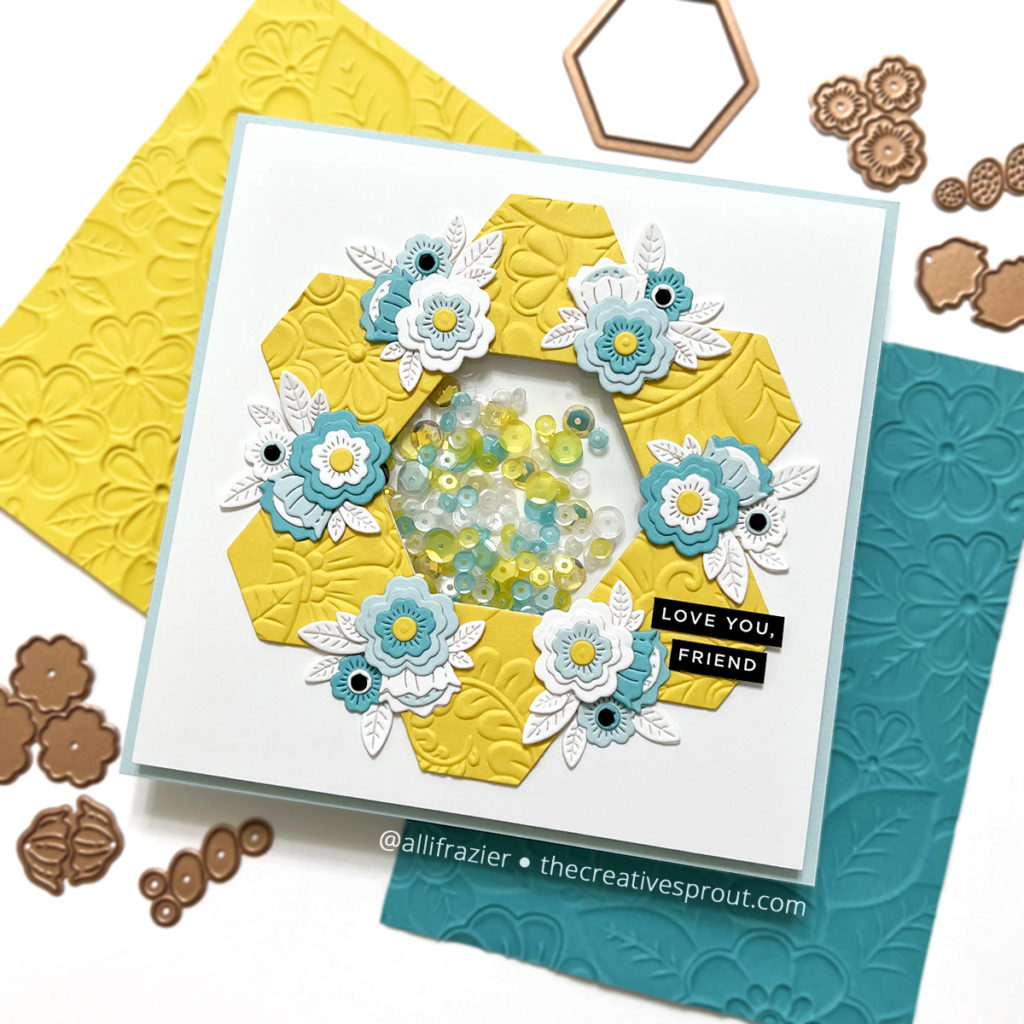
My fifth card is a shaker card using both the Small Die of the Month and the 3D Embossing Folder of the Month. I started by cutting out six of the hexagon shapes from yellow card stock. I then arranged these pieces in the 3D Embossing Folder and ran it through my die cutting machine. I find that it’s better to cut your shapes first and then emboss rather than the reverse. If you run an embossed shape through the machine, it may flatten some of the detail. I cut a white piece of card stock to 5″ square and arranged my hexagons to figure out how big of an opening I needed for the shaker element. Ideally, I would have had the right sized hexagon die to cut that shape in the middle, but I didn’t. Instead, I cut a circle into the middle of the white panel and then arranged my hexagons around that. To hide the fact that it was a circle die, I just added some of the floral dies from the Small Die of the Month kit to cover up the gaps. Now it looks like the center opening is a hexagon! Tricky, right? All of the floral pieces come from the February kit, except for the leaves, which are from the Mini Blooms and Sprigs set.
To make the shaker, I just adhered acetate to the back of the white panel, added foam tape around the hexagon (circle) opening, and added my sequins into the well created by the foam tape. I then added more foam tape to the rest of the square panel and adhered another piece of white card stock to the back to enclose the shaker mechanism. Finally, I adhered the shaker panel to a light blue square card base. The black sentiments are from a sentiment strip set that I cut apart.
That’s it for my cards today! I had a lot of fun making these, and I hope they put a smile on your face. Be sure to check out all of the clubs on the Spellbinders website. There are some really great value bundles when you purchase more than one of the club kits, assuming there is enough inventory for the particular bundle you’re interested in. Thank you so much for stopping by today.
Wishing you all a crafty day,
Allison
Note: External links on my blog may contain affiliate links. This gives me the opportunity to earn a small commission when you click on the links and place an order. This comes at no additional cost to you. Thank you so much for your support, as this helps me bring you more content.
These are wonderful, thank you for sharing your creativity!
Thank you so much, Susan. I really appreciate you visiting my blog.