Hello, crafty friends. I hope you all had a great weekend! I spent some time in my craft room getting inky with alcohol inks. It has been a really long time since I played with them, and I forgot how much I enjoy the process. I don’t do anything fancy – I just let the inks do what they do. I made a bunch of backgrounds in various color schemes, and I’m sharing two of those schemes today. The rest of the backgrounds will be making appearances over the next few weeks, I’m sure.
Card 1 Supplies
Tim Holtz – Alcohol Blending Solution
Tim Holtz – Alcohol Ink Air Blower
Simon Says Stamp – Healing Hugs Stamp Set
Simon Says Stamp – Black Luxe Glitter Card Stock
Trinity Stamps – Rainbow Fish Embellishments
Making the First Card
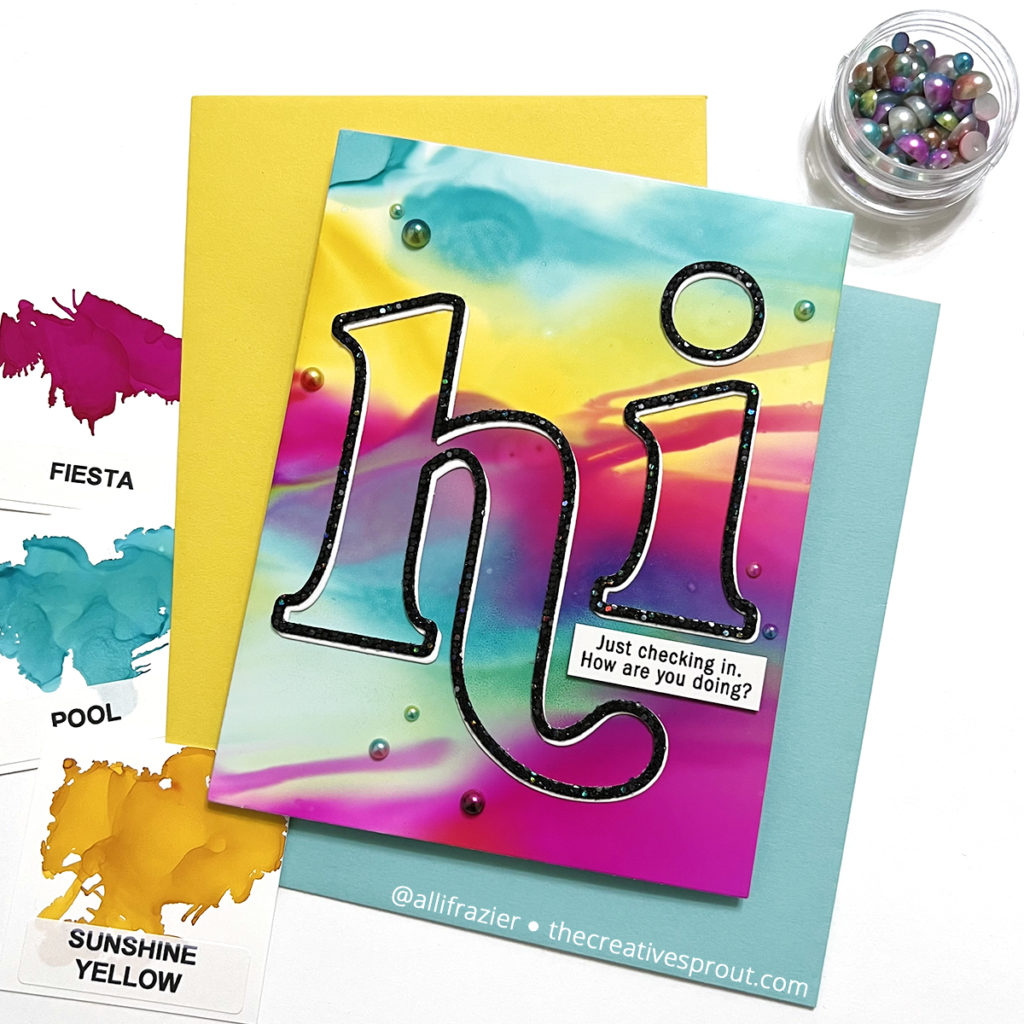
This first background is probably my favorite. I used the following colors of alcohol ink: Fiesta, Pool, and Sunshine Yellow. Like I said before, I don’t do anything fancy. I do add blending solution to my yupo paper before I add the inks. Once I add my inks, I use the Air Blower to move them around. I usually just tip my paper to one side to get the colors to flow, and then I’ll tip it the other direction if needed. Once I like what I have, I just put the paper aside and move on to the next one. It doesn’t take long to dry, especially since I live in a dry climate.
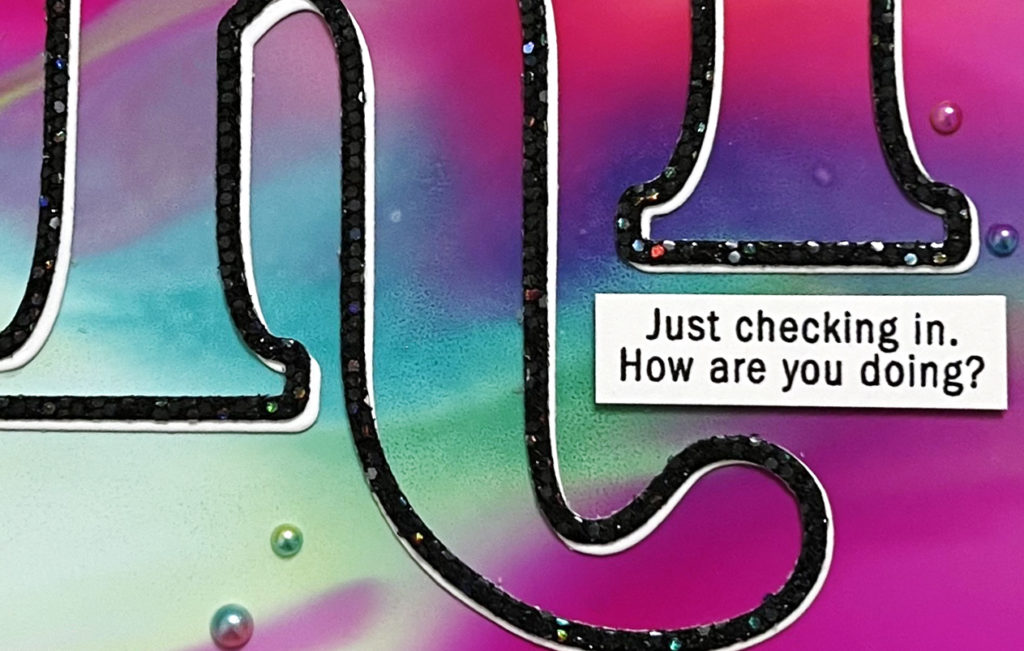
For my main sentiment, I used the “Hi” die from The Stamp Market. I cut it once from white card stock and once from black Luxe Glitter Card Stock. There is only one die, but it cuts both the letters and the outlines. For this card, I just used the outlines, and I offset the black outline on top of the white. The stamped sentiment comes from the Healing Hugs stamp set. To finish the card, I used the Trinity Stamps Rainbow Fish Embellishments. These complemented the colors of my alcohol inks perfectly! I was so happy because these have been sitting in my drawer ever since I bought them. Sadly, that describes a lot of my supplies. Raise your hand if you can relate!
Card 2 Supplies
Tim Holtz – Alcohol Blending Solution
Tim Holtz – Alcohol Ink Air Blower
Waffle Flower – A2 Layers Die Set
Altenew – Ribbon Waves 3D Embossing Folder
Simon Says Stamp – Black Luxe Glitter Card Stock
Trinity Stamps – Rainbow Fish Embellishments
Making the Second Card
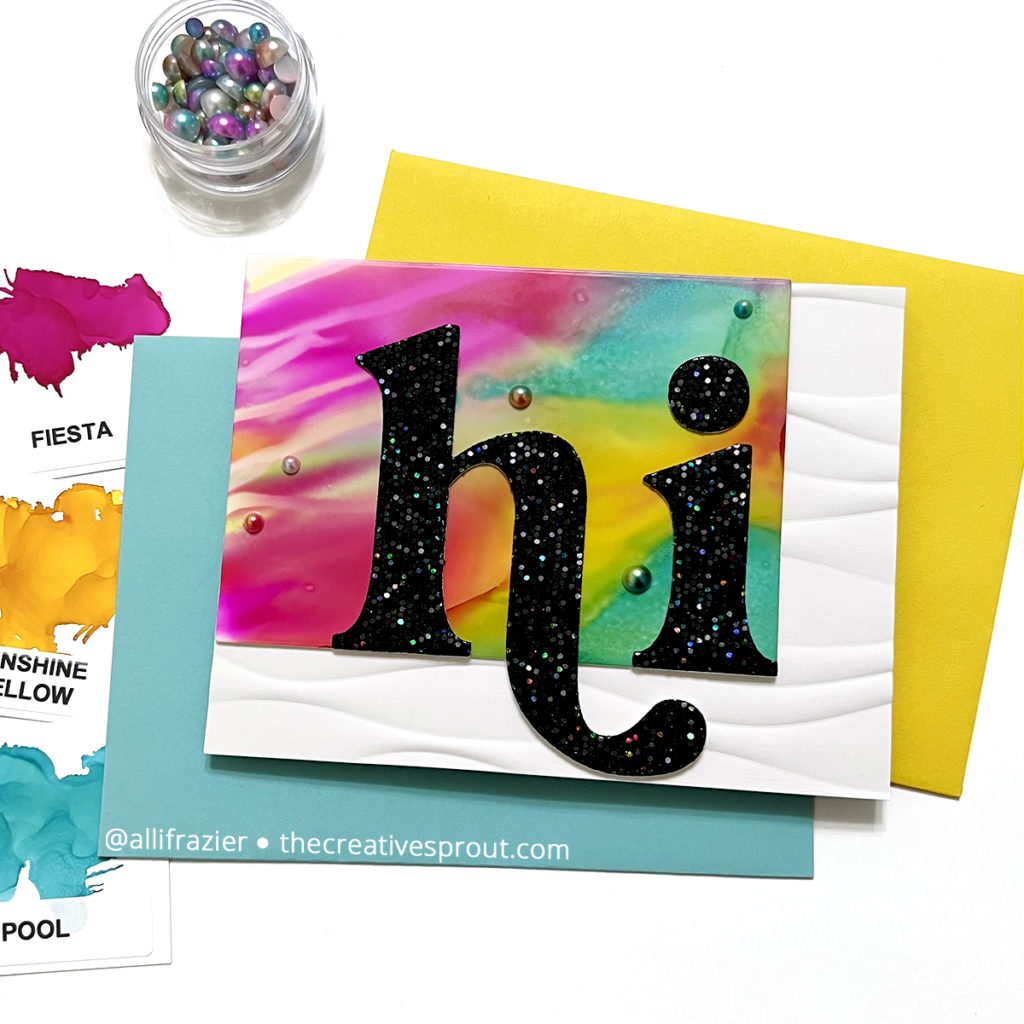
For my second card, I used the same color inks as the first. What I love about alcohol ink backgrounds is that if you don’t like all of it, then just use the part that you like! That’s what happened with this background. The top half of it was a hot mess! I used one of the Waffle Flower A2 Layer dies to cut out the good part.
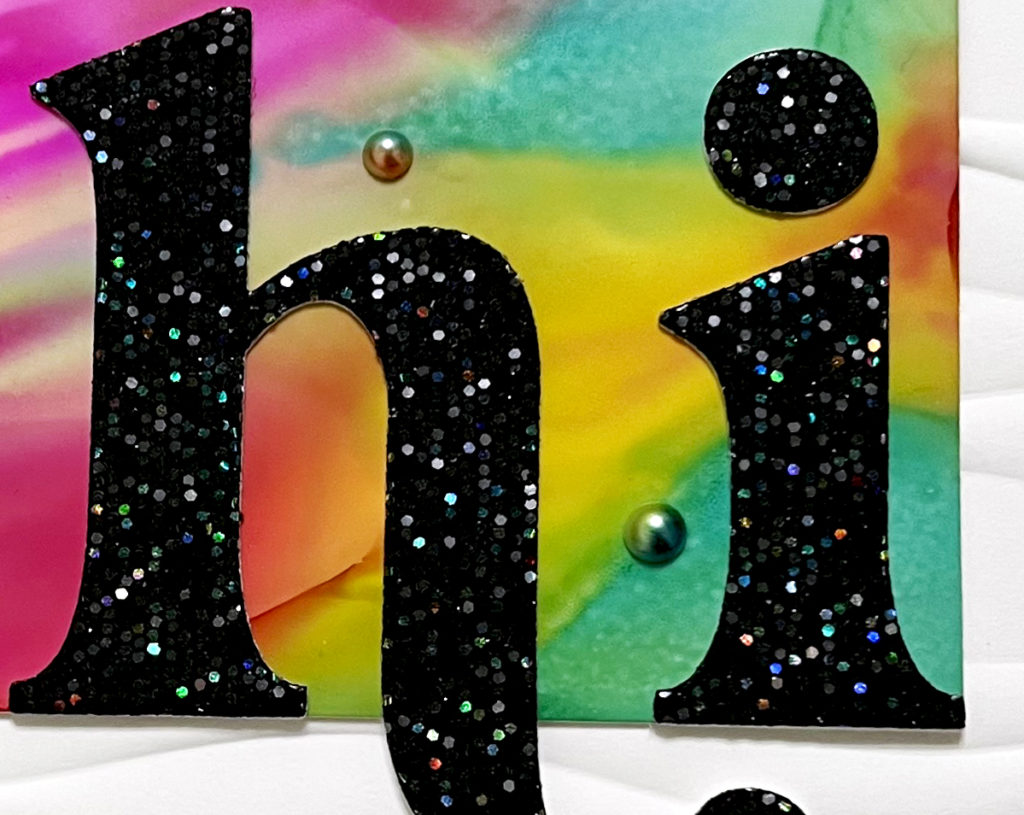
I used the “Hi” letters that I had cut out for the first card as my sentiment. And again, I used the Rainbow Fish Embellishments to finish the card. Look at that amazing glitter card stock – it is so cool!
Card 3 Supplies
Tim Holtz – Alcohol Blending Solution
Tim Holtz – Alcohol Ink Air Blower
Simon Says Stamp – Concentric Hearts Cling Stamp
Simon Says Stamp/CZ Design – Hi There Greetings Stamp and Die Set
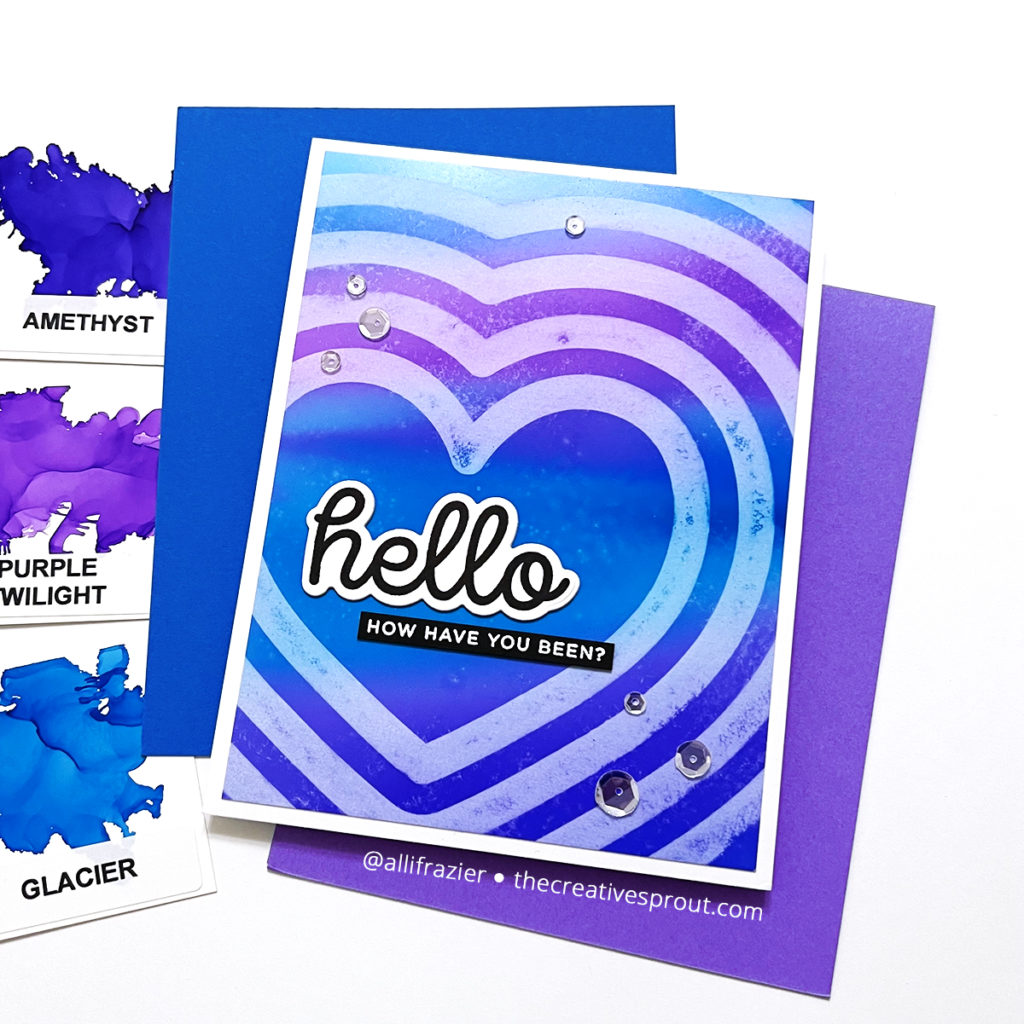
Making the Third Card
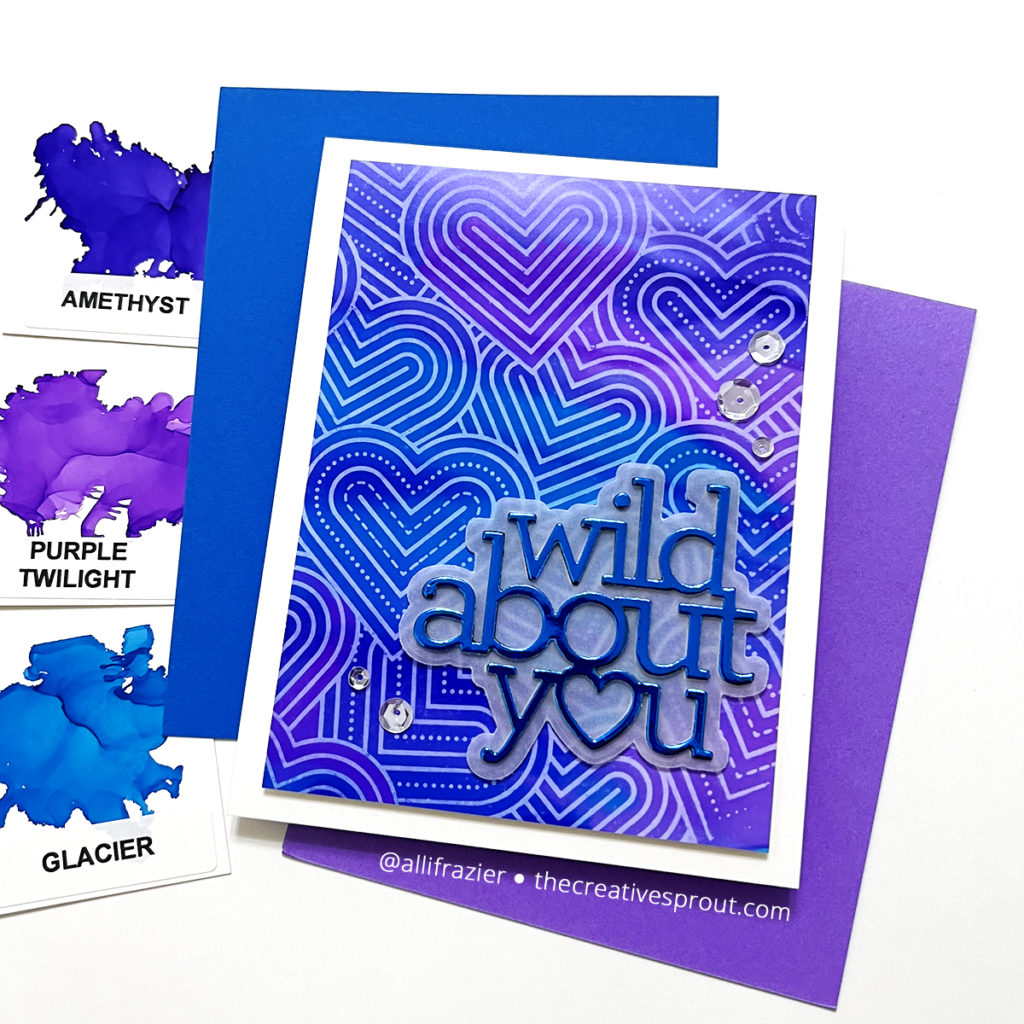
Now onto my second color scheme. For these next two cards, I used the following alcohol inks: Amethyst, Purple Twilight, and Glacier. I followed the same process as before, adding Blending Solution to the yupo paper before dropping in my alcohol inks. After moving the inks around with the Air Blower, I set the background aside. While I let it completely dry, I moved on to my sentiments. They both come from the Hi There Greetings set – the large greeting has a matching die. I stamped both sentiments with black pigment ink.
Once my background was dry, I put it into my MISTI, along with the Concentric Hearts Cling Stamp. I inked up the stamp with Alcohol Lift-Ink and stamped my background. I let the ink sit on the yupo paper for a bit. Maybe 30 seconds? Then I started dabbing the ink with a paper towel. I kept dabbing until I saw the ink coming up. Finally, I rubbed the entire background with my paper towel to get all of the ink off. It truly is magical – and easy! For both backgrounds, I only had to stamp one time to get these results. What I did forget to do was to have some spare paper on hand so that I could get two backgrounds for the price of one. I could have stamped the spare piece of paper with my stamp after I had lifted the ink off the original background. By the way, I made sure to clean my stamp completely when I was finished.
Card 4 Supplies
Tim Holtz – Alcohol Blending Solution
Tim Holtz – Alcohol Ink Air Blower
Simon Says Stamp – Jumbled Hearts Cling Stamp
Simon Says Stamp/CZ Design – Wild About You Die
Making the Fourth Card
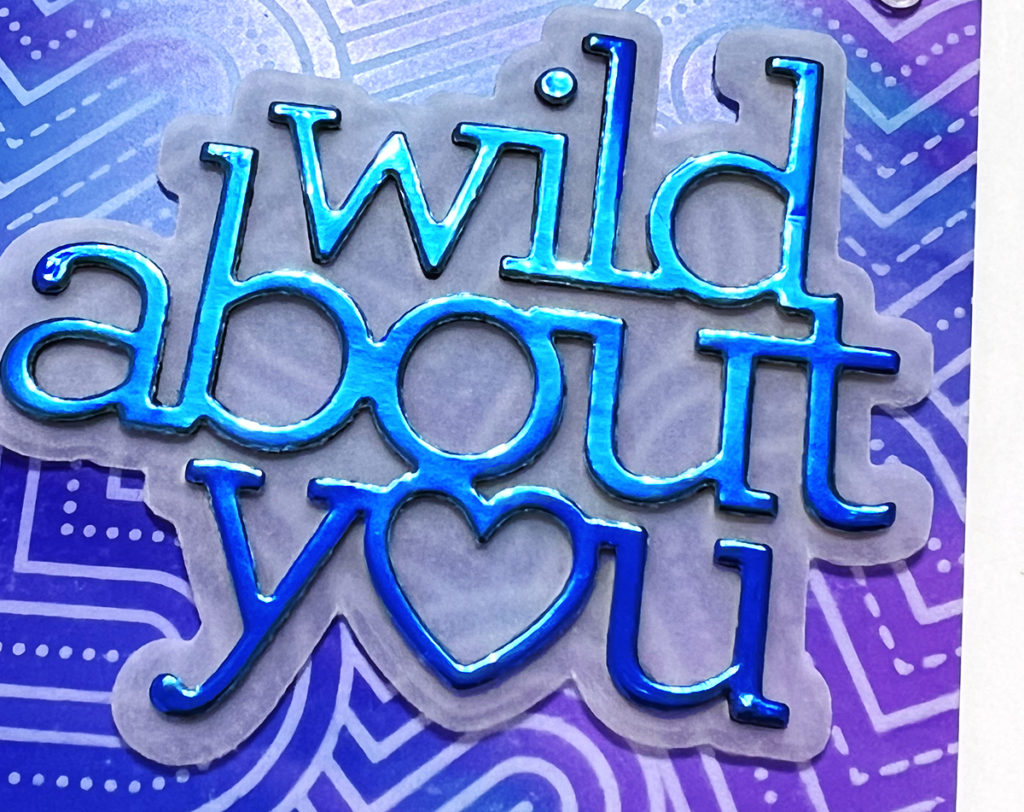
I made this card background exactly like I did with the third card, but I used the Jumbled Hearts Cling Stamp. Again, I only had to stamp with my Alcohol Lift-Ink one time to get these results. To finish this card, I used the Wild About You die. I cut the shadow from vellum and the main word die from a shiny mirror card stock that I had in my stash. It was the perfect color to complement this card.
These bold cards pack quite the punch, and they were really easy. All you need to do is set aside a little bit of time to make some backgrounds. I hope they put a smile on your face and inspire you to pull out some of your neglected supplies, whether that’s alcohol ink or something else!
Wishing you all a crafty day,
Allison
Note: External links on my blog may contain affiliate links. This gives me the opportunity to earn a small commission when you click on the links and place an order. This comes at no additional cost to you. Thank you so much for your support, as this helps me bring you more content.