Hello, friends! Since the holidays flew by so fast, I am still trying to use some new products that I never got a chance to play with during the holiday season. One of those products is the House Maker Die from The Stamp Market. The set comes with some small foliage dies that create a holiday vibe for the house. But, the main dies themselves are perfect for creating cards for new homeowners. And that’s what I made today.
Card 1 Supplies
The Stamp Market – House Maker Die
The Stamp Market – House Shingles Stencil
SugarPea Designs – Welcome Word Die
SugarPea Designs – Warm Welcome Stamp Set
Spellbinders – Mini Fall Blooms die set
Spellbinders – Petite Floral Potpourri Die Set
Process
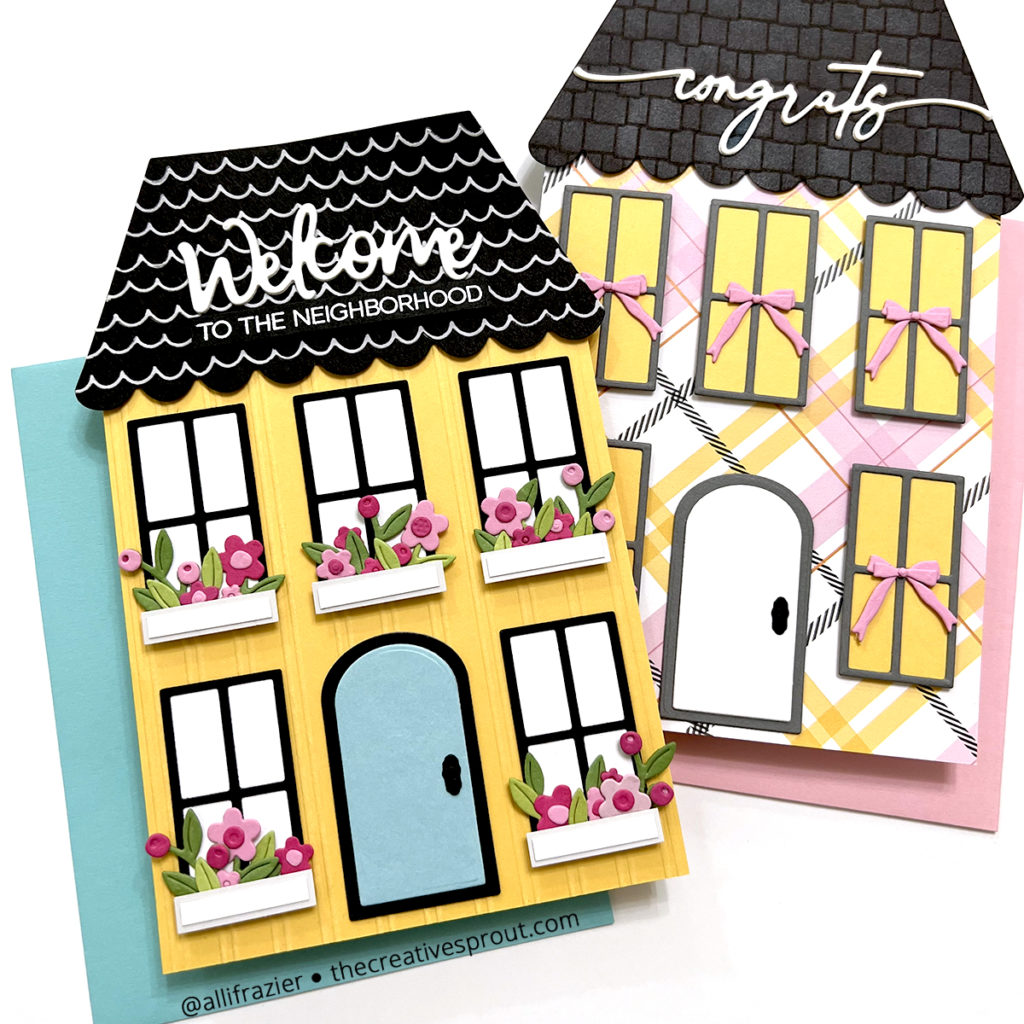
This card was a lot of fun together, and I think this House Maker die set will continue to be fun in the future because there are so many color combinations and occasions. What’s great about using this for congratulating someone on their new home is that you can obviously customize it with the actual home colors. And you can slap a turquoise door on it simply because your husband won’t allow you to do so on your actual house. Speaking for a friend…
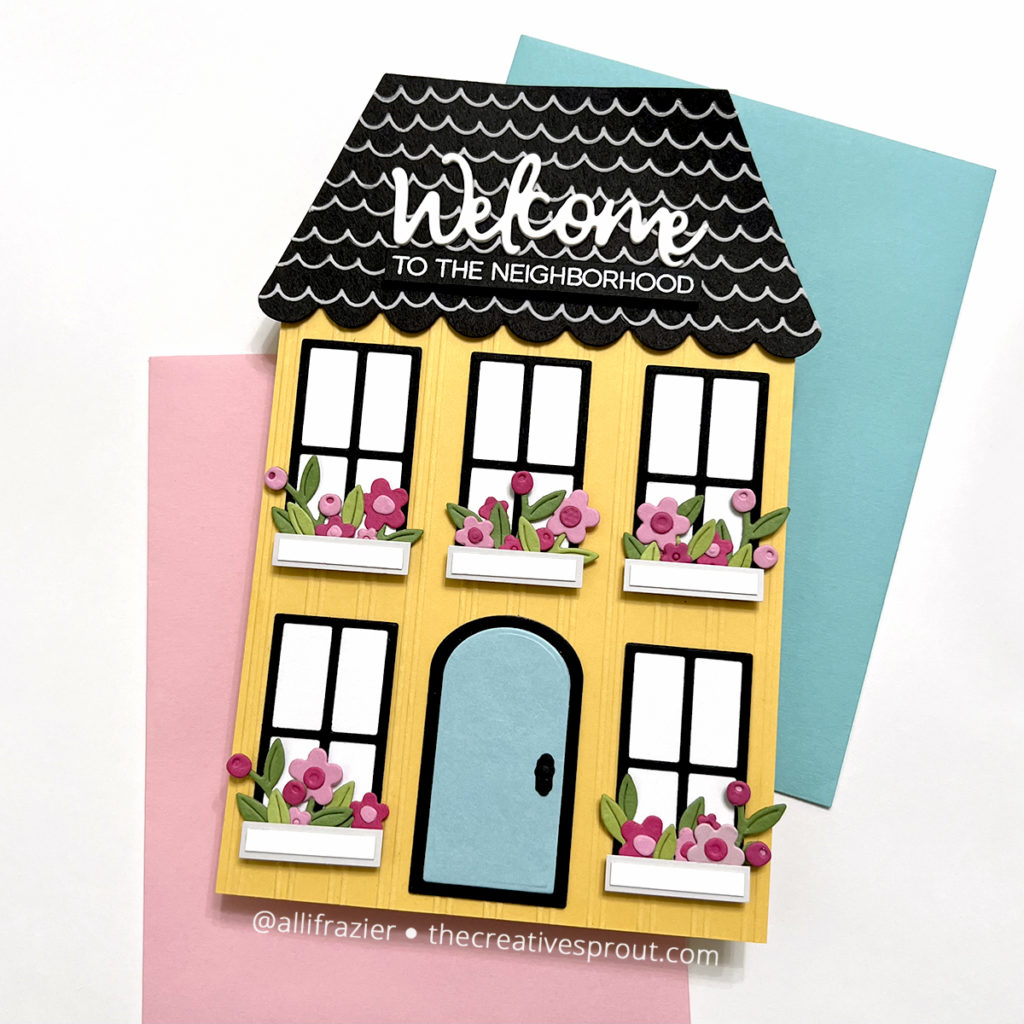
I started my card by taking a yellow A2 sized panel of card stock and embossing it with an older Taylored Expressions embossing folder called “Bead Board.” You can easily mimic the look of this by scoring your paper in your Scor-Buddy, or whatever tool you use to score your paper. You can make horizontal or vertical siding on your house by scoring it. I adhered that panel onto a yellow A2 card base. Next I created the roof by cutting it out of black card stock. I then took the House Shingles Stencil and spread Texture Paste through the scalloped design. I popped the roof up on the top of the card with some foam tape. I trimmed the corners of the top of the card base that didn’t get covered by the roof. I cut the Welcome die twice from white card stock, adhered the two layers together and glued it to the roof. I then white heat embossed the sentiment onto black card stock, cut it with a sentiment die and glued that under the “Welcome.”
Next, I created all of my windows by cutting the grid out of black card stock. There is a die in the set that cuts the rectangle piece that sits in back of the window, but I cut those pieces myself in my paper trimmer. When you’re cutting a lot of basic rectangle shapes at once, it’s just easier and faster to do in the paper trimmer than to do one at a time in the die cutting machine. I glued the front and back pieces together and then set them aside while I cut my dream door out of turquoise paper. I lined everything up and then adhered the pieces to the house.
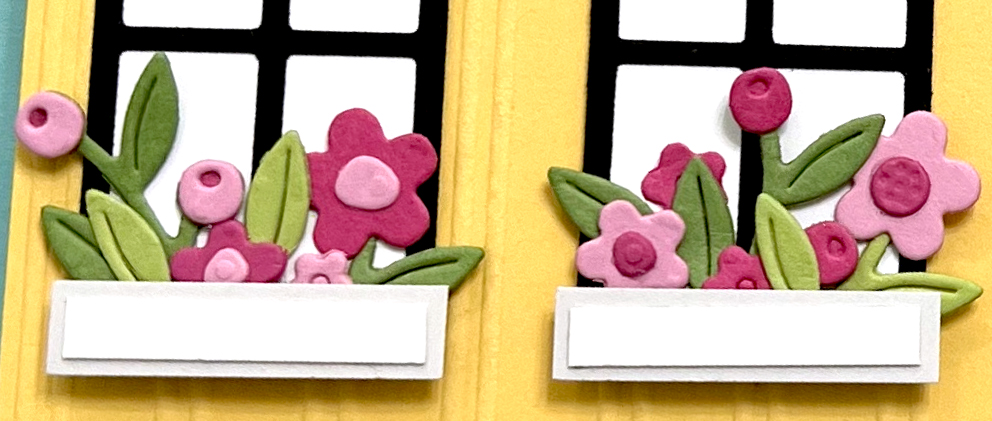
To dress up the card, I created some flower boxes. I just used a paper trimmer to make those myself, and I popped them up on foam tape. I then cut a bunch of flowers and leaves using both the Mini Fall Blooms set and the Petite Floral Potpourri set from Spellbinders. Spellbinders has a lot of die sets that contain tiny floral pieces, so they’re always my go-to when I need to add these little details.
Card 2 Supplies
The Stamp Market – House Maker Die
The Stamp Market – House Shingles Stencil
The Stamp Market – Oct 31 4evr 6×8 Paper
Hero Arts – Unicorn White Pigment Ink
Process
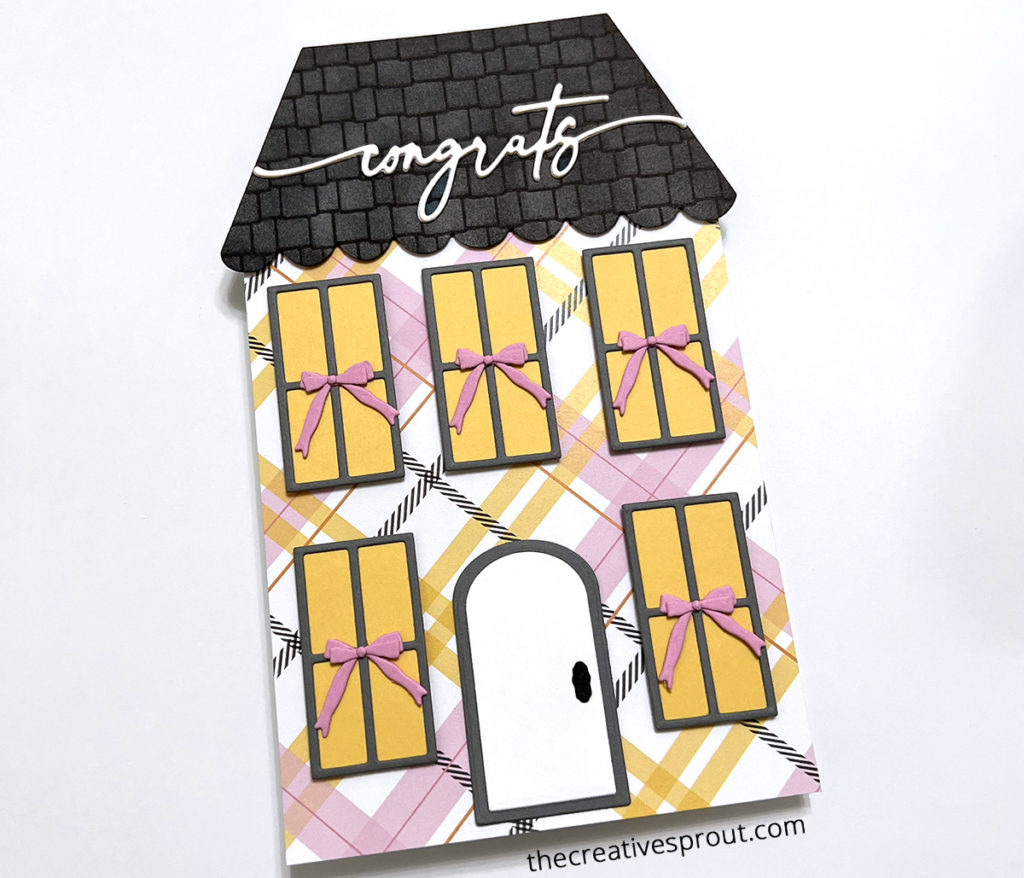
For my second card, I used a piece of patterned paper for the base of the house. This second card is a bit taller than the first one. For the roof, I used the second shingle design from the House Shingles Stencil and lightly blended white pigment ink onto a black roof. I added pink bows to the windows – the die for these bows is included in the House Maker set. Finally, I added a white “congrats” die to the roof.
That’s it for my cards today. I hope they put a smile on your face! Leave a comment and let me know which one is your favorite. Thank you so much for visiting my blog today!
Wishing you all a crafty day,
Allison
Note: External links on my blog may contain affiliate links. This gives me the opportunity to earn a small commission when you click on the links and place an order. This comes at no additional cost to you. Thank you so much for your support, as this helps me bring you more content.