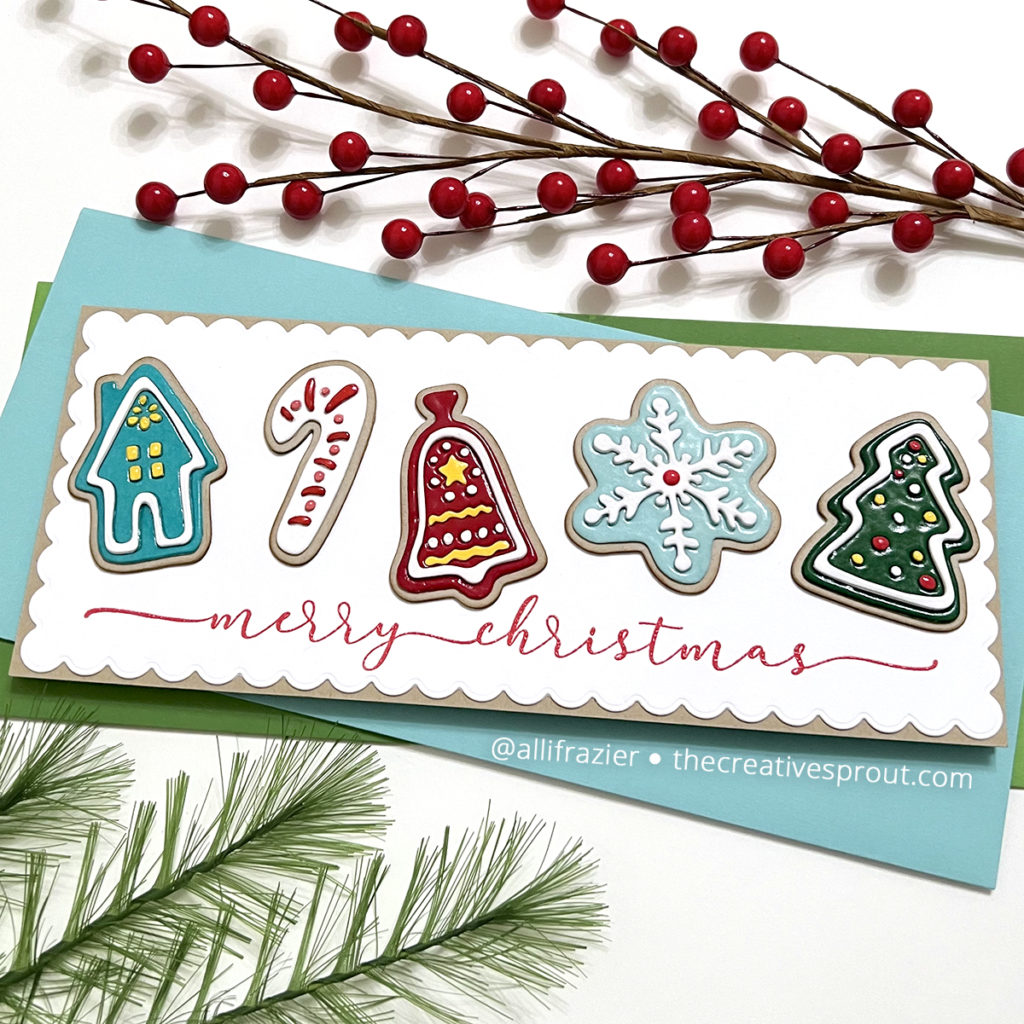
Hello, friends! It’s been awhile since my last post – I ended up taking a big break over Thanksgiving. I hope you all enjoyed your holiday, too, for those in the U.S. who celebrate. I am excited to be back in my craft room and creating again! First up is this fun slimline card featuring the Christmas Cookies die set from Tim Holtz. I made a card with this set last year, focusing solely on the snowflake cookie, and I’ve been wanting to do a follow-up ever since.
Supplies
Tim Holtz – Christmas Cookies Die Set
Impression Obsession – Winter Greetings Stamp Set
Mama Elephant – Slim Card Basics Die Set
Tim Holtz – Candied Apple Distress Oxide
Tim Holtz – Vintage Photo Distress Ink
Ranger – Clear Embossing Powder
Process
For this card, I planned on following the same process that I did for my snowflake cookie card. (See picture below)

However, I quickly realized that the other cookie shapes are not the same as the snowflake. Although each cookie shape consists of two dies (a base layer and a detail layer), there are a lot more cutouts and details on the other shapes. So, I had to come up with a plan for what I wanted to do. Just like with my previous card, I really wanted the cookies to look realistic with layers of icing. In other words, I wanted to make things more difficult than they needed to be – ha! First thing to do was to cut the base shape of each cookie. I cut each shape three times from Kraft card stock and glued them together. I then darkened the edges of each cookie with Vintage Photo Distress Ink to give them that fresh-from-the-oven look.
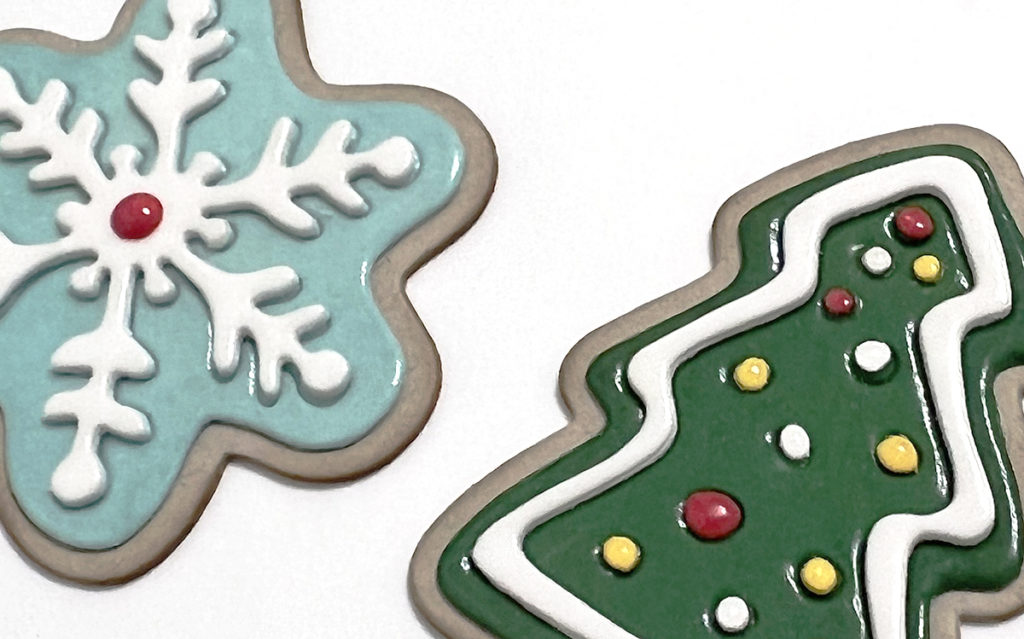
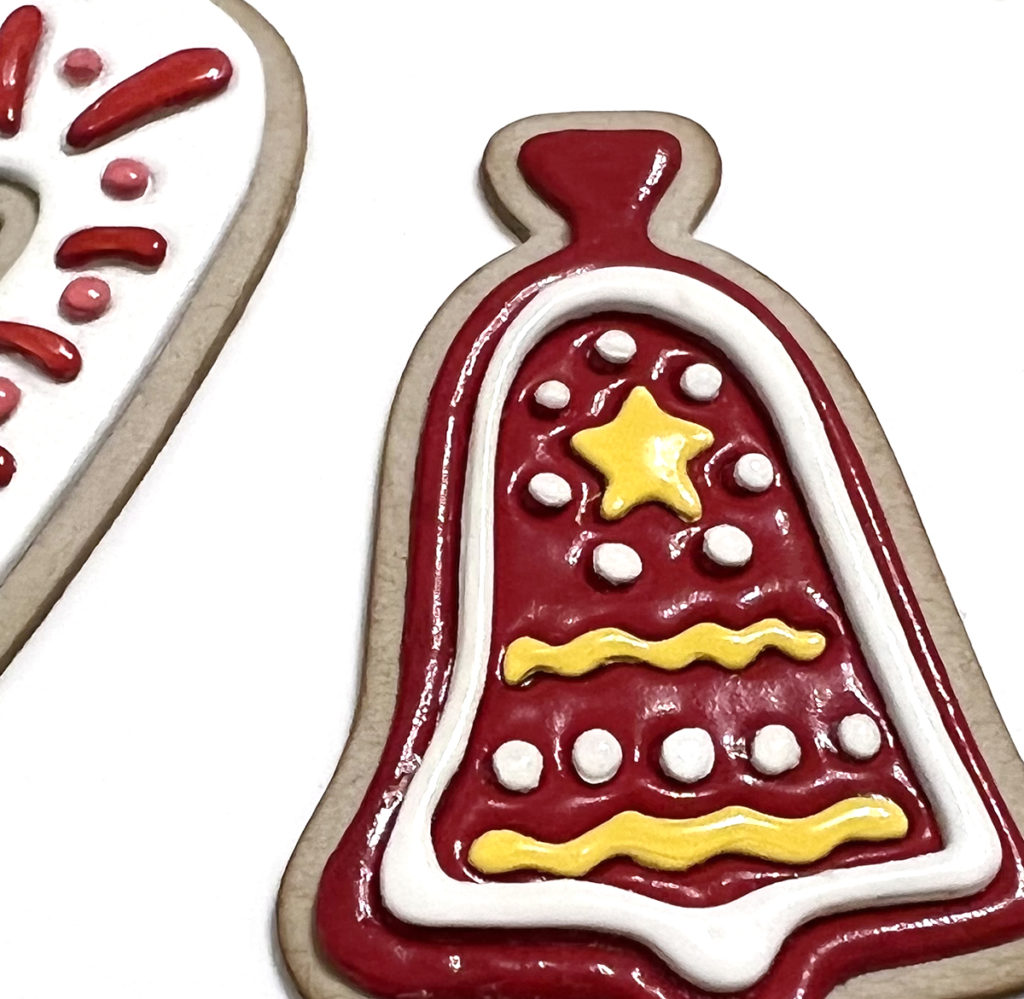
For the snowflake cookie, I cut the detail layer twice from white card stock and twice from blue card stock. I popped the fine detail snowflake out of the white layers and glued them together. For the blue layers, I left that fine detail snowflake intact and glued the two layers together. I found that it was easy to die cut the detail layers and have all the pieces stay intact if I only ran it through my die-cutting machine once. For the most part, to get all those tiny details to pop out, I had to run the dies through my machine a couple times. Once I figured out that I could keep the detail layers intact, I cut two of each shape using colored card stock – green for the tree, turquoise for the house, red for the bell, and white for the candy cane. I glued these two layers together for each cookie. I also cut two of each shape out of white card stock (except for the candy cane) and removed just the thin outer frame. I glued these two layers of outer frame together, as well.
Once I had all of my pieces ready, it was time to make them look like icing. To do that, I used embossing ink and clear embossing powder. I simply laid the die cuts on a clean piece of paper, pressed my ink pad directly onto the die cuts, transferred them into a coffee filter where I could cover them with embossing powder, and then embossed them with my heat tool. I embossed each piece twice to make the icing really shiny and smooth. The pieces that I embossed include all of the colored base layers, the white snowflake detail, the white candy cane detail, and the white outer frames for the other cookies.
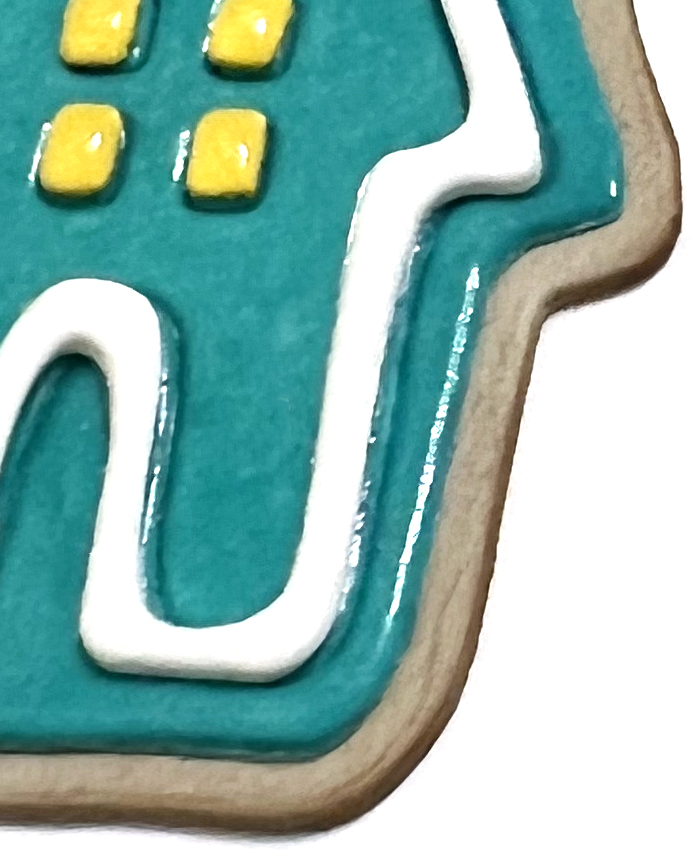
To assemble the cookies, I glued the colored, embossed icing layers onto the Kraft base layers. I then glued the embossed white detail layers on top of those. The only thing left to do was to cut out all of the tiny details from colored card stock. I cut the bell, tree and house out of yellow card stock. I cut the candy cane and tree out of red card stock. I used some of the leftover white detail pieces that I had previously cut to fill in some items, like the dots on the bell and the ornaments on the tree. I glued all of these tiny details onto the cookies, and then I covered them with Glossy Accents to maintain a consistent look of shine.
To assemble the card, I first used the scalloped die from the Mama Elephant Slim Card Basics set and cut it from white card stock. I stamped my sentiment along the bottom of that panel. I don’t have many colors of embossing powder, but what I do have is a lot of Distress Oxide inks. So, when I want a colored, embossed greeting, I stamp it with Distress Oxide and emboss with clear embossing powder. For this sentiment, I used Candied Apple. I love these slimline sentiments! These are rubber cling stamps, so they stamp really crisp. I adhered the panel to a 3.5″x8.5″ card base that I made from Kraft card stock. To finish, I just glued my cookies to the card and added a red enamel dot in the center of the snowflake.
I love how this card turned out, and I hope it puts a smile on your face. I may still love that snowflake card more, but I think it’s because it reminds me so much of cookies I used to make. Let me know which one you like better! Thank you so much for visiting my blog today.
Wishing you all a crafty day,
Allison
Note: External links on my blog may contain affiliate links. This gives me the opportunity to earn a small commission when you click on the links and place an order. This comes at no additional cost to you. Thank you so much for your support, as this helps me bring you more content.