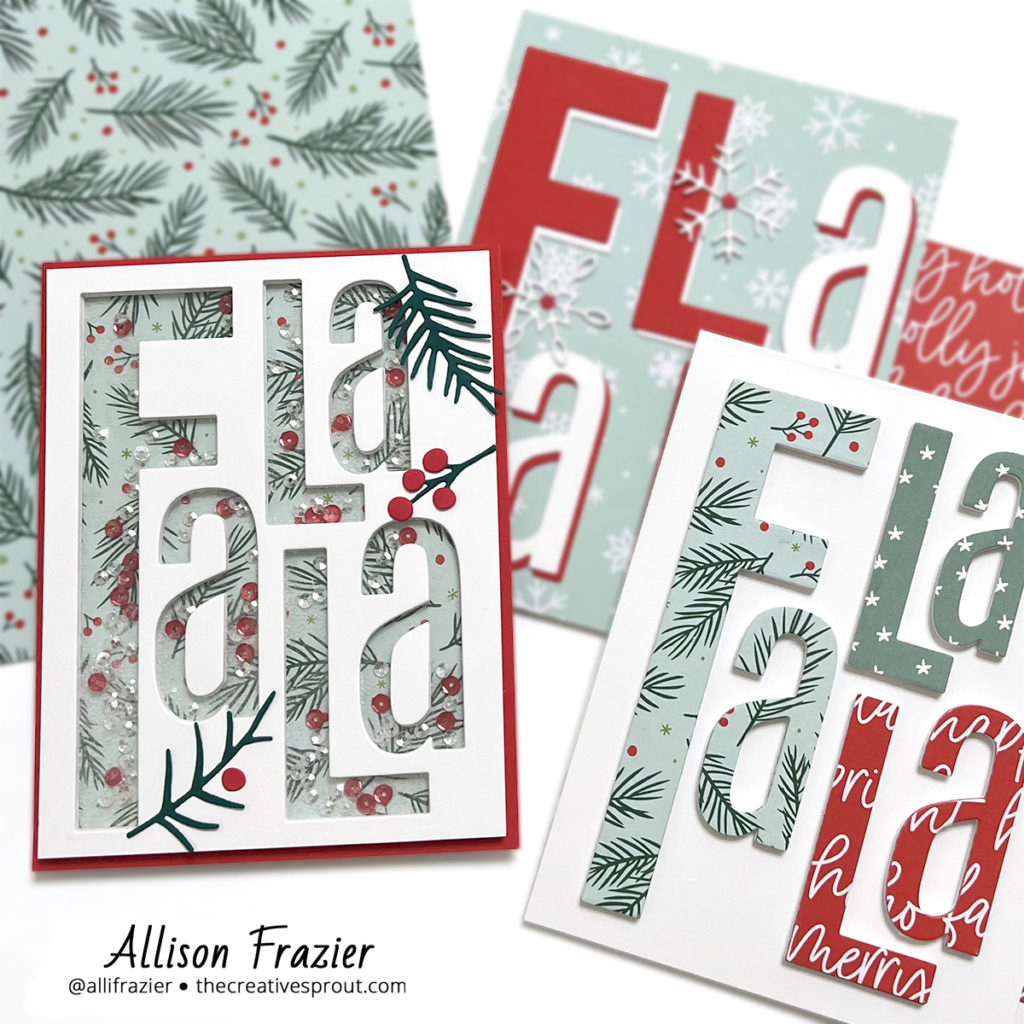
Hello, friends! I have been getting in the habit lately of making multiple cards at once. It is a good habit, for sure, and much more manageable when a die set lends itself so easily to making multiples. This Fa La La cover die from The Stamp Market is definitely that kind of die!
Supplies
The Stamp Market – Fa La La Cover Die
Concord & 9th – Be Merry Patterned Paper Pack
Concord & 9th – Boughs & Holly Dies
Birch Press Design – Felicity Snowflake Dies
Simple Stories – Baking Spirits Bright Paper Pad
Process
The reason this Fa La La cover die lends itself so easily to multiple cards is because you use part of the die cut for one card and the other part for a second (or even third) card. For my cards today, I cut five panels of white card stock with the die, stacked the negative pieces for the shaker card, and then used the letters for the other two cards. All I had to do was cut the die one more time from a piece of red card stock (for the card with the snowflake background) and then from three different pieces of patterned paper for the other card. So really, the elements for all of these cards were easy and quick to make.
For the shaker card, I glued four of the die cut panels together, adhered a piece of acetate on top of that, and then glued my fifth die cut panel on top of the acetate. The four panels of heavy white card stock create wells that are deep enough to contain shaker bits. I put a combination of thick glitter and small sequins inside the wells. I then cut a piece of patterned paper from the Be Merry Patterned Paper Pack and adhered that to the back of the shaker. This paper pack is full of gorgeous prints – I just love it! To finish off the shaker card, I added a few die cut elements using the Boughs & Holly die set. I thought these were a good match with the patterned paper
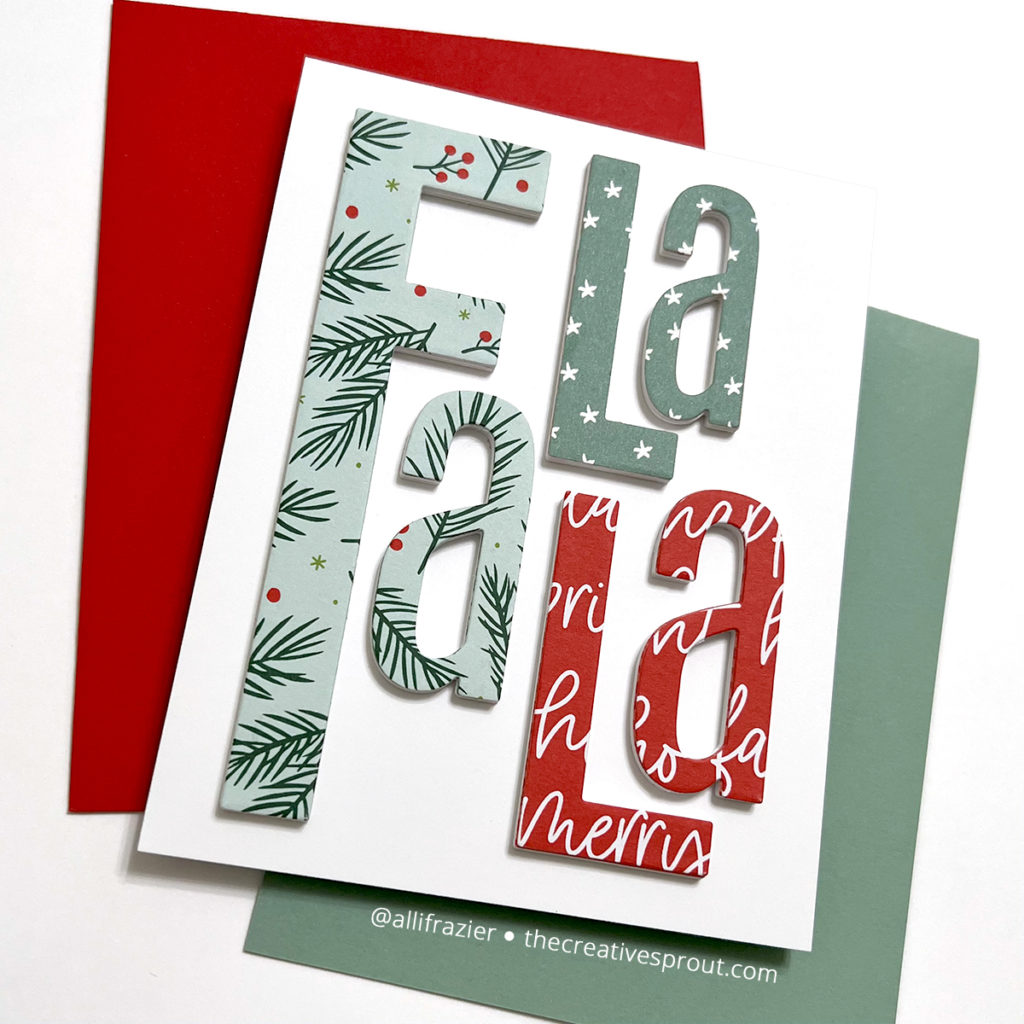
For my second card, I just stacked each of the white letters four times (remember I had five sets of these letters from my die cutting) and then topped them each with a letter that I had cut from more of the Be Merry patterned paper. To keep my colors consistent across the three cards, I went with a piece of paper from the Baking Spirits Bright Paper Pad for the top “la” (the green paper with the white stars). Is this important? Of course not! Pick any colors and any patterns you like! This card would also be fun if every letter was a different color or pattern. In order to adhere the letters in the same position as the original die, I used the red panel that I had already die cut as a template.
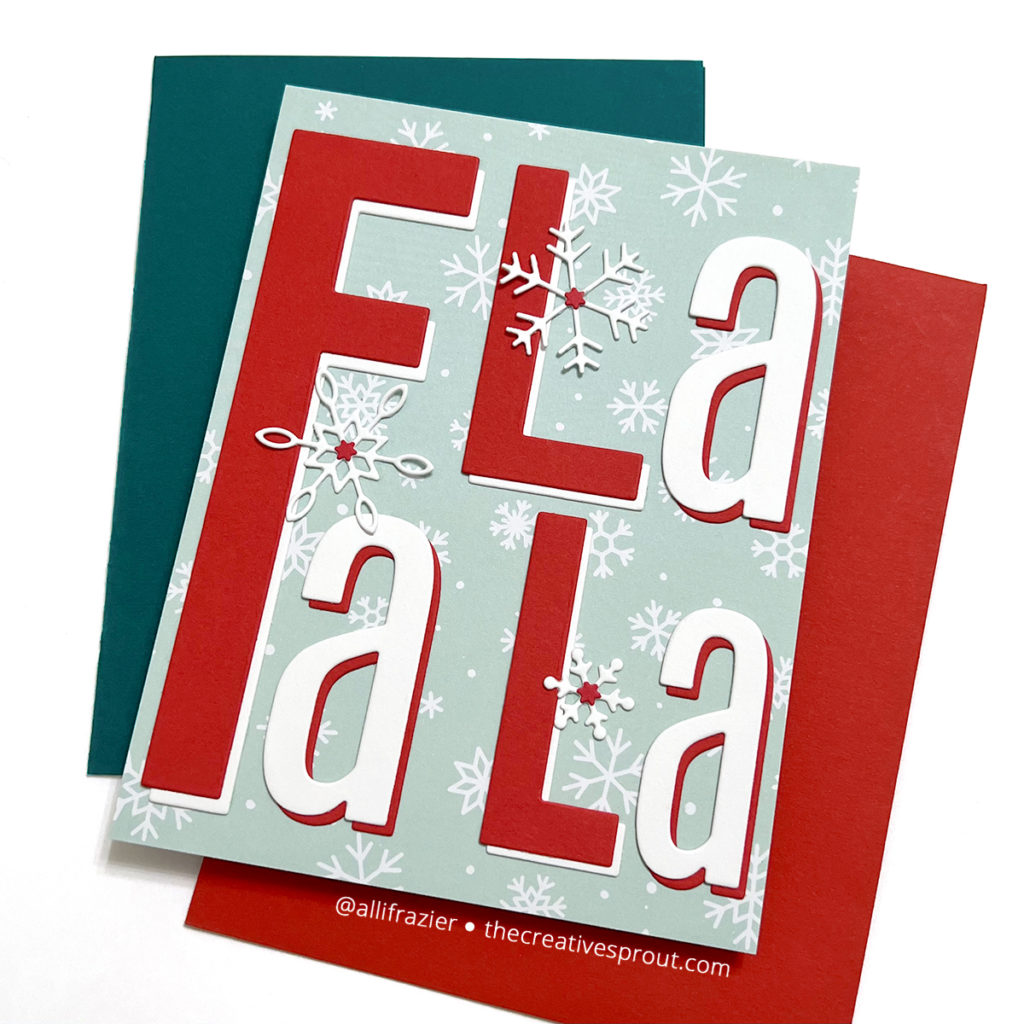
Speaking of the red panel, the letters that I cut out of that ended up on this third card, along with the fifth set of white letters. I just offset the two colors to create a shadow effect. For this card, I chose not to put the words in the same orientation as the original die. I just played around with them until I liked what I had. I adhered them to a card base that I had already covered with another piece of the Be Merry Patterned Paper. I added some snowflake dies as an embellishment to tie into the patterned paper. What happened to the red panel that I had cut the letters out of? I used that to cover the A2 card base that my shaker panel went on! Like I said, I used all the pieces and parts of my die cuts for the three cards, and I love that there was no waste.
That’s it for my cards today. I hope they put a smile on your face! Leave a comment and let me know which one is your favorite. Thank you so much for visiting my blog today!
Wishing you all a crafty day,
Allison
Note: External links on my blog may contain affiliate links. This gives me the opportunity to earn a small commission when you click on the links and place an order. This comes at no additional cost to you. Thank you so much for your support, as this helps me bring you more content.