Hello again, crafty friends! I am back with a pair of fun Halloween cards using this amazing layering stencil from Simon Says Stamp. It is so good, that all it needs is a sentiment.
Card 1 Supplies
Simon Says Stamp – Layered Spooky Icons Stencil Set
CZ Design – Reverse Witch Please Sentiment Strips
Tim Holtz – Distress Oxide Inks
Simon Says Stamp – Small Blending Brushes
Simon Says Stamp – Fog Gray Card Stock
Pretty Pink Posh – 4mm Sequins
Memory Box – Black Glossy Card Stock
Making the First Card
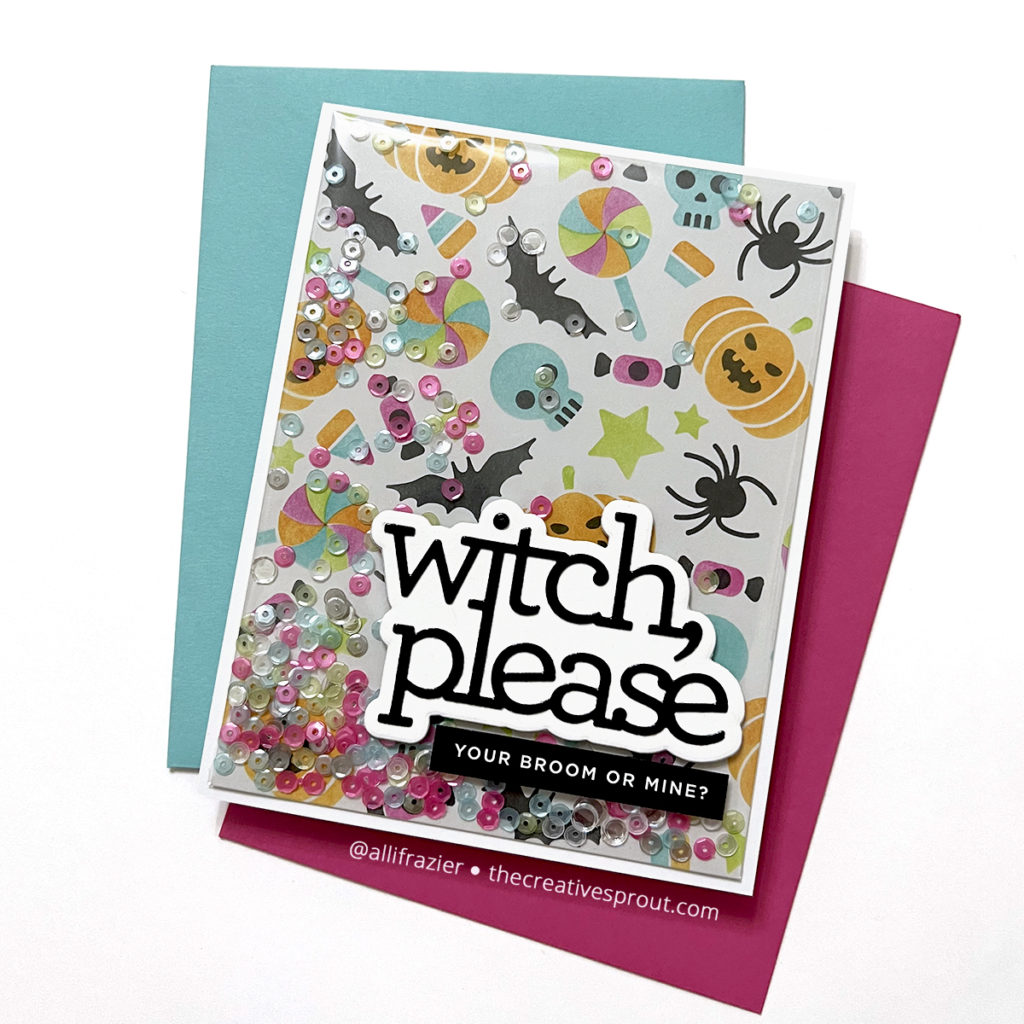
I started with a panel of Fog Gray card stock, which is one of my favorite neutral backgrounds. Since I wasn’t using a white background, I used Distress Oxide inks for my stenciling. The pigment properties of the Oxides ensure that the colors will still be vibrant on colored card stock. I used the following colors: Picked Raspberry, Twisted Citron, Black Soot, Spiced Marmalade, and Salvaged Patina. There are four stencils in this layering set, and you can easily get a great result by just blending one color per stencil. But of course I made it more difficult for myself because I wanted those lollipops to be different colors. It wasn’t really all that difficult – I just had to make sure that I masked off any parts of the stencil that were close to the spaces that I was using a different color. I use washi tape to do this. Once I was done stenciling, I cut my panel down to 4″x5.25″ and set it aside to allow the Oxides to dry.
I cut the word die from black glossy card stock and the shadow from white card stock. I cut the sub-sentiment using my paper trimmer and ran a black marker around the edges to get rid of the white core that you would otherwise see. I decided last minute to make this a full (or “infinity”) shaker. I just used some leftover stamp packaging and wrapped it around the panel using Scor-Tape. I left one side unsealed so that I could drop in some various colored sequins, and then I sealed up that last side. I used Scor-Tape to adhere this panel to a white A2 card base. All that was left was glueing my sentiments on top, and it was done!
Card 2 Supplies
Simon Says Stamp – Layered Spooky Icons Stencil Set
Simon Says Stamp – Outline Halloween Die
CZ Design – Reverse Witch Please Sentiment Strips
Simon Says Stamp – Small Blending Brushes
Making the Second Card
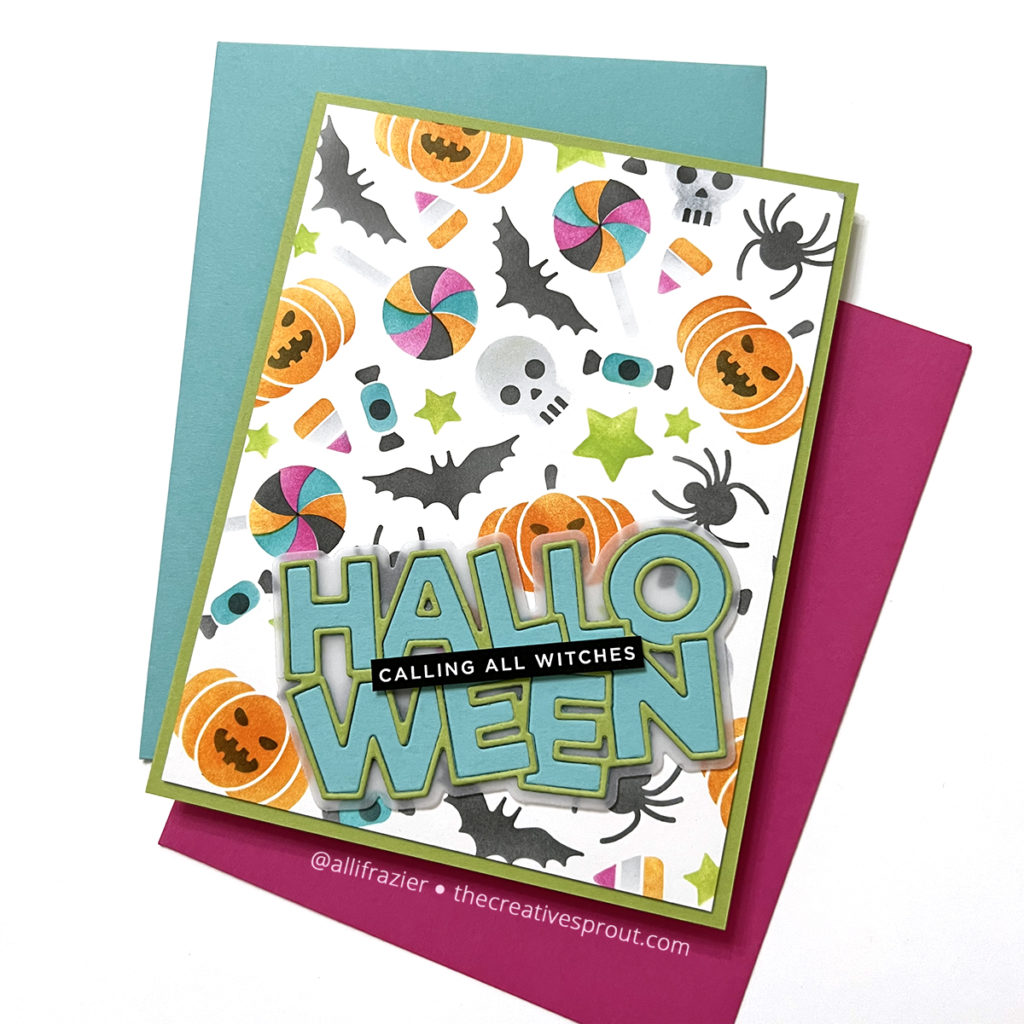
This is essentially the same card as the first one, except it’s not a shaker, and I used regular Distress Inks instead of Oxides (since my background is white). I used similar colors, although I believe I substituted Mermaid Lagoon and Carved Pumpkin inks, as well as the addition of Weathered Wood. I love this Halloween die because it not only has a shadow die, but the word die cuts out the letters and the thin outline. I cut the word out once from turquoise card stock and then again from green card stock. I inlaid the blue letters into the green outline and then glued this onto a vellum shadow. The sub-sentiment is from the same set of sentiment strips as the first card. There are just so many great sentiments in this set – it’s hard to choose just one!
That’s it for my cards today. I really love how they turned out. I hope they put a smile on your face. Thank you so much for visiting me today – I appreciate you all!
Wishing you all a crafty day,
Allison
Note: External links on my blog may contain affiliate links. This gives me the opportunity to earn a small commission when you click on the links and place an order. This comes at no additional cost to you. Thank you so much for your support, as this helps me bring you more content.