Hello, crafty friends! I know it’s been awhile since I have posted anything. I have been working on a lot of projects behind the scenes that you’ll see soon. But, I have also been dealing with a pinched nerve in my back, which has not been fun. The good news is that I started going to physical therapy last week, and I’m definitely noticing some improvement. The other good news is that the chair in my craft room is one of the few places that I can sit comfortably during the day! Meanwhile, I have been taking the opportunity to slow down, and while I do that, I have been pulling some backgrounds from my stash to make into completed cards.
Card 1 Supplies
Simon Says Stamp – Winter Floral Mix Background Stamp
The Stamp Market – Say Hello Foil Plate & Die
Spellbinders – Polished Brass Hot Foil
Tonic Studios – Nuvo Shimmer Powders
Spellbinders – Fashion Gold Embellishments
Spellbinders – Glimmer Hot Foil System
Making Card 1
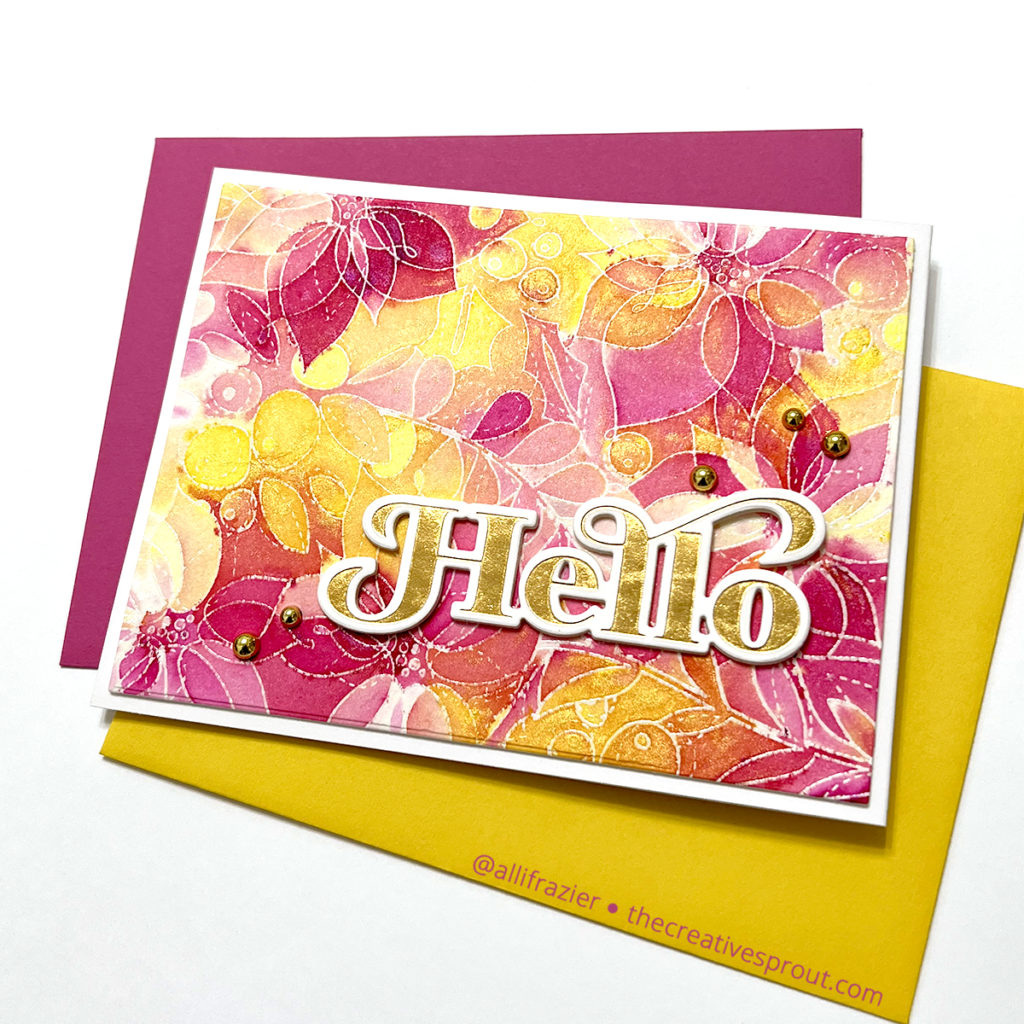
Playing with shimmer powders is one of my favorite ways to make a background. All you need to do is white heat emboss a background stamp onto watercolor paper. You can also use clear embossing powder, since the watercolor paper is already white. From there, all you do is sprinkle the shimmer powder onto the paper and spritz with water – the powders do the work for you. For this card, I used the Winter Floral Mix background stamp and two of my favorite colors of powders – Cherry Bomb and Solar Flare. I can’t tell if Tonic Studios has discontinued Solar Flare or not, but it’s still available at some resellers. It looks like Tonic has another yellow color that I may have to add to my collection. Before I add my shimmer powder backgrounds to my stash, I make sure they dry completely, and then I seal them. I use Kamar Varnish, but there are a lot of other options out there for sealing, so definitely use what you have and what you like.
To make this background into a completed card, I chose the Hello hot foil plate from The Stamp Market, and I foiled it onto white card stock with Polished Brass hot foil. I love the font of this plate. I used the matching die to cut it out, and then I cut out 2 more layers from plain white card stock in order to stack them for dimension. To finish my card, I added a few gold embellishments around the sentiment. A Hello card is always handy to have in your stash – there are so many occasions for which you can use it.
Card 2 Supplies
Simon Says Stamp – Thank You Text Background Stamp
My Favorite Things – Radiating Rays Stencil
Waffle Flower – Oversized Thank You – Print
Lucy’s Cards – Glossy Eggshell Pearls
Waffle Flower – Mini Stencil Mat
Making Card 2
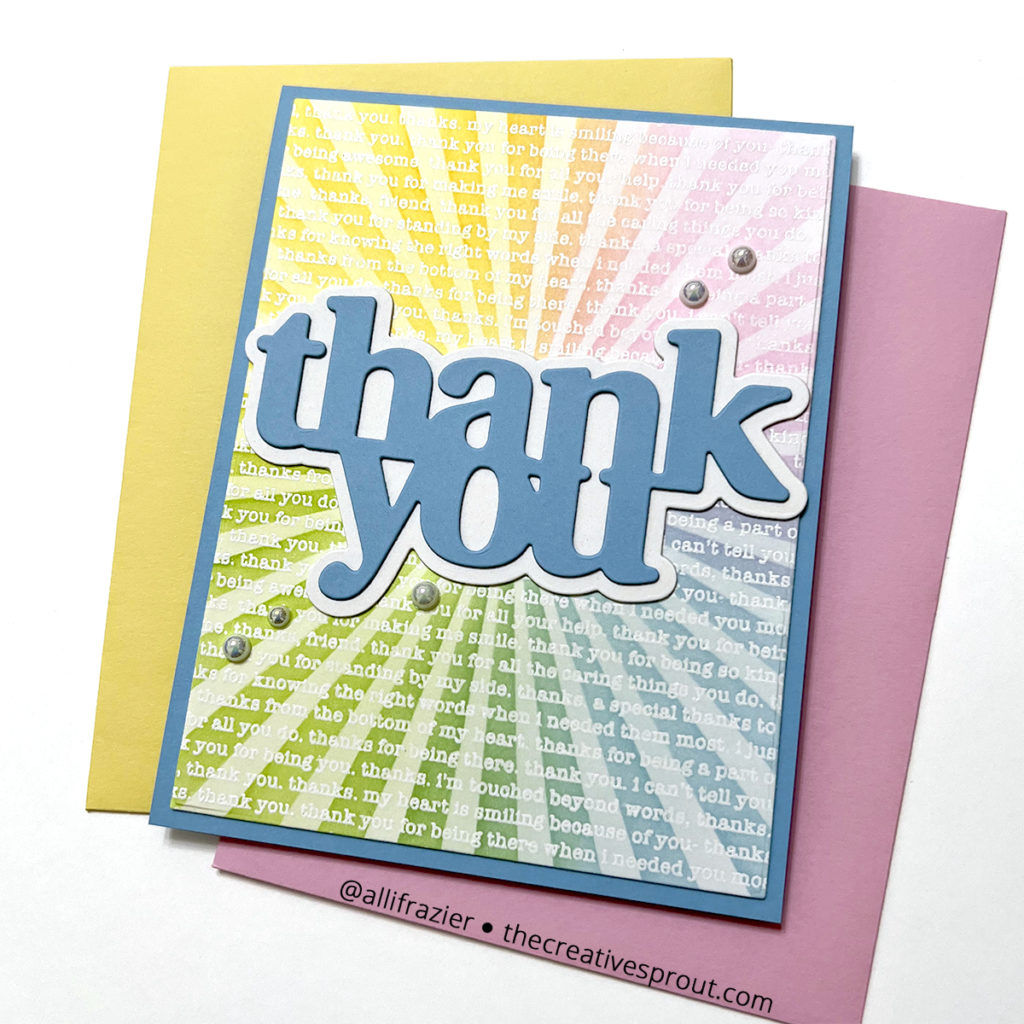
Another easy way to make an emboss resist background? Pull out your inks! For this card, I started the Thank You Text stamp from Simon Says Stamp. Simon makes a lot of great background stamps, and I especially love ones with little details like text that allow you to combine it with other patterns on your card. After I heat embossed the stamp onto white card stock, I used the Radiating Rays Stencil and some of my favorite Distress Ink colors – Mustard Seed, Kitsch Flamingo, Broken China, and Twisted Citron. Once I was done blending these colors through the stencil, I removed the stencil and then very lightly blended the same or lighter inks where the white card stock was still showing. I think that it helps to not have such a sharp contrast between the rays, but for some designs, that contrast might be exactly what you’re going for. When you apply inks over heat embossed images, the embossing resists the ink, but you still need to wipe off any ink that may be sitting on the surface.
To make this background into a completed card, I chose this fun, big Thank You sentiment die from Waffle Flower. I cut the words from the same blue card stock that I used to make the card base, and I cut the shadow from white card stock. Again, I cut a couple extra layers of the shadow in order to create dimension. I also have an extra layer of the blue words to make it stand it out more from the shadow. A smaller sentiment may have been better so that I didn’t cut the sun ray design in half, but I wanted to completely cover the circle in the middle (from the design of the stencil), and I just love this die so much. It is a very big thank you that I plan to give to my physical therapist when I am finished with this pinched nerve – fingers crossed that it will be soon!
That’s it for my cards today! I hope they bring a smile to your face. Thank you so much for visiting and let me know in the comments which card is your favorite.
Wishing you all a crafty day,
Allison
Note: External links on my blog may contain affiliate links. This gives me the opportunity to earn a small commission when you click on the links and place an order. This comes at no additional cost to you. Thank you so much for your support, as this helps me bring you more content.