Hello, Friends! I hope you are all doing well. I have a few cards to share with you today using some new 3D embossing folder and die sets from Memory Box. These sets also have matching stencils, and the whole concept is so cool and fun to play with. I made three very different cards. Let’s get started!
Card 1 Supplies
Memory Box – Ocean Fish 3D Embossing Folder and Dies
Memory Box – 3D Ocean Fish Layering Stencils
Waffle Flower – Lacy Circles Dies
Altenew – Featured Sentiments Die Set
Memory Box – Clear Fairy Drops
Tim Holtz – Distress Spray Stains
Waffle Flower – Mini Stencil Mat
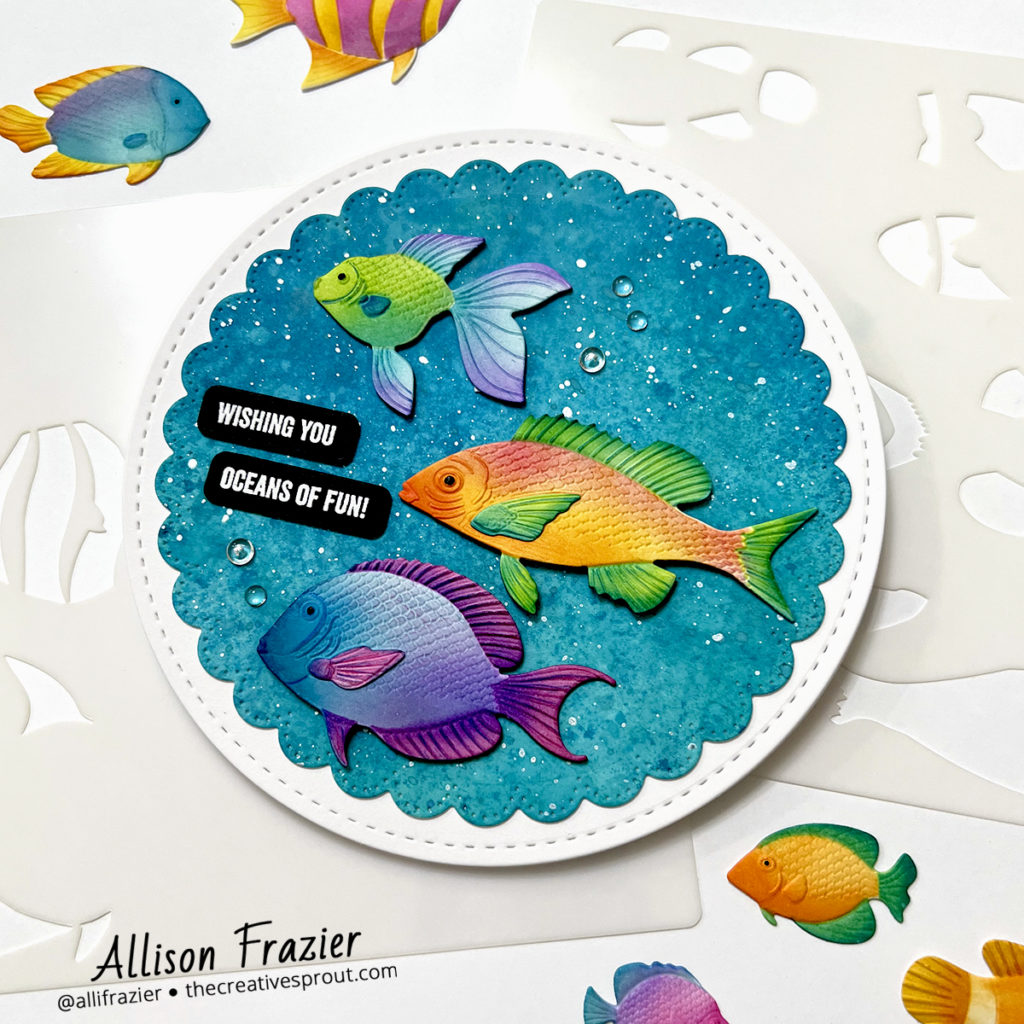
Making the First Card
I started out by spraying several shades of blue Distress Spray Stain onto some watercolor paper. I then splattered some of the stain and followed up with splatters of some white acrylic paint. I used the largest scallop circle die to cut this out. I then mounted that onto a white circle that I had cut using the largest die from this Lacy Circles set. I created a second white circle, scored a line about 1/2″ down to create a hinge, and mounted the panel to the hinge in order to create the circular card base.
Now onto the fish! I first used the dies to cut all of the fish from heavyweight white card stock. I then put the fish into the embossing folder and ran that through my die cutting machine – it’s really easy to fit the fish into their respective spots in the folder. After they were embossed, I laid them onto my Mini Stencil Mat and then blended different shades of ink through the layered stencils. So much fun! I added some thin foam tape to the backs of the fish and mounted them onto the card panel. To finish the fish, I added the eyes with a black gel pen.
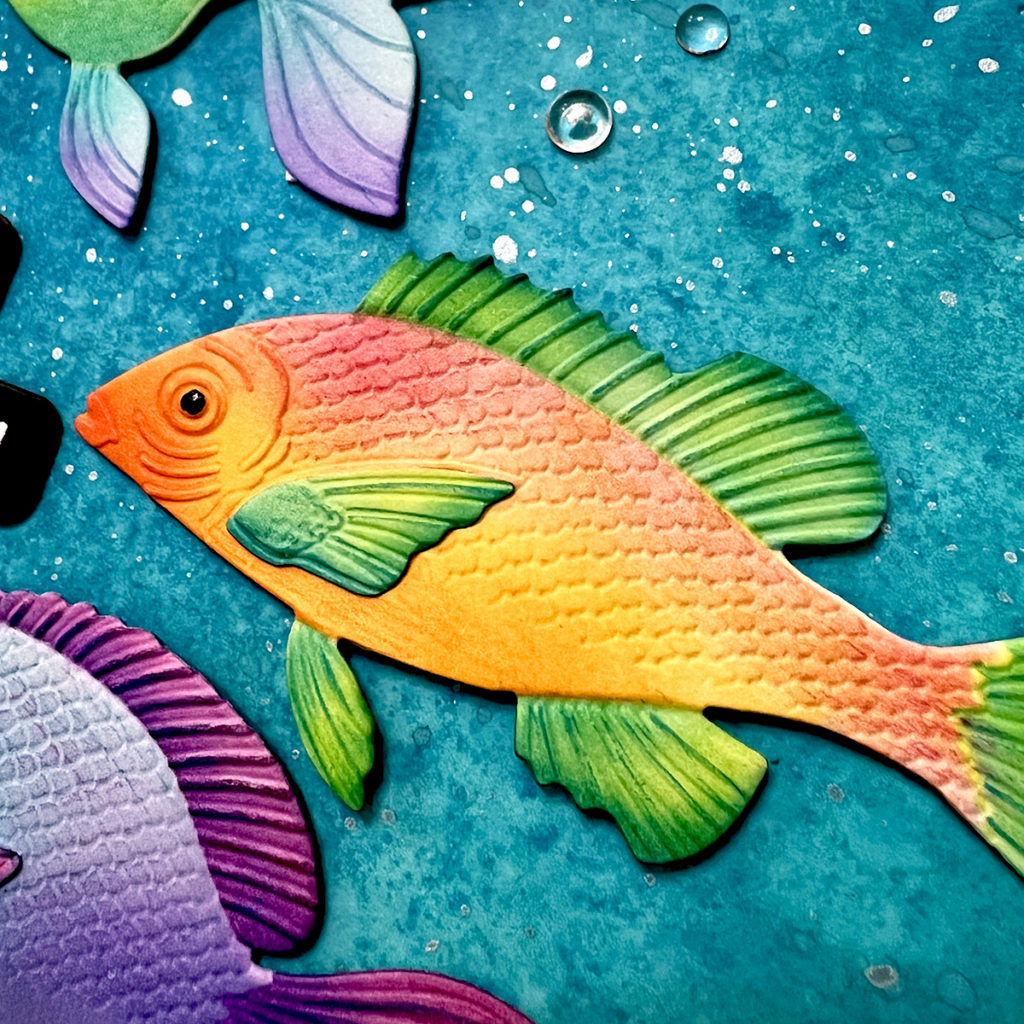
The sentiment comes from a very old stamp set in my stash. I heat embossed it onto black card stock, and then cut them out with the Featured Sentiment Die Set. To finish the card, I added some clear Fairy Drops around the panel.
Card 2 Supplies
Memory Box – Ocean Fish 3D Embossing Folder and Dies
Memory Box – 3D Ocean Fish Layering Stencils
Memory Box – Curling Waves 3D Embossing Folder and Dies
Memory Box – Curling Waves Layering Stencils
Spellbinders – Color Block Scenic Scape Die Set
MFT – You Keep Me Afloat Stamp Set
Memory Box – Clear Fairy Drops
Ranger – Stickles Glitter Glue – Twinkle
Waffle Flower – Mini Stencil Mat
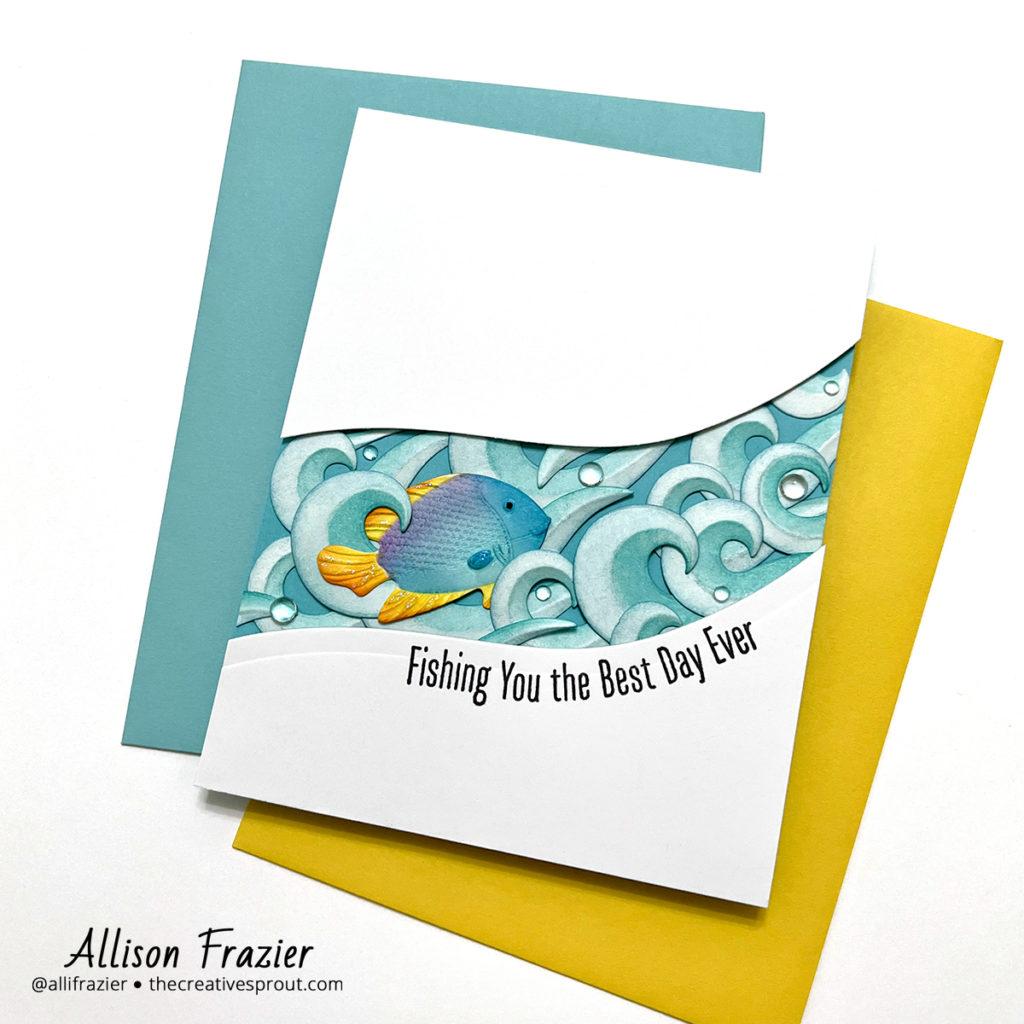
Making the Second Card
My second card started out with one of the fish leftover from making the first card. I then repeated the same process for the Curling Waves: cutting the waves out with the dies (this time from watercolor paper), embossing them in the folder, and then blending ink through the stencils. To create the wavy shape to contain the waves, I used one of the dies from the Color Block Scenic Scape set. I just made one cut onto an A2 sized panel of white card stock, and then I made straight cuts along the bottom of one and the top of the other resulting pieces.
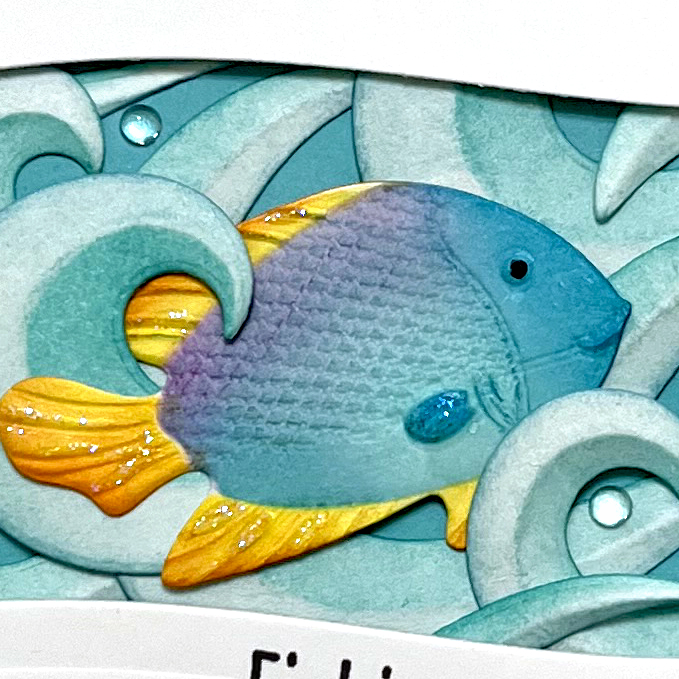
Holding the two white pieces in temporary position over an A2 card base, I figured out how to lay all of the waves until I was happy with how it looked. I then glued the waves into place and then adhered the white pieces on top, using craft foam to give them dimension. I tucked the little fish into some of the waves and added a bit of Stickles to its fins. I scattered some Fairy Drops around the waves and then finished up the card by stamping the sentiment. This sentiment comes from a set that was JUST retired by MFT last week – it is still currently available until it sells out, although it will still be available from other resellers for awhile. I was able to stamp along that curve by manipulating the stamp inside my MISTI.
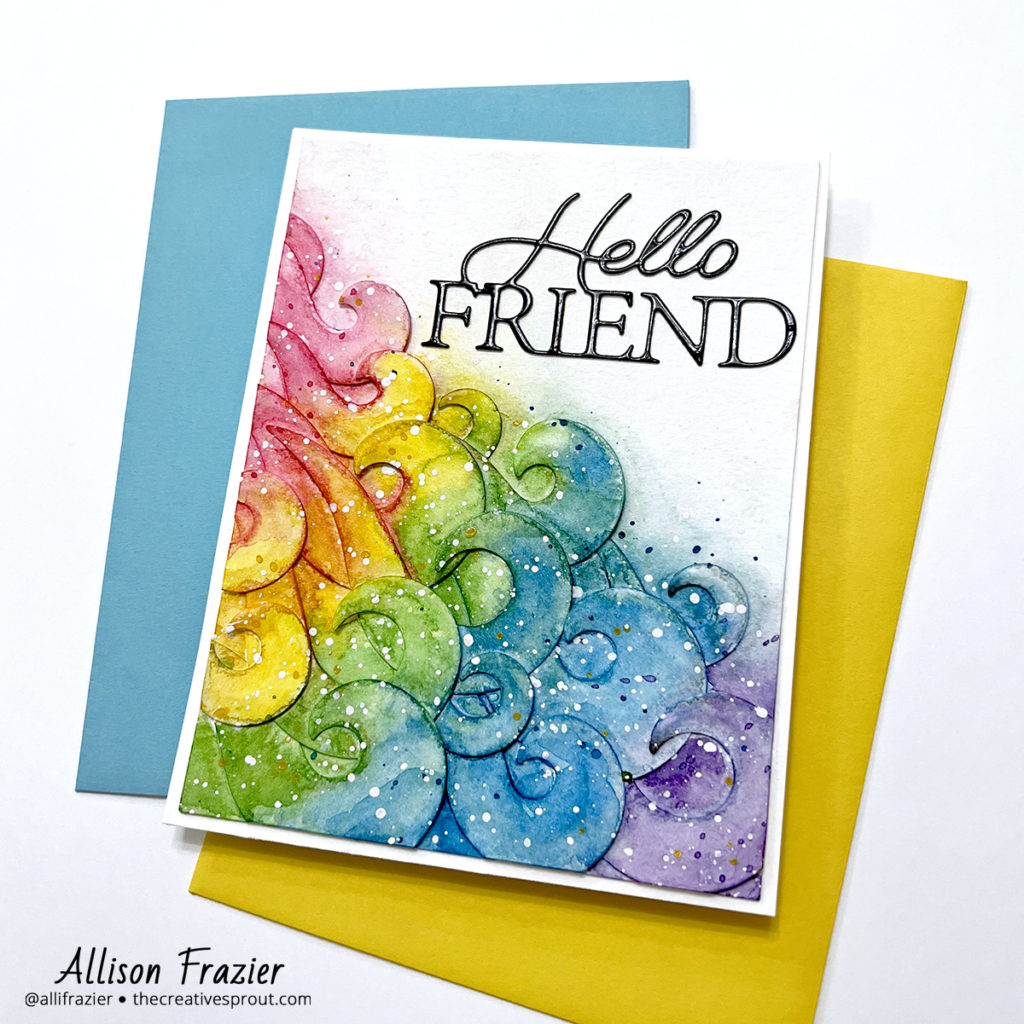
Card 3 Supplies
Memory Box – Hello Friend Posh Script Die
Memory Box – Curling Waves 3D Embossing Folder and Dies
Memory Box – Black Glossy Card Stock
Now for some real creative fun! This third card is definitely different than the others. I used the waves that I made from the second card (that I had kept uncolored). Notice that I used waves on the second card that go in one direction, and this card uses the waves that go in the other direction. I glued these uncolored waves onto a panel of watercolor paper and let the glue dry before moving on. I then wet the panel with a large, flat paintbrush and then started dropping the watercolors in with a large round paintbrush. It has been awhile since I pulled out my watercolor paint, and I forgot how much I love these. As you can see, I used rainbow colors and let the paint settle into all the nooks and crannies created by the dies. I heat set between each layer, as I did add several layers of paint to make it more vibrant. I also splattered some of the paint, in addition to some white acrylic paint, over the waves. I tried to keep the rest of the panel pretty clean so that I could add the die cut sentiment.
I love how different these cards turned out, and yet they all started with the same supplies and process. These 3D embossing folders with matching dies are such game changers, for sure. And they are so much fun to play with! Thank you so much for joining me today. I hope these cards put a big smile on your face.
Wishing you all a crafty day,
Allison
Note: External links on my blog may contain affiliate links. This gives me the opportunity to earn a small commission when you click on the links and place an order. This comes at no additional cost to you. Thank you so much for your support, as this helps me bring you more content.