Hello, friends! This week has flown by, and while it was a hot, hot spring when it started, it is now winter again. We are getting a big dumping of snow here in Colorado! Crazy, right? There are so many graduation ceremonies and parades that are being rescheduled and relocated. And speaking of graduation, I have a few cards to share with you today. Both of them feature products from Simon Says Stamp / CZ Design.
Card 1 Supplies
CZ Design – Grad Word and Shadow Die
The Greetery – Year In, Year Out Sentiments Stamp Set
Hero Arts – Circle Infinity Die Set
Waffle Flower – Blending Brushes
Making the First Card
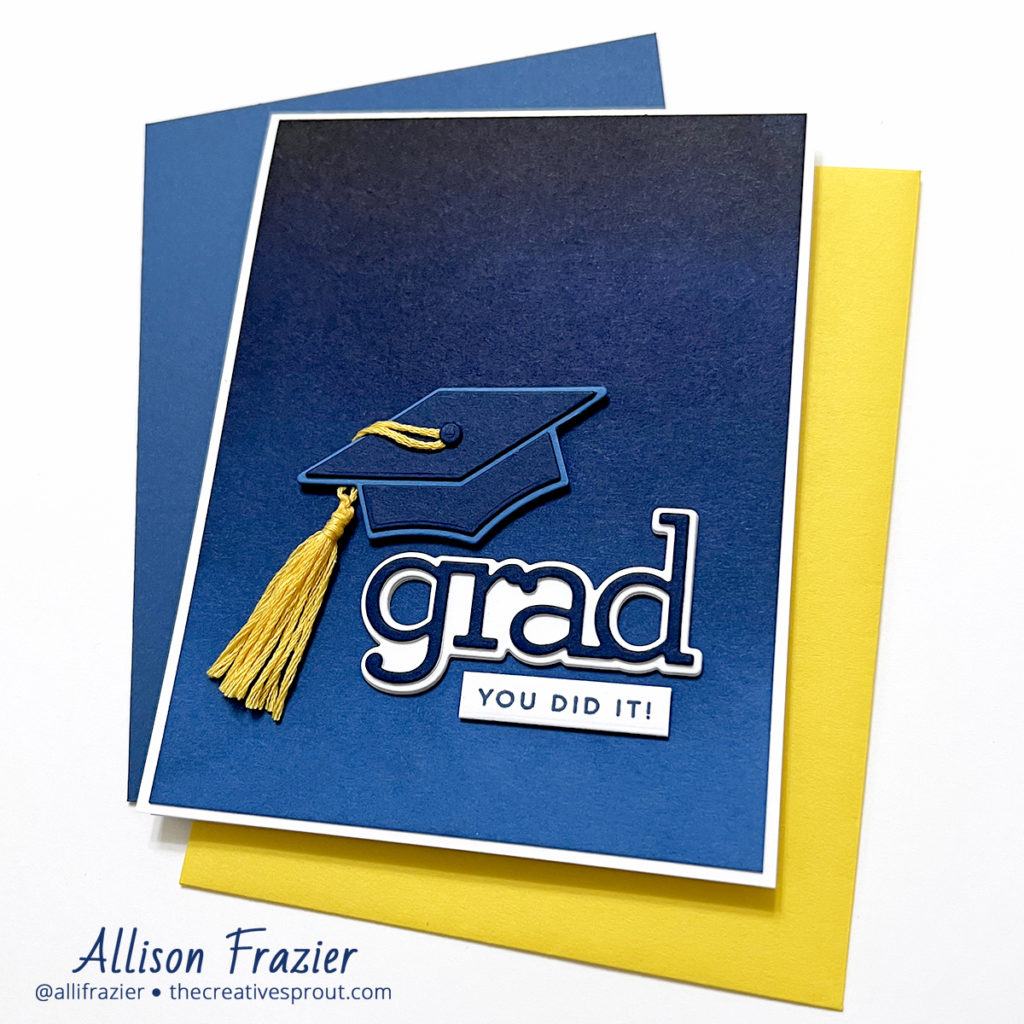
For the background of my card, I started with a piece of blue card stock. I then blended a couple shades of darker blue ink along the top and middle in order to create an ombre look. I also blended a little bit of black towards the top to make it even darker. I mounted this panel (which is 4″x5.25″) onto a white A2 card base.
I die cut the “grad” out of a dark blue card stock and mounted it onto a white shadow (the shadow is actually several layers stacked together for dimension). For the cap, I used a lighter blue card stock for the base and then the darker blue card stock for the separate pieces, which give it dimension. For the tassel, I used some yellow embroidery floss. I actually watched a Youtube video on how to make a tassel! I’ve made them before, but somehow I always find it helpful to refresh my memory by watching someone else do it. I poked a hole in the middle of the cap and fed the end of the tassel through it, taping it onto the back. I then covered the hole with a dark blue circle that I cut with the tiniest of circle dies.
To finish the card, I stamped the sentiment in dark blue ink and trimmed it down. I adhered everything to the card base, and that’s it! I wanted this to be very clean and simple, which is rare for me!
Card 2 Supplies
Birch Press Design – Let’s Party Sugar Script Dies
Waffle Flower – A2 Infinity Shaker Cover
Waffle Flower – Blending Brushes
Tim Holtz – Distress Oxide Inks
Making the Second Card
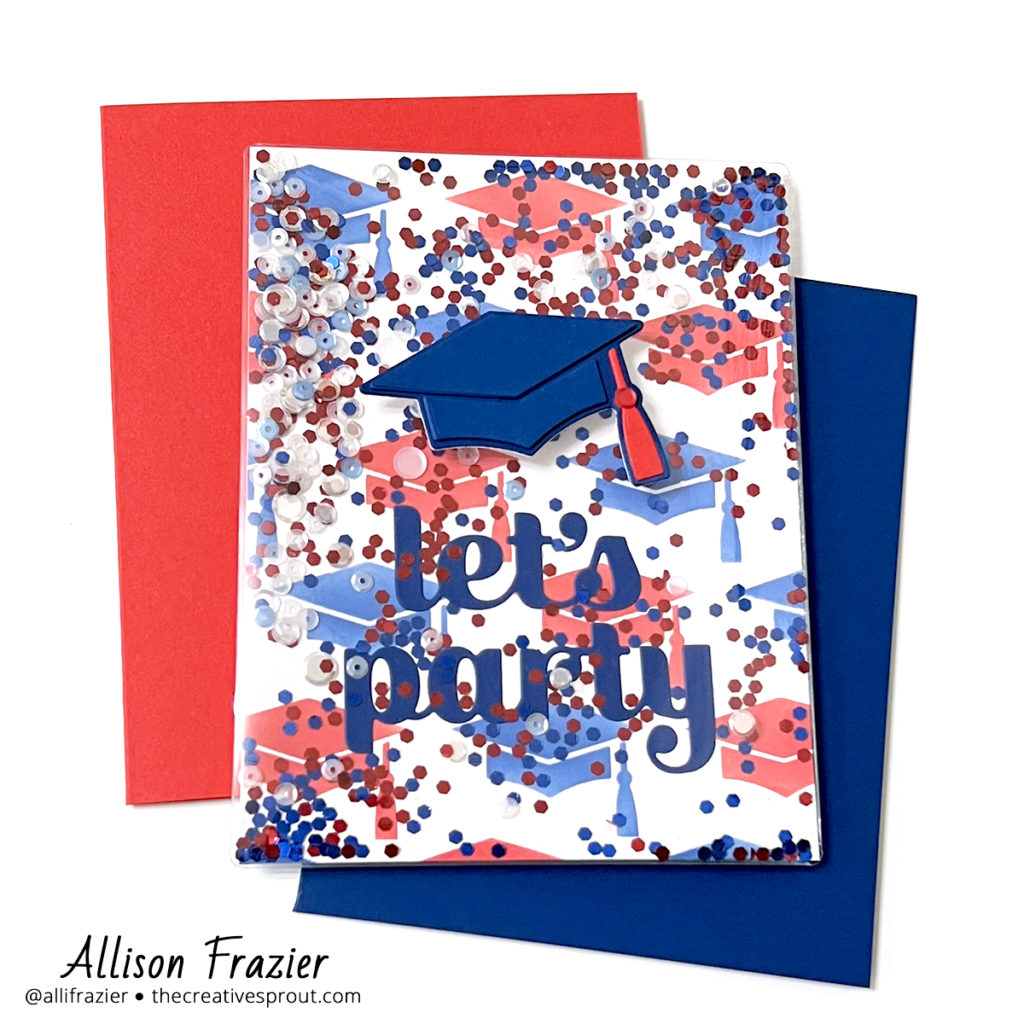
I started with an A2 panel of white card stock and blended Prize Ribbon and Festive Berries Distress Oxide Inks through the stencil. I let that ink dry for several hours while I was off doing other things. I wanted to make sure it was completely dry before making it into a shaker card, so that none of the sequins would stick to the ink. I die cut the “let’s party” from blue card stock and glued that directly to my panel. Usually I put a sentiment on the outside of my shaker cards, but this time I put it on the inside. You gotta shake things up some times. Get it? Ha.
This shaker card couldn’t have been simpler to assemble, thanks to the shaker covers from Waffle Flower. You just put the panel inside, secure three sides of the cover to the back of your panel, throw some sequins in there, and secure the fourth side. Easy peasy! I did end up attaching the cap to the outside of the shaker. I cut the cap from the same blue card stock as the words. The separate pieces were cut from a blue card stock that is ever so slightly lighter – I think it gives the cap a little bit of dimension. The tassel was cut from red card stock.
That’s it for my cards today! I hope they put a smile on your face. Leave a comment to let me know which card you like better – simple or shaker. As always, thank you for visiting.
Wishing you all a crafty day,
Allison
Note: External links on my blog may contain affiliate links. This gives me the opportunity to earn a small commission when you click on the links and place an order. This comes at no additional cost to you. Thank you so much for your support, as this helps me bring you more content.