Hello, friends – I hope you all are doing well. It is full-on spring here in Colorado, so of course that means I’m going to make some Christmas cards – ha! Not that I ever need inspiration to make holiday cards (they are my favorite), but I have a few letters from the brand new Stitched Alphabet Collection from Spellbinders and couldn’t wait to play – oh joy!!
Now, many of you may be thinking, “But Allison, I already have a hobby. I don’t want to start stitching.” I hear ya! What I love about the Spellbinders’ stitching dies is that you really don’t have to stitch them. No, really!
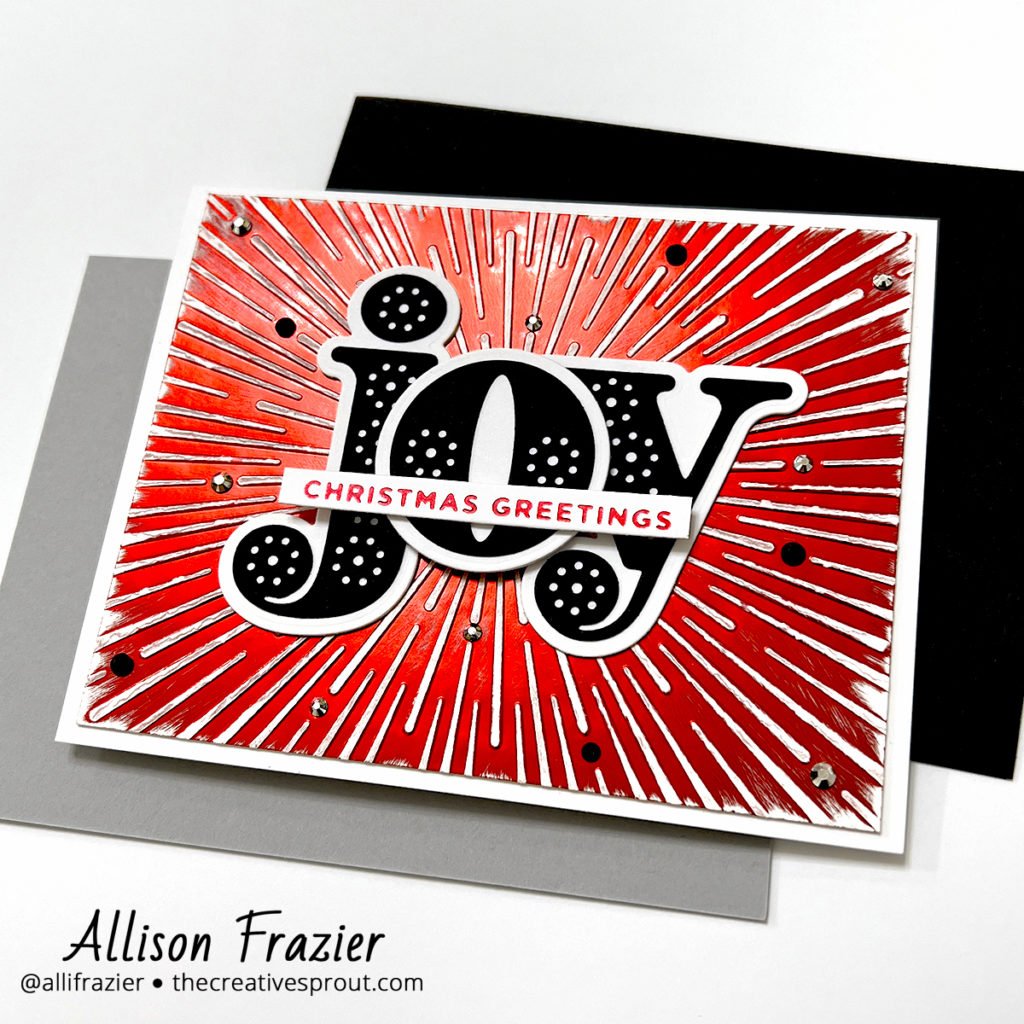
Card 1 Supplies
Spellbinders – Mini Christmas Sentiment Strips Hot Foil Set
Spellbinders – Radiant Burst Embossing Folder
Spellbinders – Glimmer Hot Foil System
Memory Box – Rainbow Reflections Mirror Pad
Making the Card
The first thing I did was to emboss a red piece of glossy card stock with the embossing folder by running it through my die cutting machine. This embossing folder was last month’s Embossing Folder of the Month, but it is available for regular purchase. This is a new club that Spellbinders recently started. If you haven’t heard of their monthly clubs, you should definitely check them out. For this particular club, you pay the same price for the embossing folder as you would otherwise, BUT the shipping is free and you can cancel at any time. The best part is that these folders are so large, you can emboss a slimline panel or even a 5″ x 7″ panel (and yes, they still fit into the die machine).
Back to the card. Once my glossy card stock was embossed, it was very impressive and shiny. Maybe too shiny. I decided to rough it up a bit with a sanding block. The cool thing about this paper is that, when you sand the top layer off, you’re left with white (which is the color of the back of the paper).

The rest of the card was straightforward. I cut the stitched letters out of black card stock and the corresponding shadows from white card stock. Like I said, you don’t have to stitch these die cuts! The stitching police will not show up at your door – I promise. I hot foiled my sentiment on white card stock with the red foil and then arranged all of my elements onto the card. I finished with some black and silver gems.
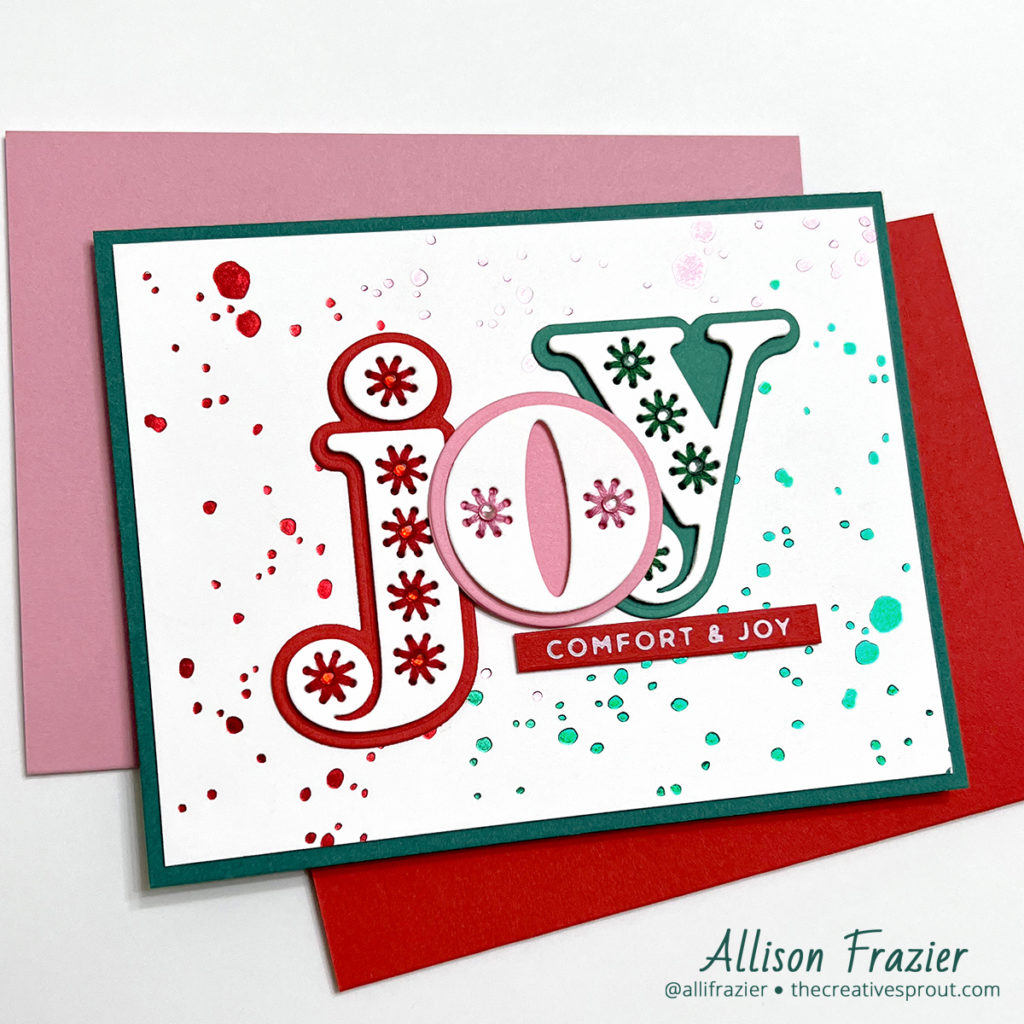
Card 2 Supplies
Spellbinders – Mini Christmas Sentiment Strips Hot Foil Set
Spellbinders – Splatter Sentiments Glimmer Hot Foil Plate
Embroidery Floss – Warm Colors
Embroidery Floss – Cool Colors
Spellbinders – Glimmer Hot Foil System
Spellbinders – Silver Hot Foil
Spellbinders – Viridan Green Hot Foil
Making the Card
Since I didn’t stitch the letters on the first card, I wanted to stitch them on this one. It was so fast and easy! I stitched them in red, pink and green, and then chose matching card stock for the shadow layers. Stitching requires minimal supplies, and you may already have floss in your crafty stash. The only other thing you need is a needle, which you must have somewhere in your home, right?

I decided that I wanted a festive background to go with my colorful letters, and I wanted to do something different. So, I decided to use the same three colors, but this time in hot foil. I used the splatter hot foil plates to create it. There are three different splatter plates in this set, and really my intention was to use each one just once…one in each color. You can see how well that plan went, right? I went a little overboard, to say the least. To finish my card, I added a little jewel into the middle of each stitched circle on the letters and hot foiled the sentiment. I’m not sure that “Comfort & Joy” exactly matches the vibe of this card, but that’s the one I chose, and I’m sticking with it…until I rip it off in a month or two and replace it. Do you ever do that?
That’s it for me today. I hope that these cards put you in a festive mood and made you smile. I must know what you think the answer is to the question posed in the title of this post. To stitch or not to stitch? Let me know your preference in the comments! Thanks so much for joining me today.
Wishing you all a crafty day,
Allison
Note: External links on my blog may contain affiliate links. This gives me the opportunity to earn a small commission when you click on the links and place an order. This comes at no additional cost to you. Thank you so much for your support, as this helps me bring you more content. https://shrsl.com/3irec