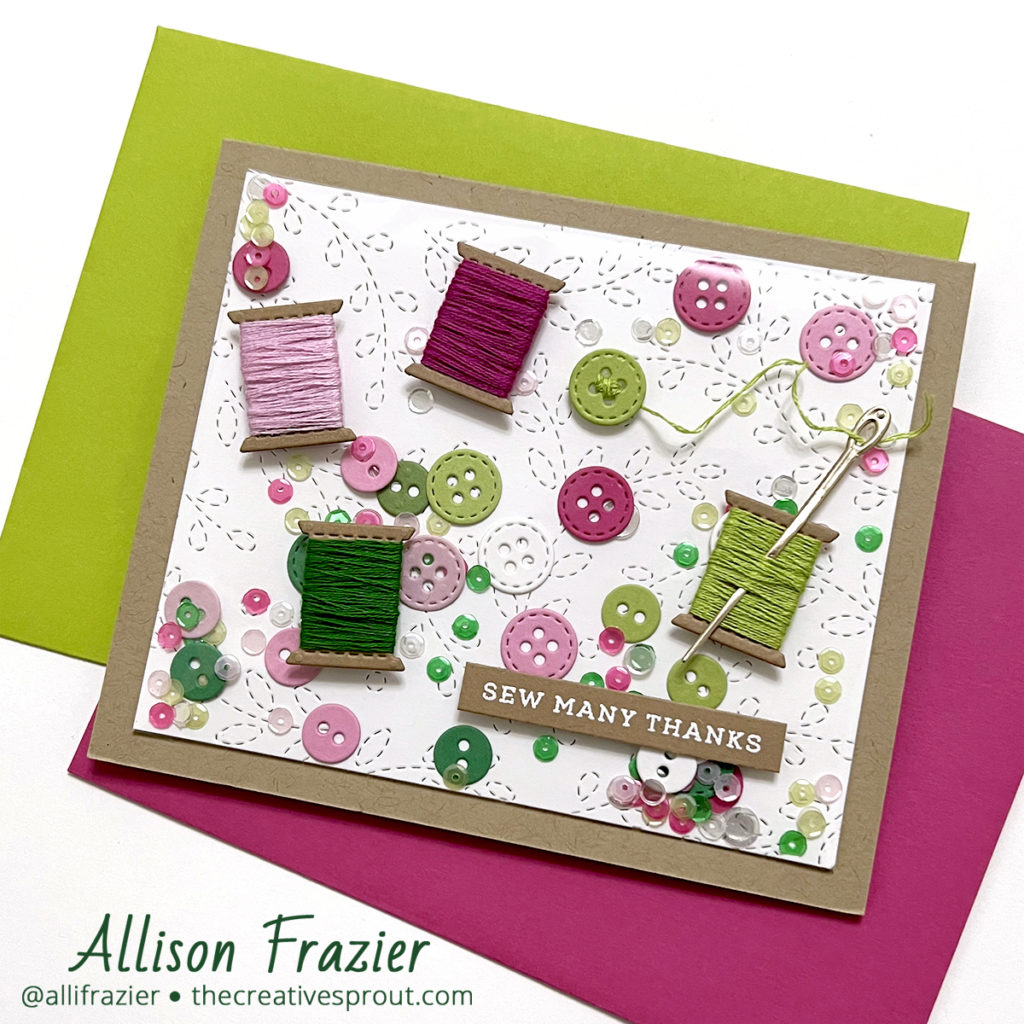
Hello, crafty friends – Happy Thursday! I have a fun shaker card to share with you today using products from Concord & 9th. I admit that this was not the plan when I first started making the card, but I think it turned out pretty cute, especially with the little buttons as shaker elements.
Supplies
Concord & 9th – Sew Lovely Dies
Concord & 9th – Sew Lovely Stamp Set
Concord & 9th – Stitched Vines Card Front Die
MFT – Skinny Strips Die-namics
Inspiration
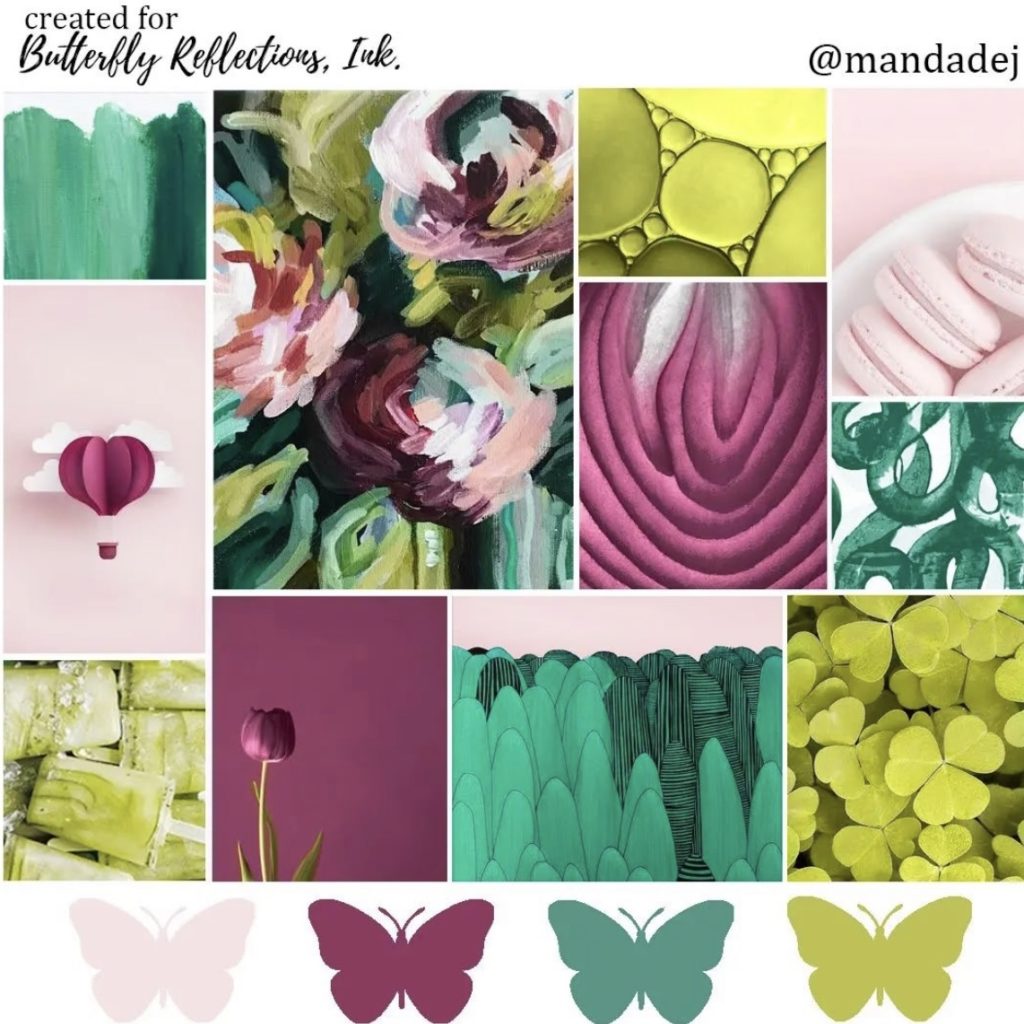
Like I mentioned above, I didn’t sit down with a plan of making a shaker card. My intention was to use the embroidery floss in each color to stitch some of the design on the Stitched Vines panel. Speaking of the colors, my initial inspiration for this card came from the May mood board from Butterfly Reflections, Ink. They have a monthly mood board challenge where you can win a $20 credit to their online shop! All you have to do is tag your creations on Instagram with #brimoodboard. They carry all of our favorite brands, including Concord & 9th, so check it out!
Making the Card
Let’s just say that my initial plan to stitch some of the panel with the embroidery floss did not work out. I had already wrapped my little die cut spools with the embroidery floss, so I decided to keep those elements and pivot. I thought the buttons in the Sew Lovely die set were so cute that I decided to make them into shaker elements.
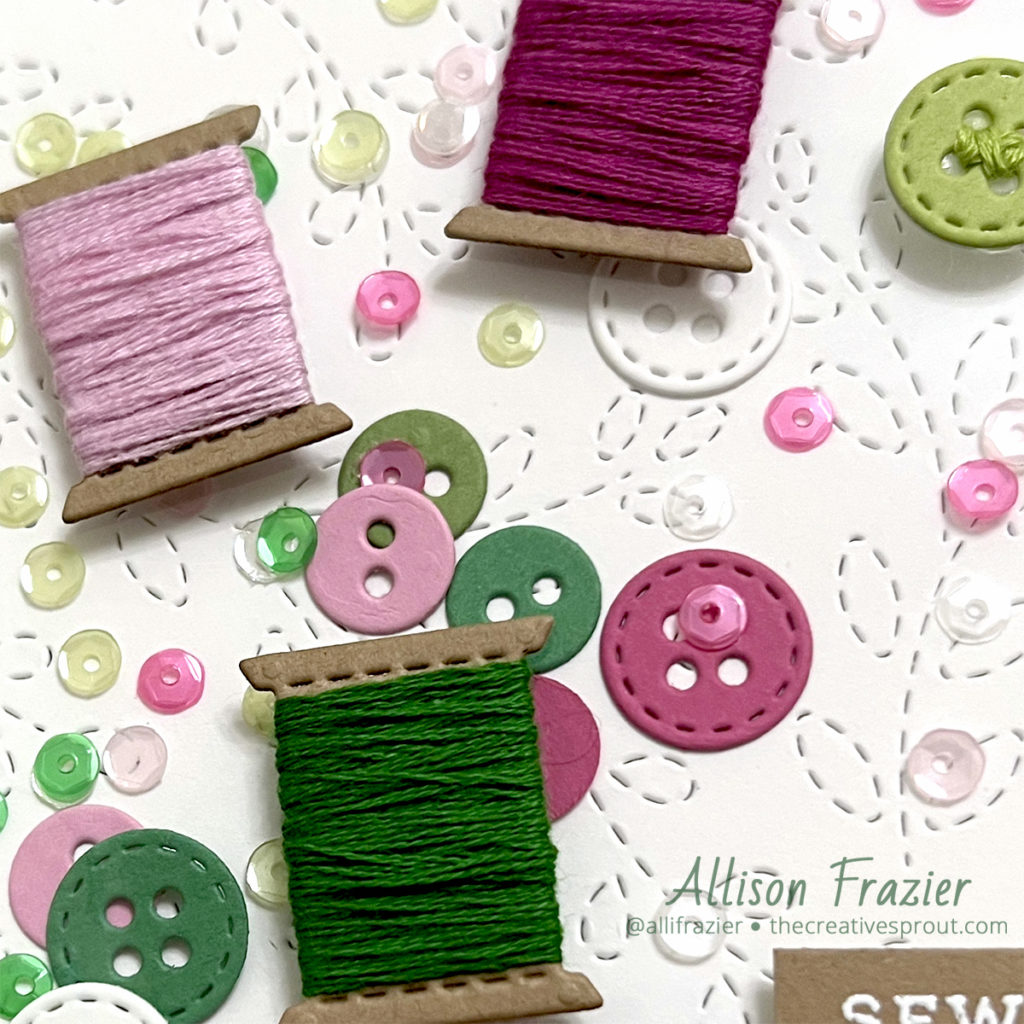
To make my shaker card, I trimmed down my stitched panel, since I had to cut off the part that I had ruined with my attempted stitching. It’s a bit of an abnormal size, but I do like how the card base ended up creating a margin around the shaker element. I used the plastic packaging from the die set to make the flat shaker, which is also known as an infinity shaker, or edge-to-edge shaker. I just used Scor-tape to affix the plastic packaging around the panel to the back, adhering only three sides at first. This allows you to put whatever shaker elements you want between the panel and the plastic before you close up the fourth and final side. I die cut a bunch of buttons in corresponding colors and also added some small sequins. Once I sealed the fourth side of the shaker element, I attached it to my card panel with more Scor-tape.
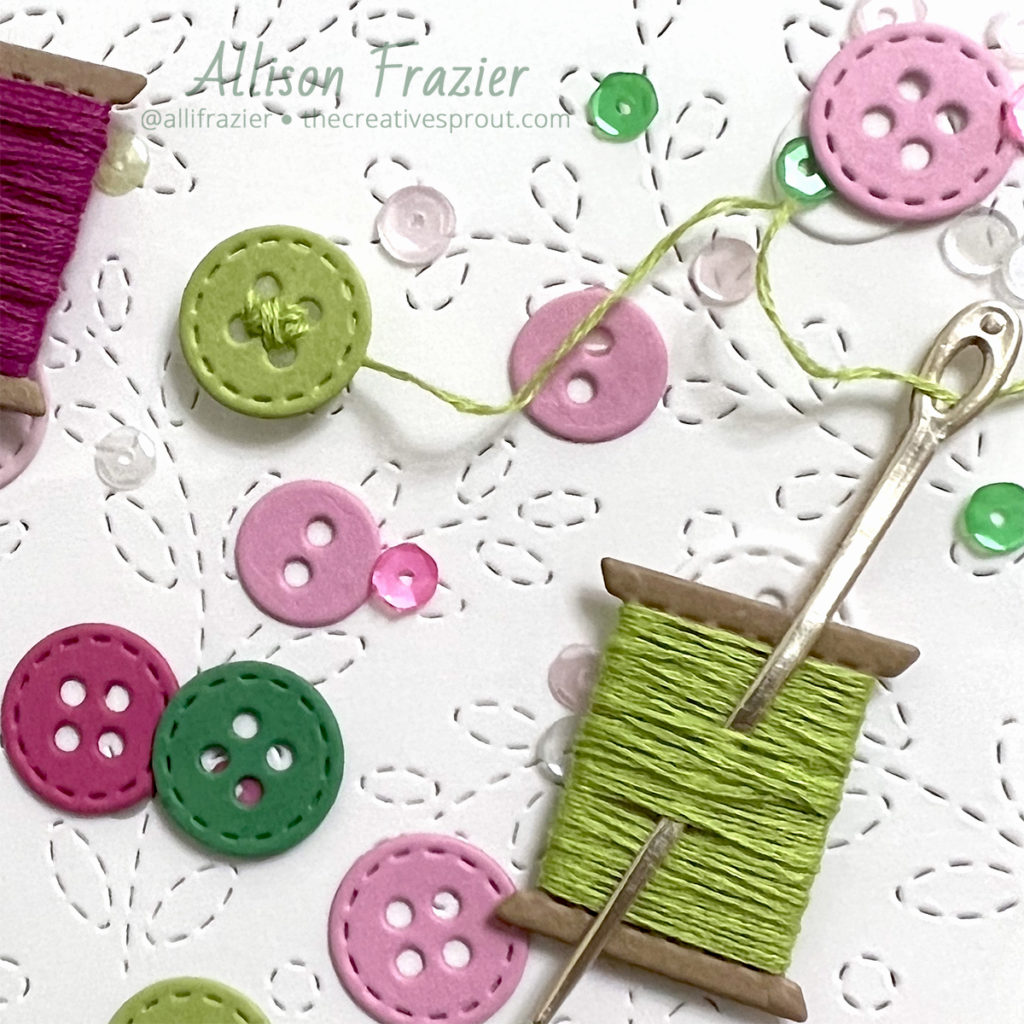
Before attaching my spools of floss, I decided to “sew” one of the buttons. I used the light green floss to do that, and then I thread the loose end of the floss through the needle that I had die cut from metallic card stock. I tucked that needle into the floss that I had wrapped around my die cut spool, and then I adhered all of those elements to the front of the shaker panel.

To finish the card, I heat embossed the sentiment with white embossing powder onto Kraft card stock, trimmed it down with my sentiment die, and glued that to my panel.
This Sew Lovely die set from Concord & 9th is just too adorable. Maybe you like to stitch or sew or you know someone else who does. But even if you don’t, it’s pretty irresistible and has SEW many cute dies – 17 total! In the end, I am happy with how my card turned out, even though it was the furthest thing from my original plan! I hope it brings a smile to your face today.
Wishing you all a crafty day,
Allison
Note: External links on my blog may contain affiliate links. This gives me the opportunity to earn a small commission when you click on the links and place an order. This comes at no additional cost to you. Thank you so much for your support, as this helps me bring you more content.