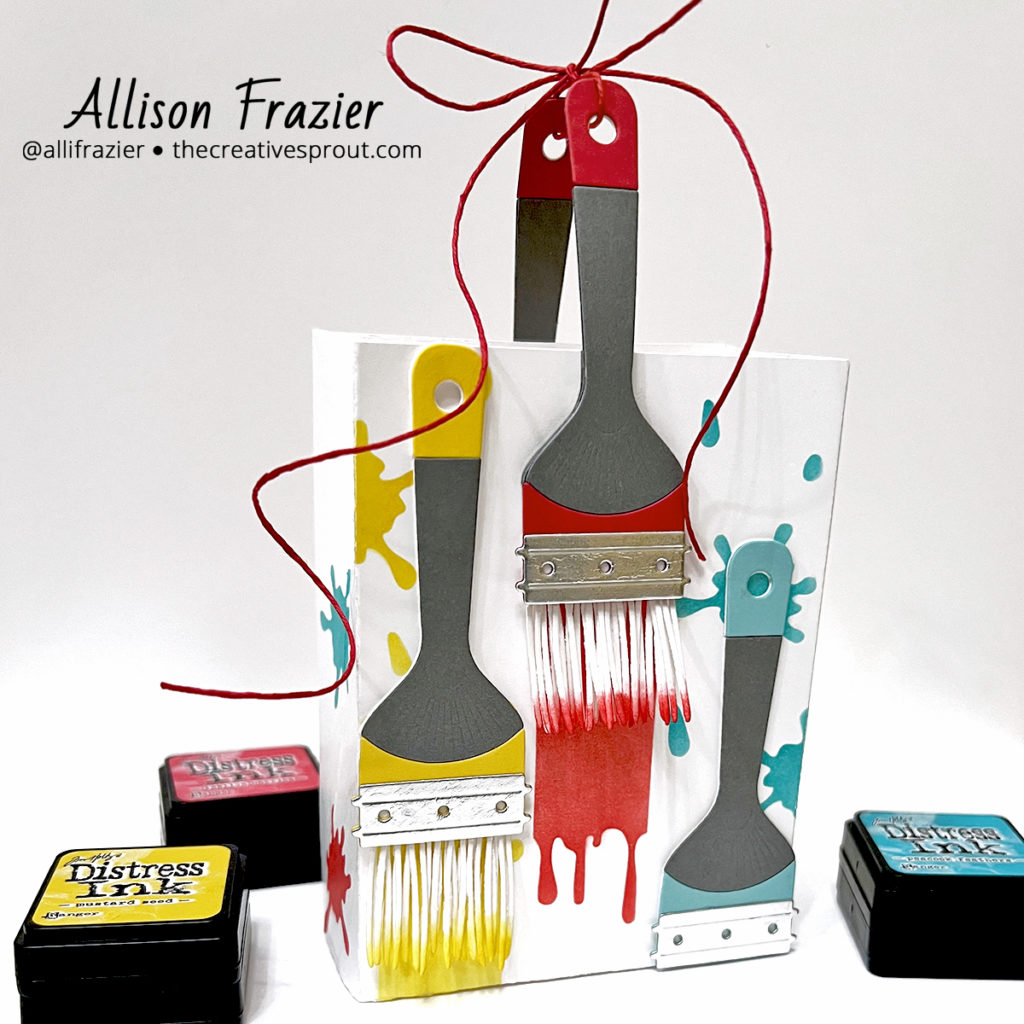
Hello, friends! I have another non-card project to share with you today, which combines the new Gift Bag and Artful Tulip die sets from Spellbinders. I love using dies in creative and unexpected ways, and this paintbrush just seemed perfect for using as a handle on the gift bag.
Supplies
Spellbinders – Gift Bag Die Set
Spellbinders – Artful Tulip Die Set
Heffy Doodle – Messy Desk Stencil
Tim Holtz – Mini Distress Ink Pads
Creative Process
I first used the Gift Bag die to cut two pieces of white card stock, as you need to cut this twice in order to assemble the bag. I applied Scor-Tape to the small flap of one of the pieces and connected it to the other piece. That was all the assembly I did at that point, since I needed to stencil the design before final assembly. Next, I cut out all the pieces for the paintbrushes. There really is one main die for this, but I cut it out of several colors of card stock. I used the bristles die to cut several pieces of white card stock so that the paintbrush would look fuller. I made two of the red paint brushes, since those were going to act as the handles. I fussy cut a full paintbrush shape to use as a backer for all the pieces, which also makes it easier to add additional pieces for dimension. Once I was done with the paintbrushes, I then used the Messy Desk Stencil to add paint strokes and splats to the front, sides, and back of the gift bag. As you can see from the picture below, I made the back different from the front, which I think is fun. I love this stencil! I chose Festive Berries, Mustard Seed, and Peacock Feathers Distress Ink to match the colors of card stock that I used.

I finished assembling the gift bag and then glued all of the paintbrushes to it, making sure that the red paintbrushes were lined up together. I tied a red string through the holes of the paintbrushes, and now I just need to decide who will be the lucky recipient! There are so many cute little crafty goodies that could go in this bag, including Mini Distress Ink pads!
I hope this project brings a smile to your face and encourages you to look at your dies in a different way. Thank you so much for joining me today.
Wishing you all a crafty day,
Allison
Note: External links on my blog may contain affiliate links. This gives me the opportunity to earn a small commission when you click on the links and place an order. This comes at no additional cost to you. Thank you so much for your support, as this helps me bring you more content.