Hello, crafty friends! I am very excited to share a project that I made with the new Spellbinders Paint Your World Collection. Spellbinders was kind enough to send me the Artful Tulip die set to play with. That set is now available starting today in their online shop. What do I love most about this die set? It was designed by Vicky Papaioannou, who is partly responsible for my card making hobby! However, this is not a card…
Supplies
Spellbinders – Artful Tulip Die Set
Spellbinders – Be Bold Uppercase Alphabet Die Set
Spellbinders – Fashion Silver Embellishments
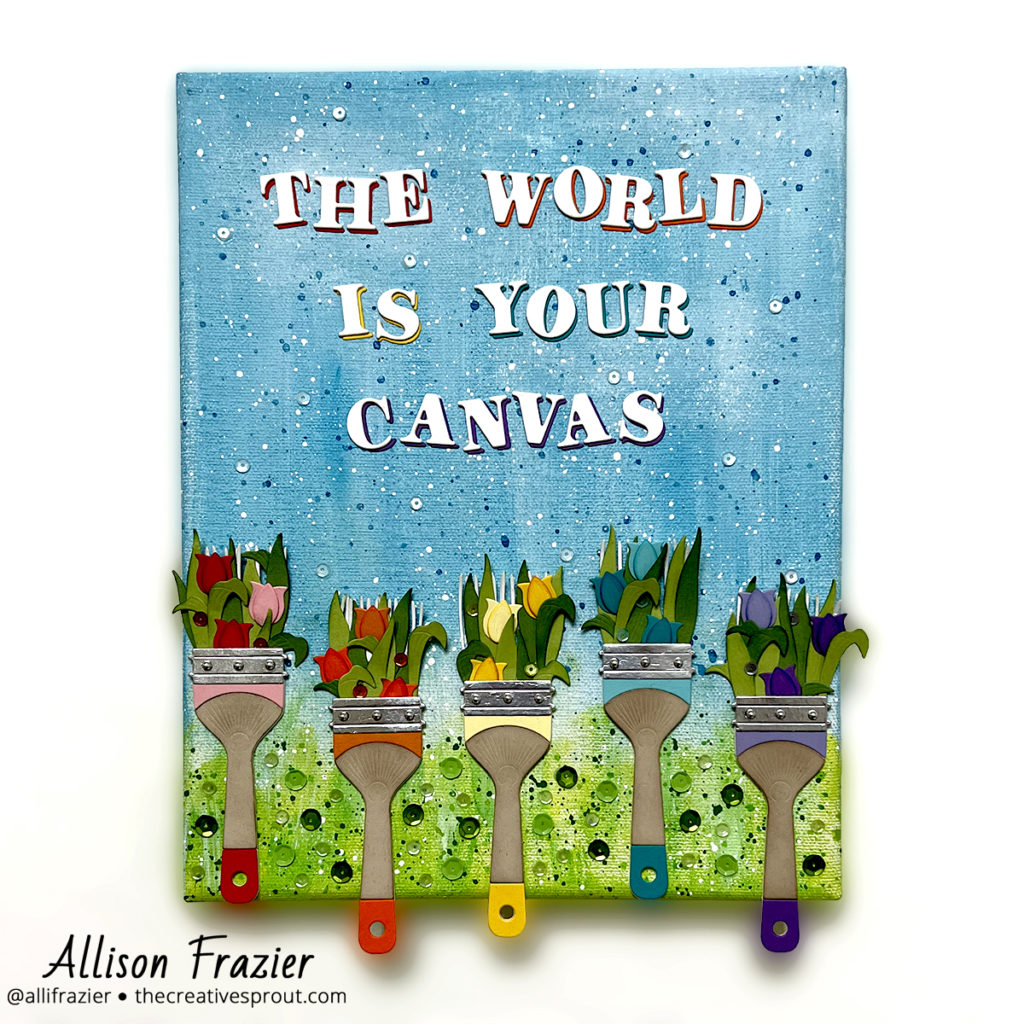
So, how is Vicky responsible for my card making hobby? About four years ago, I had quit my job and was looking for a creative outlet. I started painting with acrylics and had to research paint mediums on YouTube. I somehow stumbled onto one of Vicky’s AMAZING art journal videos, and then I spent a lot of time watching ALL of her videos. And a lot of time art journaling. After many months of art journaling, I finally watched some of Vicky’s card making videos, and the rest is history. I really wanted to do something fun with this die set. I could have actually made an art journal page, and I may still do that. But, this is an actual paint canvas, and it is now hanging on the wall in my craft room where I can see it every day.
Creative Process
I started with a blank 8″ x 10″ canvas and dry brushed Distress Paint in various colors of blues and greens. I then watered down the paints a little bit and splattered the different colors all over the canvas.
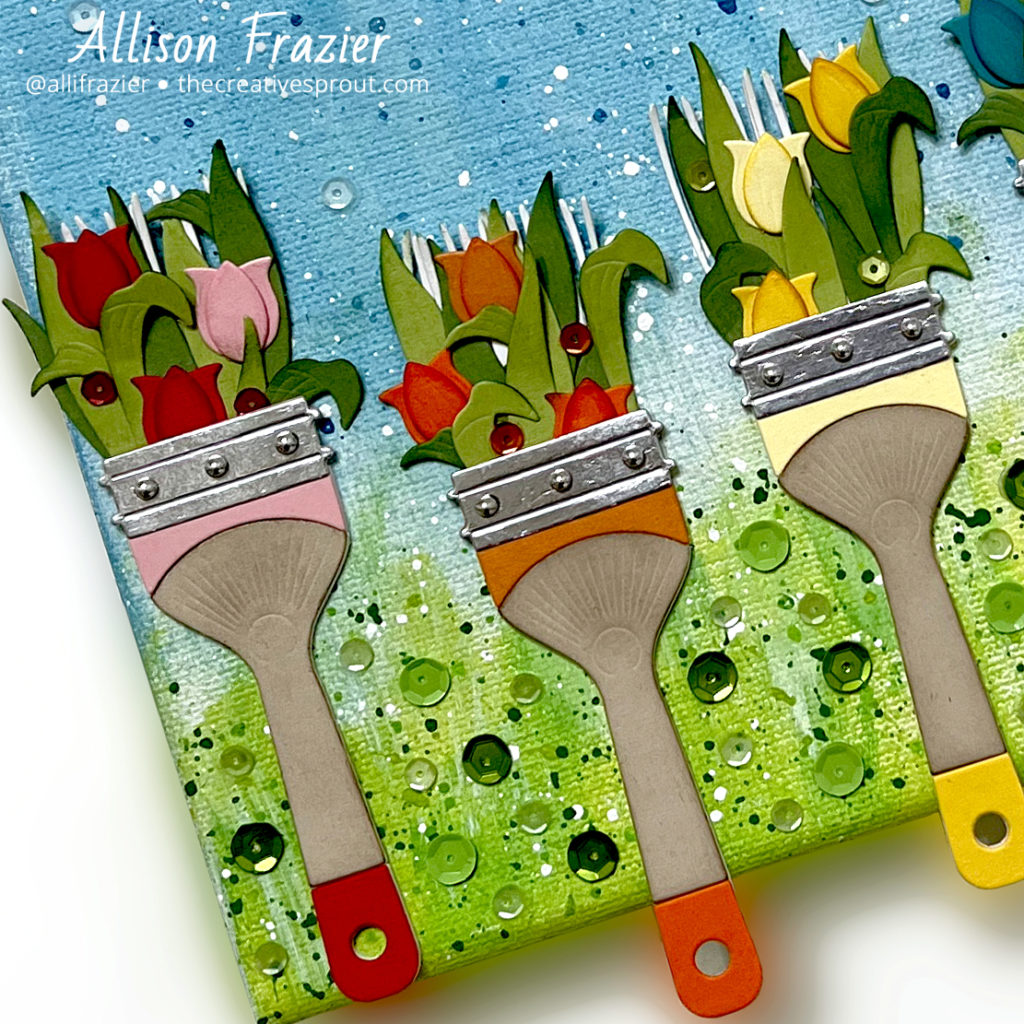
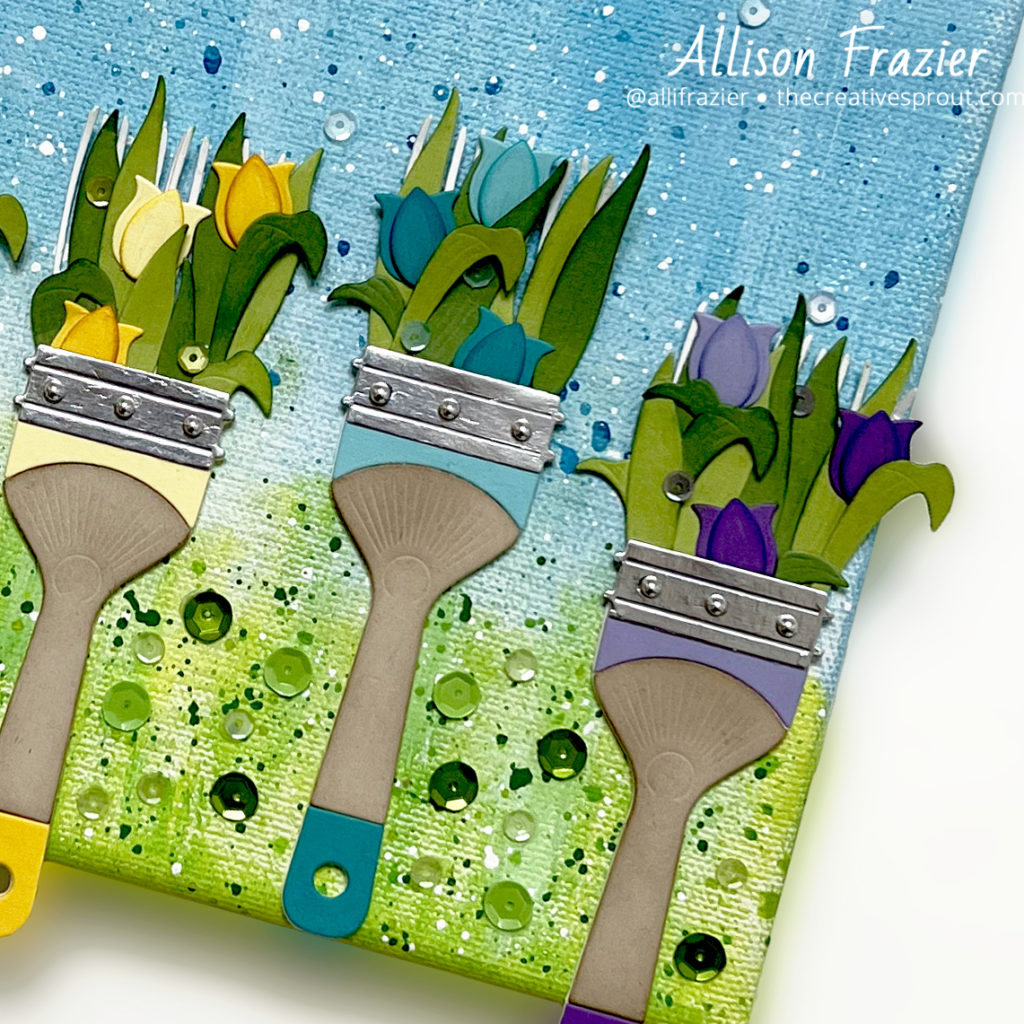
Next, I did a lot of die cutting. For each color in the paintbrushes, I chose two shades of card stock. I also used two shades of green for the leaves. Assembling the paintbrushes was fun because I arranged the tulips and leaves differently on each one. The metal element at the top of the paintbrush (which I cut from silver metallic card stock) has three small holes. I covered those holes with a tiny silver embellishment, which gives it the look of a real paintbrush. By the way, did you know that the metal part of the paintbrush is called the “ferrule”?
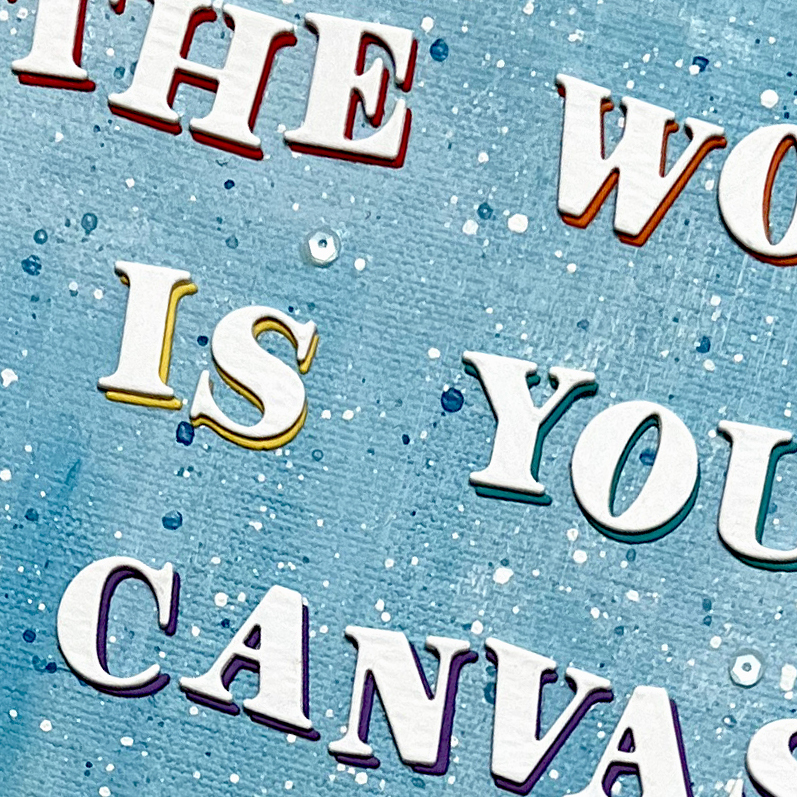
The sentiment is probably one of the main reasons I chose to make a canvas instead of a card. I was trying to think of the perfect sentiment, and once I settled on this one, I really had no choice…right?? Since there are five words in the sentiment, I chose to use the colors from the five paintbrushes as the shadow for each word. These Be Bold Alphabet letters (which I absolutely love) do not come with a shadow die. I just simply offset my white letters on top of a colored letter when stacking them up. The wonkiness of the letters was purposeful. However, if there was one thing I would change about this canvas, I would probably make those all straight and perfectly lined up. Sometimes you feel wonky, and sometimes your OCD kicks in when it’s too late – ha ha.
Once I was done, I decided to add some sequins to the grass. I also added a few to each paintbrush and some to the sky. I think I may eventually add some small butterflies to the sky, too, but I’m going to sit with it as is for awhile.
This project was so much fun to make. I loved doing something different and getting my hands covered with paint again. I hope this inspires you to try something different with your supplies. Thank you so much for joining me, and I’ll see you next time!
Wishing you all a crafty day,
Allison
Note: External links on my blog may contain affiliate links. This gives me the opportunity to earn a small commission when you click on the links and place an order. This comes at no additional cost to you. Thank you so much for your support, as this helps me bring you more content.