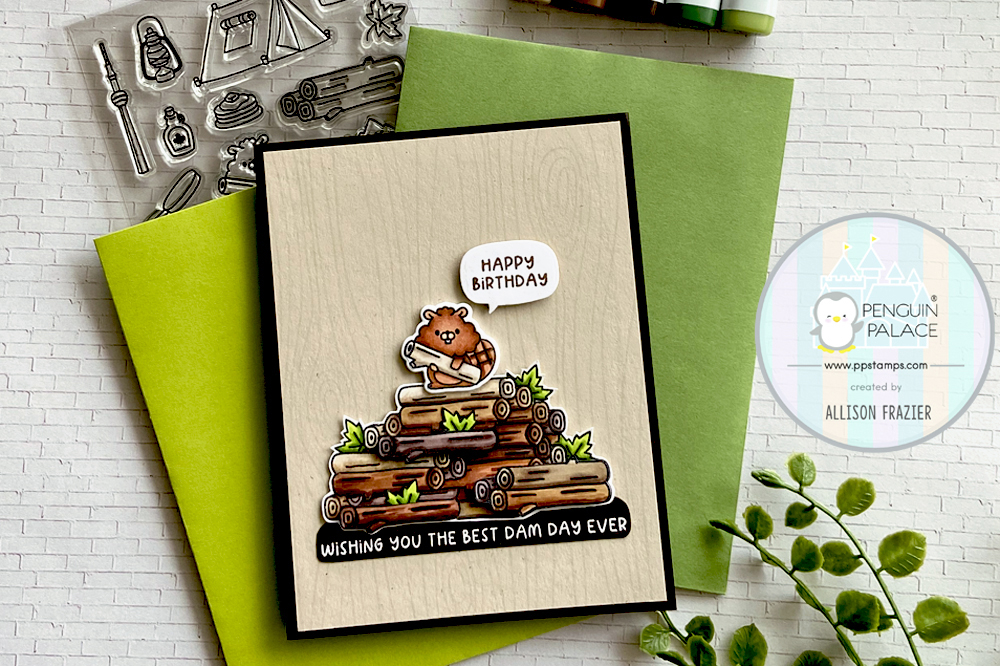
Hello, Everyone! Today I am sharing this fun birthday card featuring products from Penguin Palace. I used just a few little images to create this scene – all it took was a little bit of masking!
Making the card
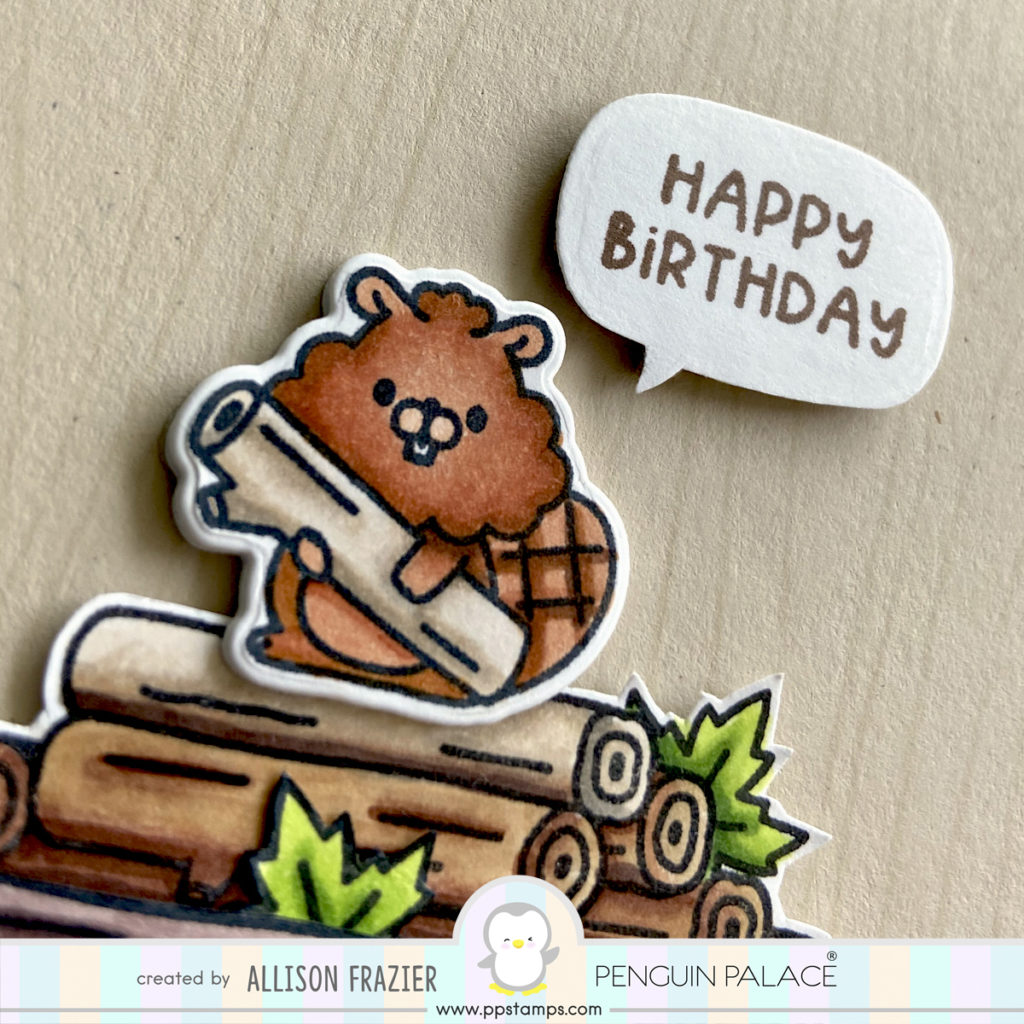
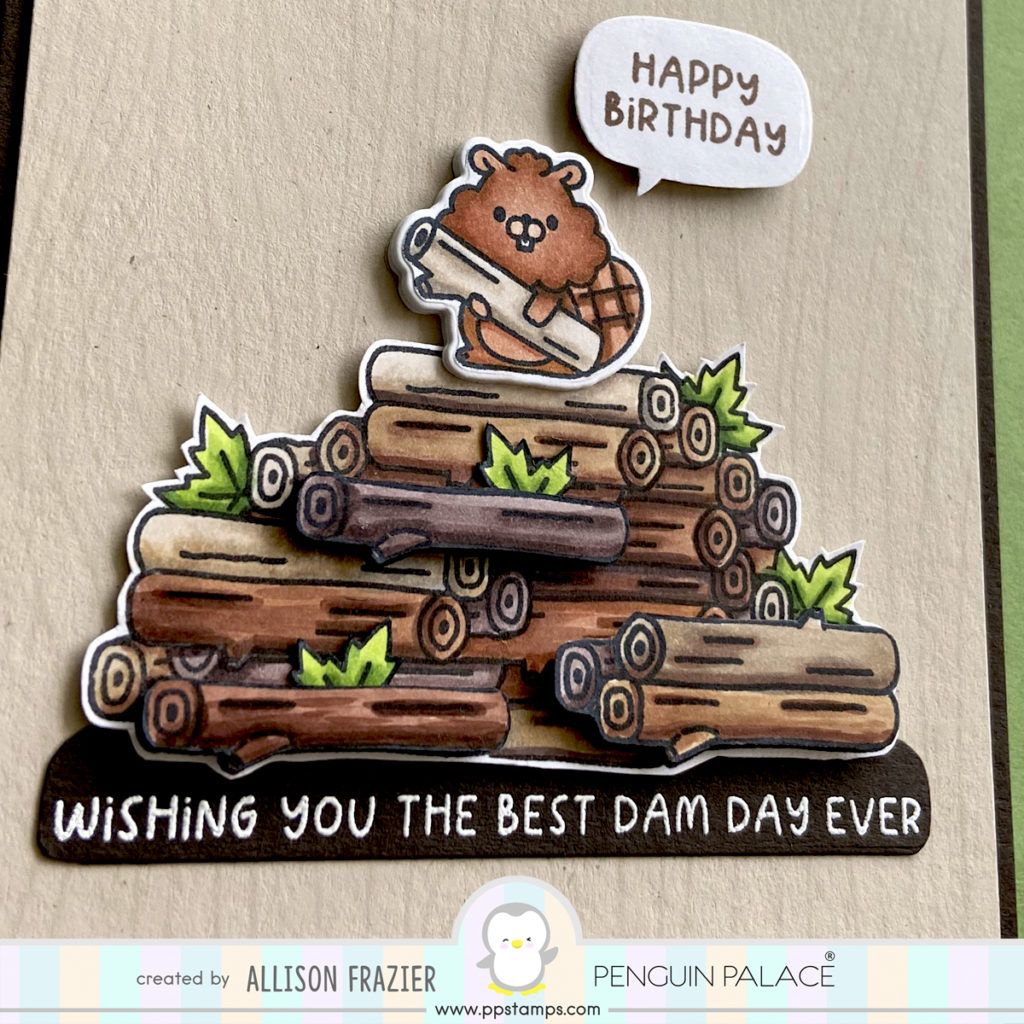
My card today features a few images from the “Bond With Nature Canada” stamp set. This little beaver is so adorable, and I really wanted to make him the star of his own card. So, I decided to build him a dam. The stamp set comes with an image of three stacked logs. Using masking paper, I was able to create the dam. I stamped the very top image first, masked it off, stamped the two stacks underneath that, masked those off, and so on. I also included the leaf stamp as part of the dam and the masking process.
Once I was done stamping, I colored the beaver and the dam with my Copic markers. I cut the beaver out with its matching die, and I fussy cut the dam. In order to give the dam some dimension, I stamped it several more times onto some clean paper, colored those, and then fussy cut them. In a few cases, I cut just one of the logs from the stamped image. I then mounted these extra logs onto the dam with some foam tape, along with a few more leaves tucked here and there.
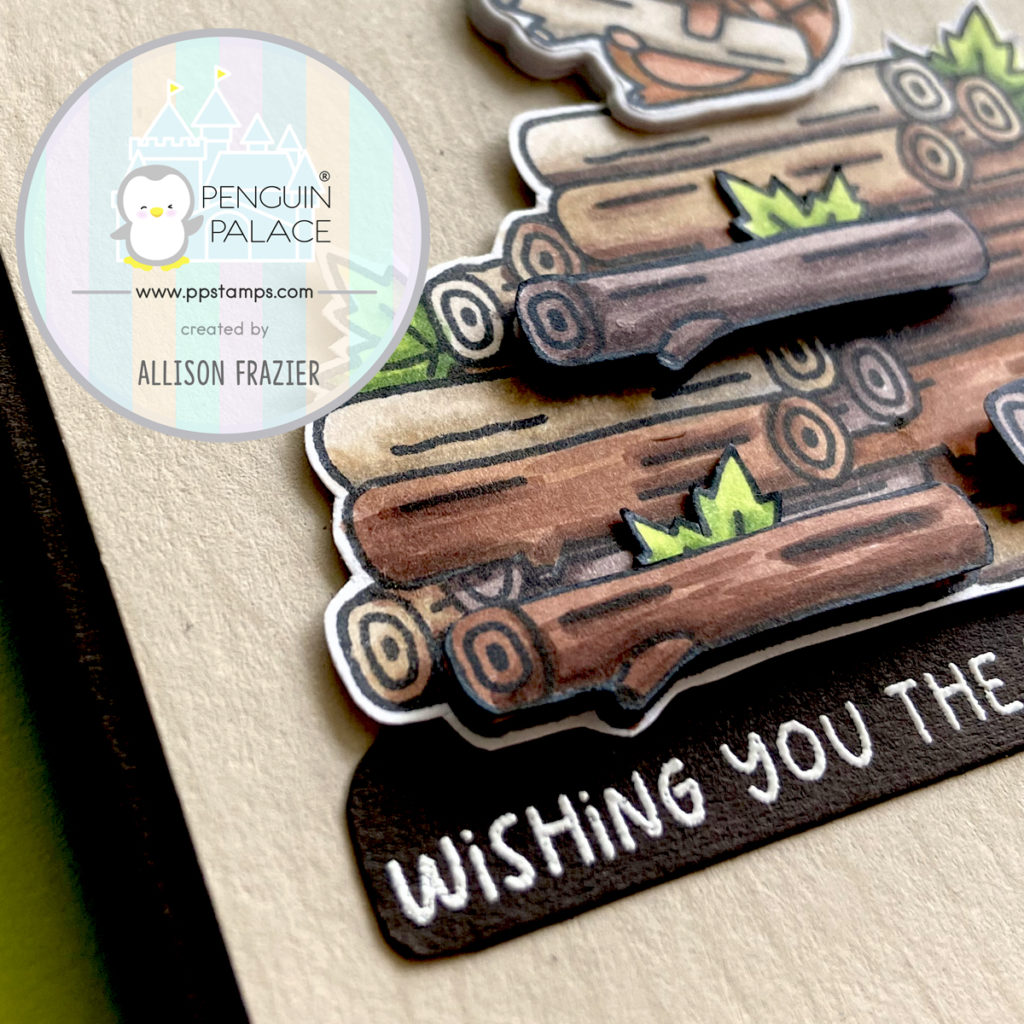
I white heat embossed the long sentiment from the set onto dark brown card stock and cut that to be slightly longer than my dam. I took the “Happy Birthday Eh” sentiment from the set and cut it apart so that I could place the Happy above the Birthday. Cutting clear stamps apart is super easy, as is placing the stamps back together when you want to stamp the original sentiment. I stamped the Happy Birthday in dark brown ink onto white card stock and then cut it with a word bubble die from my stash.
If you’re anything like me, then you have tons of backgrounds that you’ve made over the years just waiting for the perfect use. In this case, I was finally able to use this beige piece of card stock that I had stamped with a now-retired MFT woodgrain background stamp. I thought it would be the perfect fit for the beaver and his dam, and on the plus side, it adds another masculine-ish birthday card to my stash! I mounted it onto a dark brown card base, and then adhered all of the other images on top.
I have to say that this card turned out to be even cuter than I had pictured it in my mind. Thanks so much for joining me today. Be sure to check out all of the fun products in the Penguin Palace online shop.
Wishing you all a crafty day!
Allison
Note: External links on my blog may contain affiliate links. This gives me the opportunity to earn a small commission when you click on the links and place an order. This comes at no additional cost to you. Thank you so much for your support, as this helps me bring you more content.