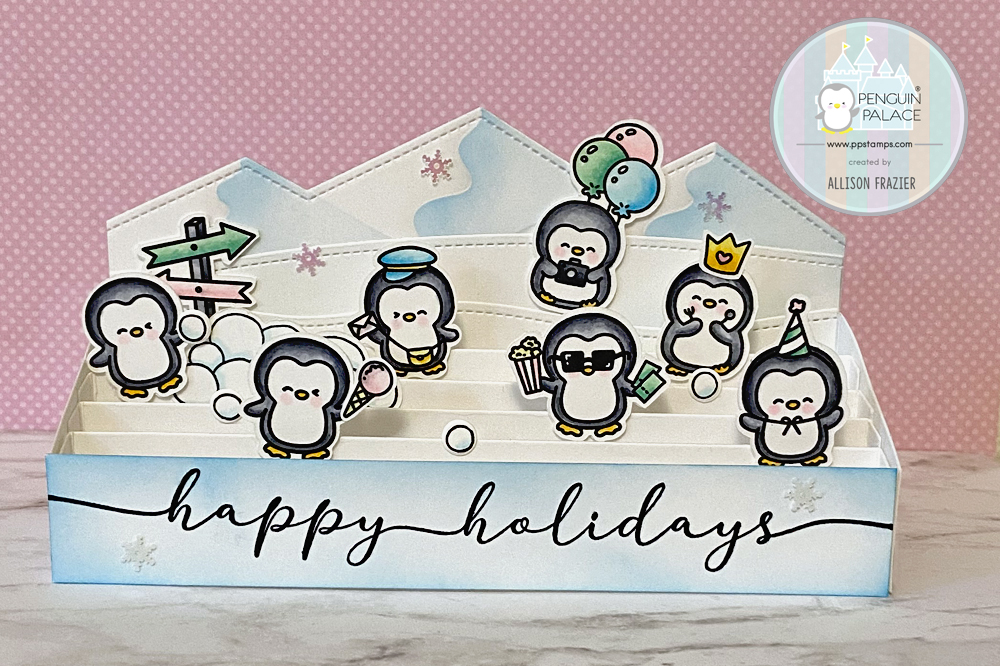
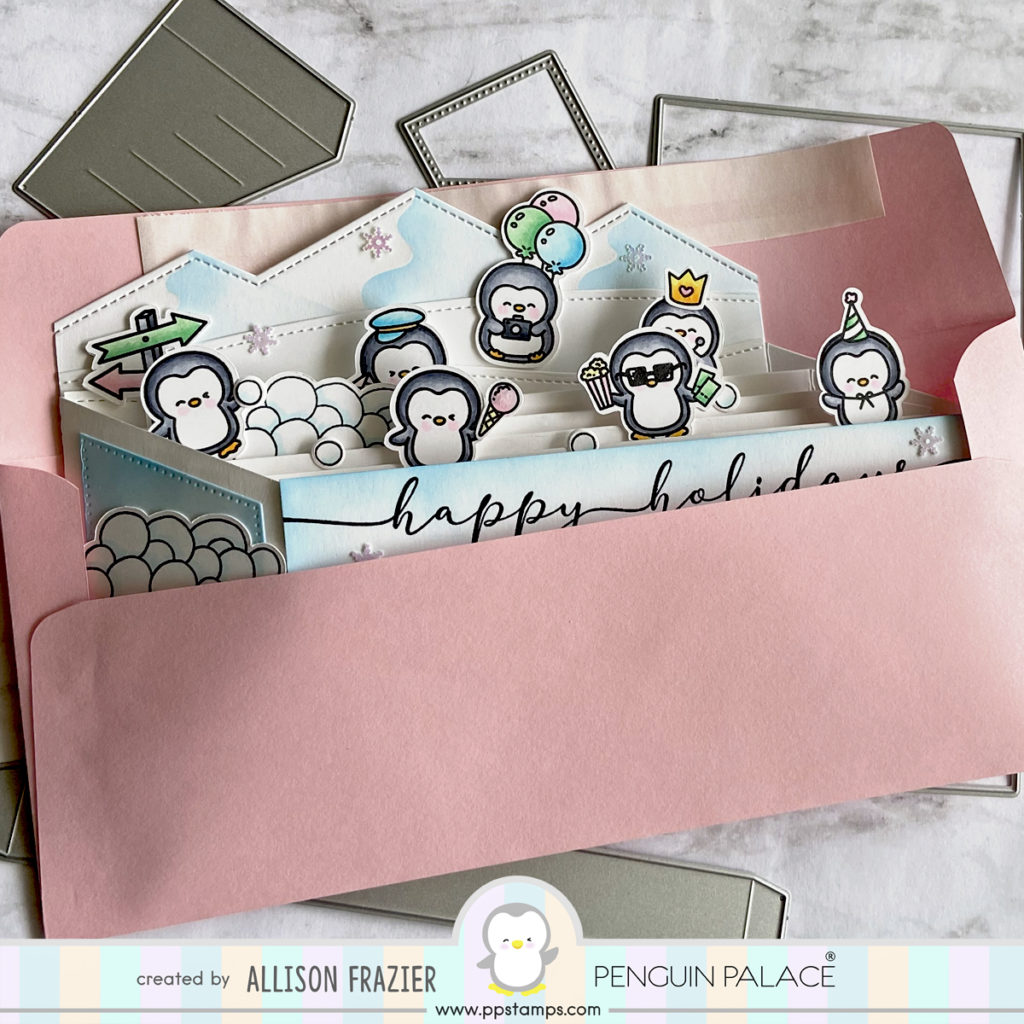
Hello, Everyone! Today I am sharing this super fun shadow box card featuring products from Penguin Palace. I really love the unique products that Penguin Palace offers, and the Cinematic Shadow Box die set is no exception. This shadow box folds down flat and fits into a slimline envelope – so cool!
Holiday Cards Already?
I don’t know about you, but I’m already way behind on making holiday cards this year. That may sound crazy, considering that it’s only April, but I told myself at the beginning of the year that I would make one holiday card a week. That puts me about three months behind – oops! The Penguin Agenda stamp set was just the inspiration I needed.
Making the Card
When it comes to interactive cards, I find that it is so much easier to learn how the card goes together by watching a video versus reading a long-winded explanation. I apologize that I am not yet ready for YouTube, so I am going to point you to the Penguin Palace YouTube channel, specifically this video, for learning how the Cinematic Shadow Box goes together.
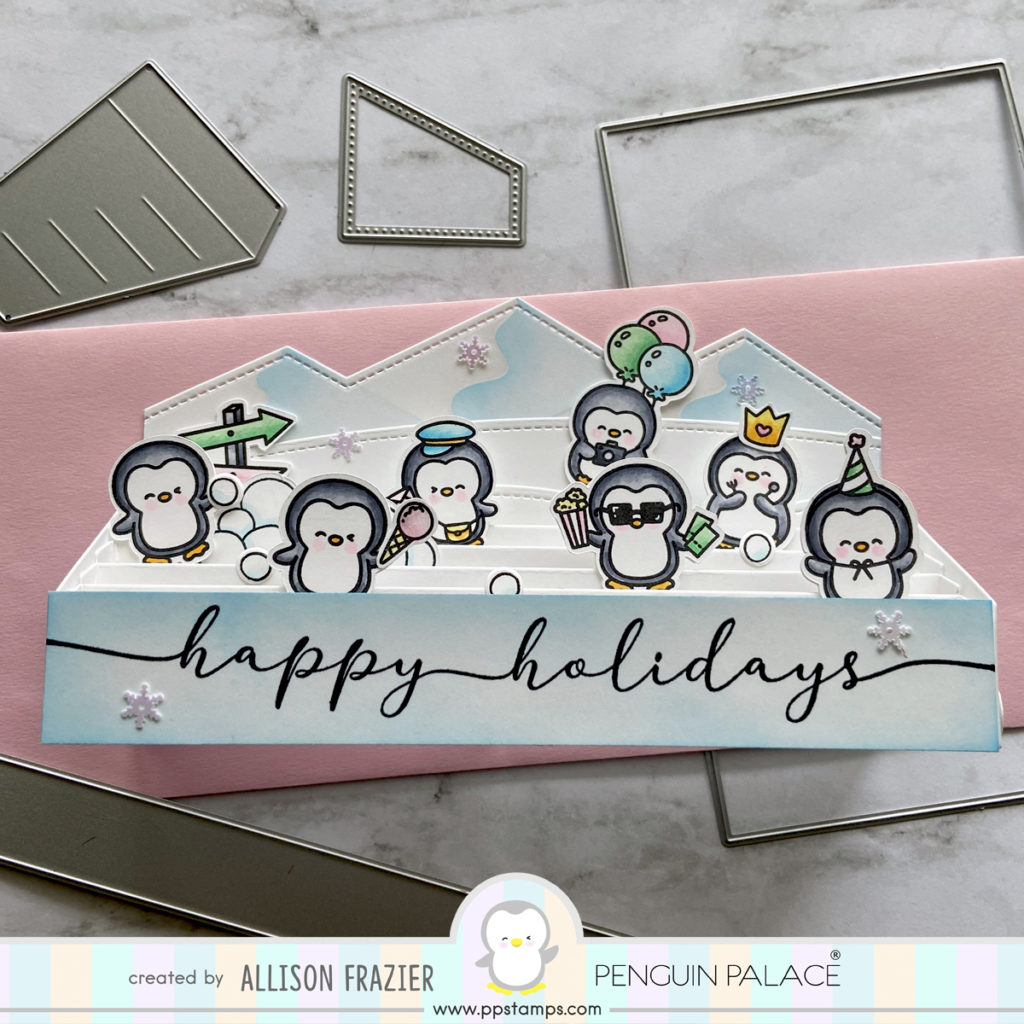
If you watched the video, then you can see how easy it is to make this kind of card. There are some minor details that I tweaked on my card. When I cut the large piece that serves as the back of the card, I used the mountain-shaped die from the Desert Landscape Scene Builder set to give the back a shape. What’s really cool about this set is that it comes with dies and stencils that help add highlights. I used the stencils and some light blue distress ink to help create the look of icebergs (or snowy mountains) on my card. I then cut a couple panels of white card stock using the hill-shaped dies from the set and glued those under the mountains.

For the front panel, I didn’t use the stitched die from the set because my sentiment was too large, so I just cut a piece of card stock that would completely cover the front panel. I used black pigment ink to stamp the sentiment (which is from Impression Obsession), heat embossed it with clear embossing powder, and then lightly applied some distress ink with a blending brush to give the panel some color.
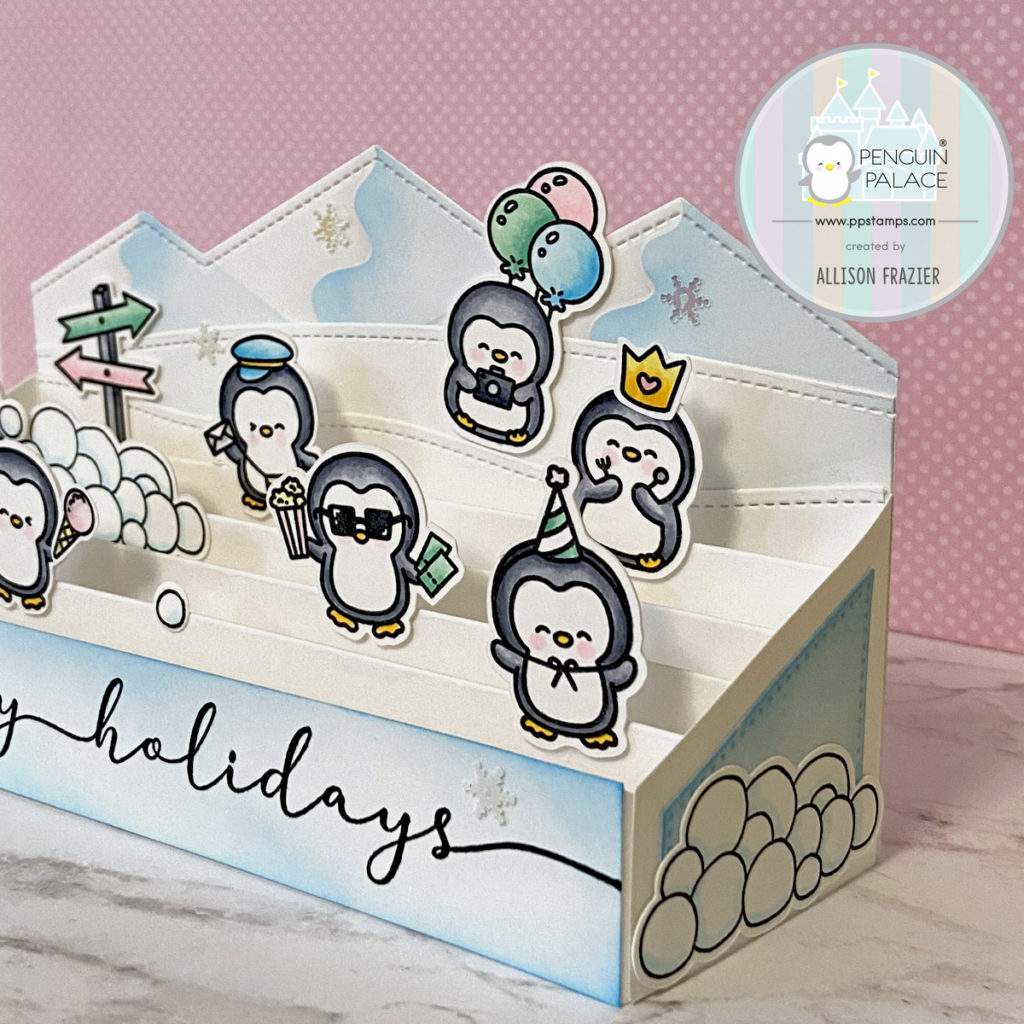
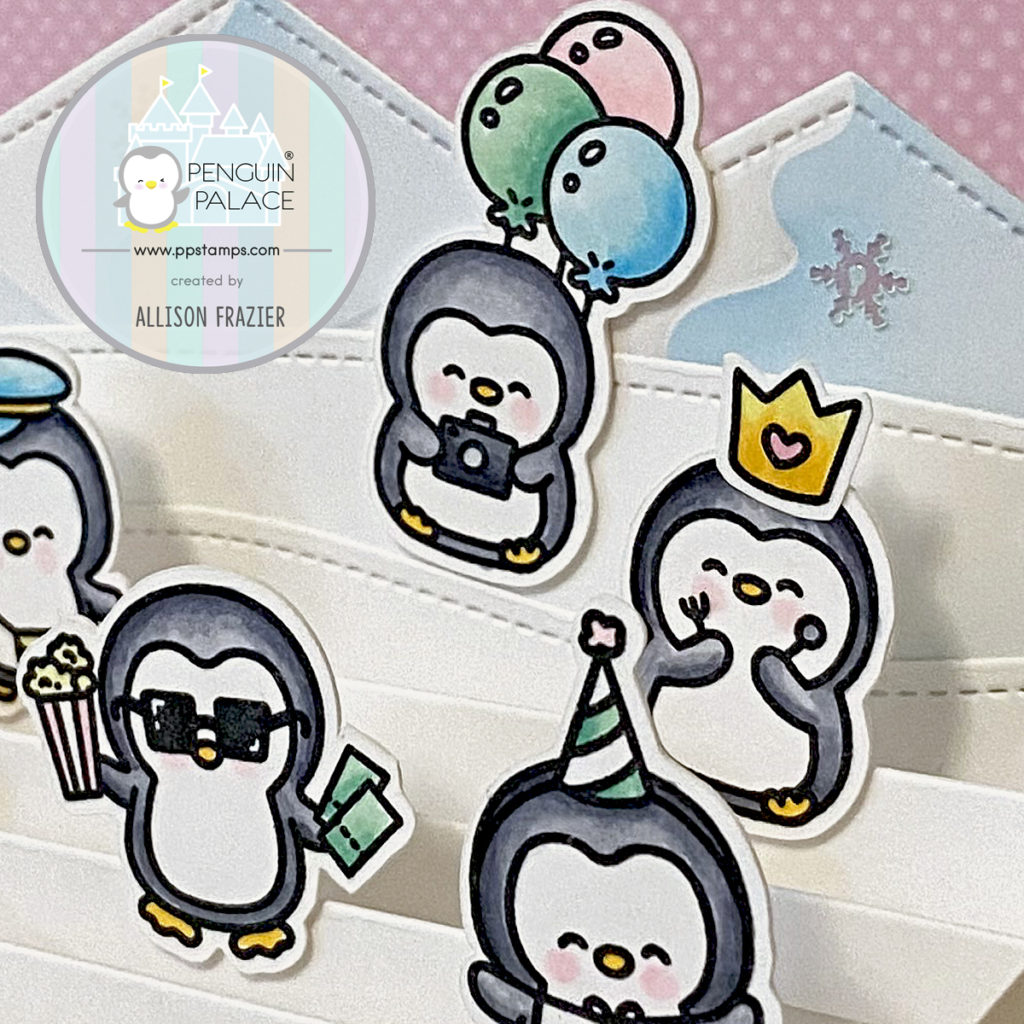
Once the box card base was assembled, it was time to decorate. I had stamped out all of the penguins and colored them with my Copic Markers. I added fun little accessories to some of the penguins and tried to keep my palette limited to pastel holiday colors. To round out the scene, I added the directional sign from the Fun Adventure stamp set, as well as the mound of snowballs, which comes from a Hello Bluebird stamp set,
I played around with the placement of all the penguins and then glued them to the various dividers on the card base. I finished the card with a few snowflake-shaped sequins and some shimmer pen highlights to some of the smaller elements.
I really love how the card turned out, and how easily it fits into an envelope and pops right back up when you take it out. What I love most about it is how much fun it was to make. After all, that’s why we’re here, right? Thanks so much for joining me today! I hope these penguins put a smile on your face.
Wishing you all a crafty day!
Allison
Note: External links on my blog may contain affiliate links. This gives me the opportunity to earn a small commission when you click on the links and place an order. This comes at no additional cost to you. Thank you so much for your support, as this helps me bring you more content.