Happy Friday, Everyone! I’m so excited to finally share a card on my blog. I decided that the first card should include one of my favorite techniques, which involves shimmer powder.
Expect the Unexpected
Nuvo Shimmer Powders are really fun to work with, as long as you know what to expect. So, what can you expect? Absolutely nothing, and that’s what I love about them. You can stamp the same background onto two pieces of paper, sprinkle them with the same colors of shimmer powder, spray them both with water, and you will end up with two totally different pieces of art.
![]()
Making the Background
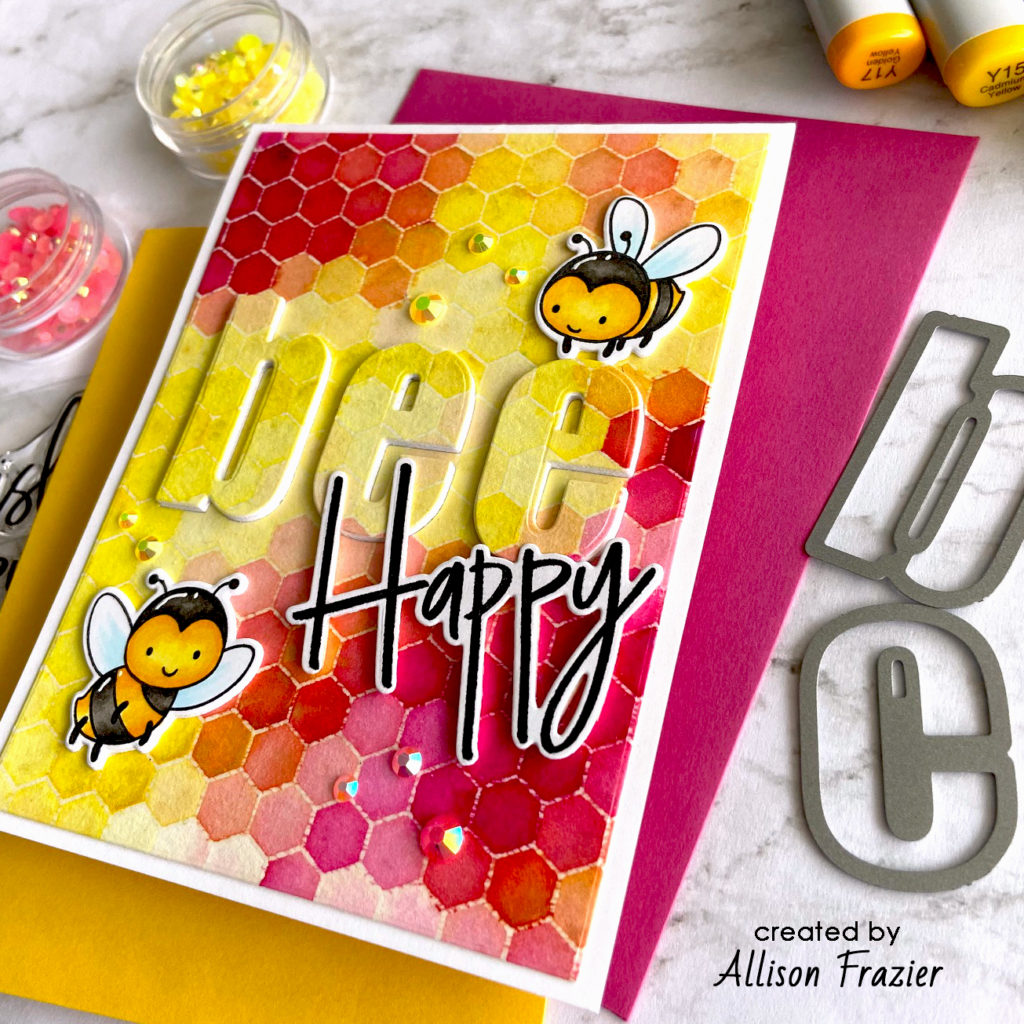
The first part of making a background like this is to pick a background stamp. Because I knew I was going with a bee theme, I chose the Honeycomb Background stamp from My Favorite Things. I believe this stamp is retired, but there are plenty of honeycomb background stamps out there, along with hundreds of other fun designs.
The next step is to stamp the background onto watercolor paper using VersaMark ink. If you have a stamp positioning tool, like the Misti, you can use that to make sure you get a good impression. I like to just lay my background stamps face-up on the table, apply the ink, lay my paper on top, and rub with the palm of my hand. I always end up with good results that way. When the paper is all inked up, heat emboss it with either clear or white embossing powder – they essentially give you the same results when your paper is white.
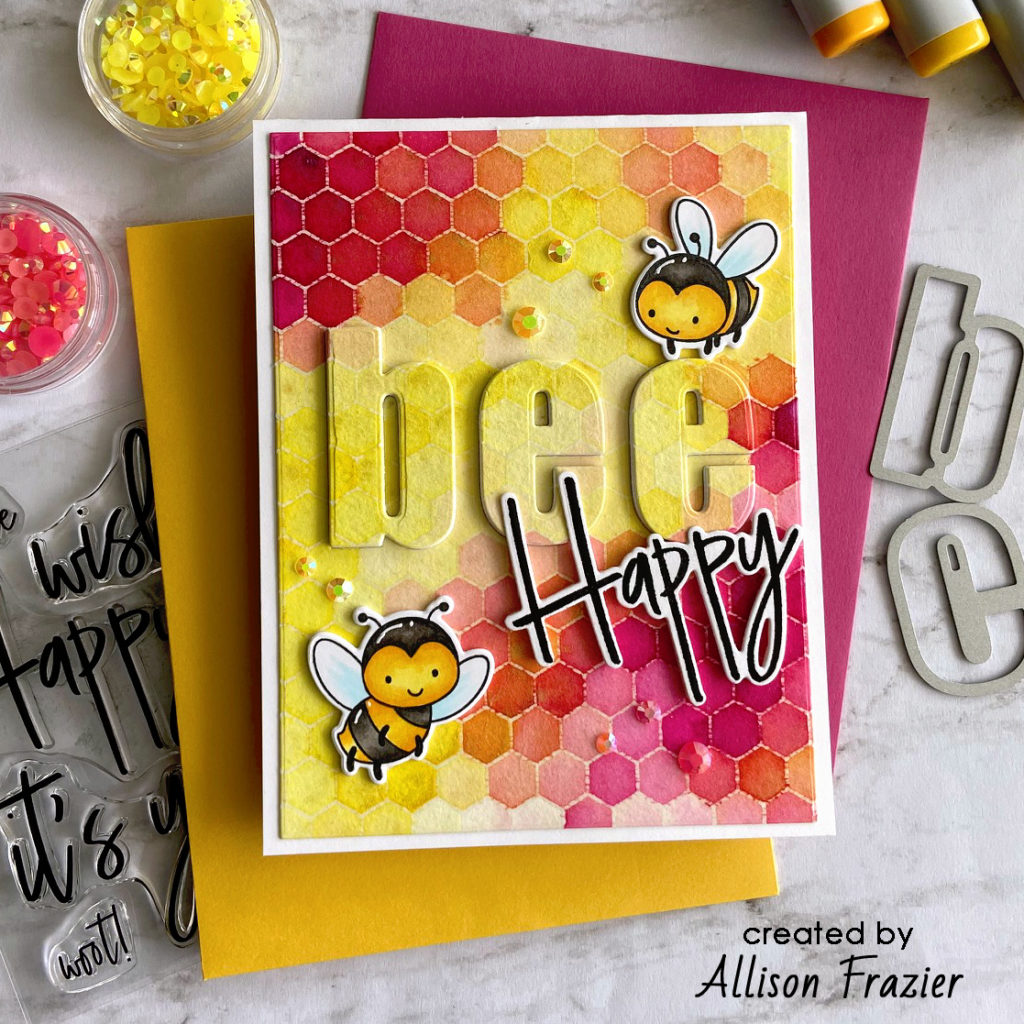
Now comes the fun (and sometimes messy) part. I usually put my embossed background in a shallow box before the sprinkling and spraying starts. A little bit of shimmer powder goes a long way. All you need to do is tap the bottle – don’t squeeze it! For this background, I sprinkled two colors of powder – Solar Flare and Cherry Bomb. I tried to sprinkle the pink color in the corners, but again, you cannot always control it. After sprinkling, take a spray bottle and spritz the panel with water. If any of the powder is clumped up, I usually try to spread it around with my fingers so that it dries better. Let the panel dry, and if you want more color or more intensity, you can repeat the steps. Once it’s dry and you’re happy with the results, you may want to seal it. I always take my shimmer powder backgrounds outside and spray them with a sealer.
Making the Card
Once the background was done, I trimmed it down to 4″x5.25″ so that I could leave a small border around it. I took some big letter dies to cut out the word “bee” from the center. The letters I used are part of Altenew’s Bold Alphabet die set. I also cut out four of each letter from thick white card stock, and glued all of the layers together. I adhered my panel to an A2 top-folding white card base and then inset the thick letters into place. I love the effect of popping up letters like this on a background.
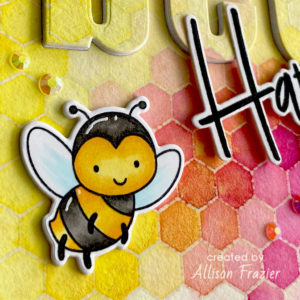
Next, I stamped the bees from Hello Bluebird’s Bee Happy stamp set onto some copic friendly paper (I use Neenah Classic Crest Solar White 80#). I used Memento Tuxedo Black ink, but you can use any alcohol marker friendly ink. I colored the bees with my Copic markers and then cut them out with the matching dies. I also used the dies to cut two additional layers from white card stock in order to give the bees dimension.
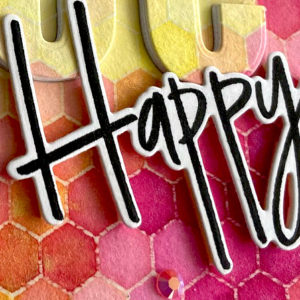
The “Happy” sentiment is from the (now retired) It’s Your Birthday stamp set and matching die from The Stamp Market. I cut tiny pieces of foam tape to pop the sentiment up. For a finishing touch, I added some yellow and pink jewels from Pinkfresh Studio’s Essentials Jewel Mix. I also used a white gel pen to add some highlights on the bees. I always worry that I’m going to ruin my images when I do this, and sometimes I do! But hey, life is about taking risks, right?
I really love how the card turned out, and I hope it brings a smile to your face.
Wishing you all a crafty day!
Allison
That card is so colorful and fun! I love bees, knowing the vital role they play in our world! Yours are adorable!
Thank you so much, Renee! And thank you for visiting my blog 🙂